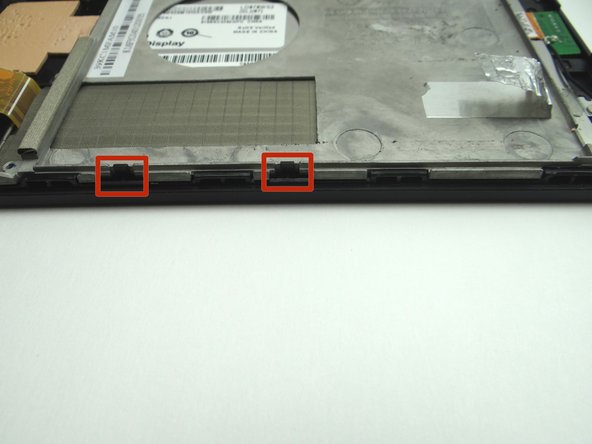
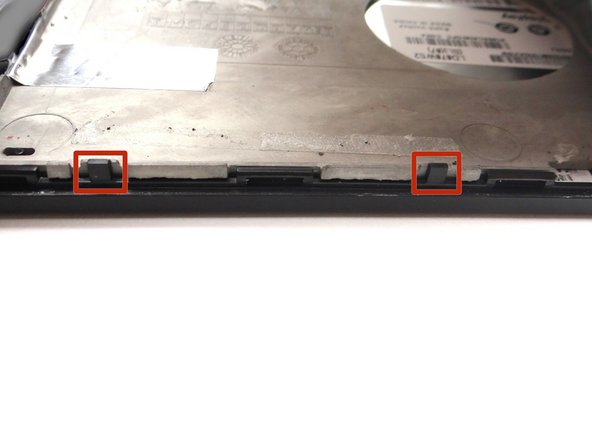
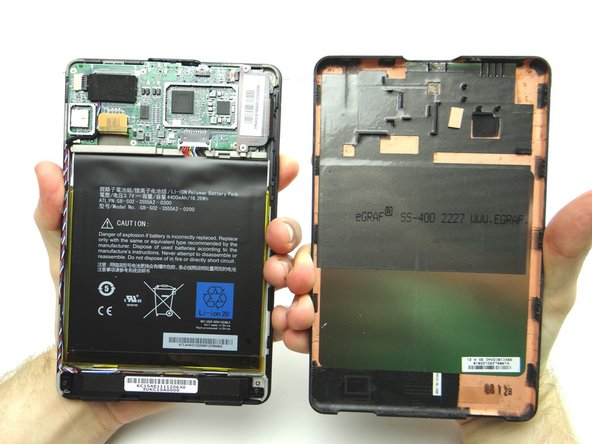
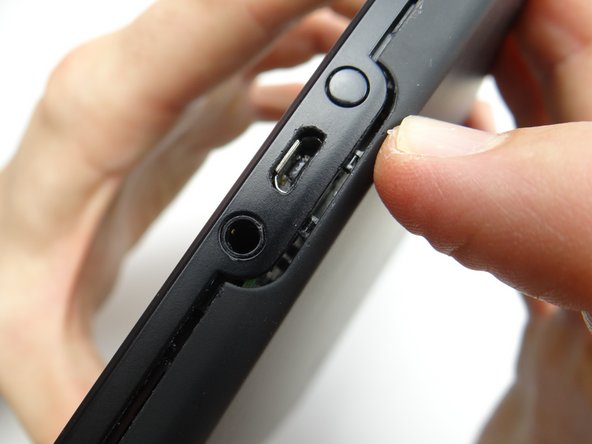
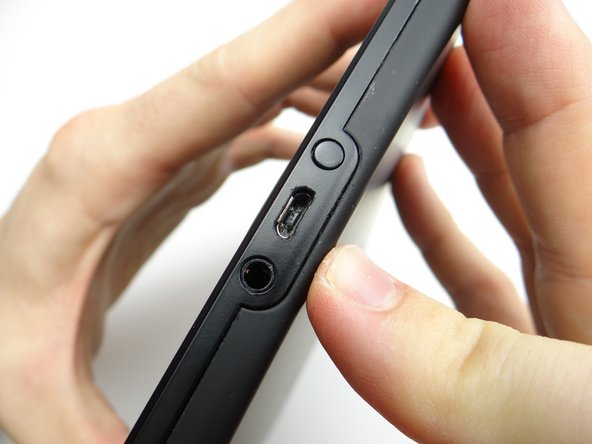
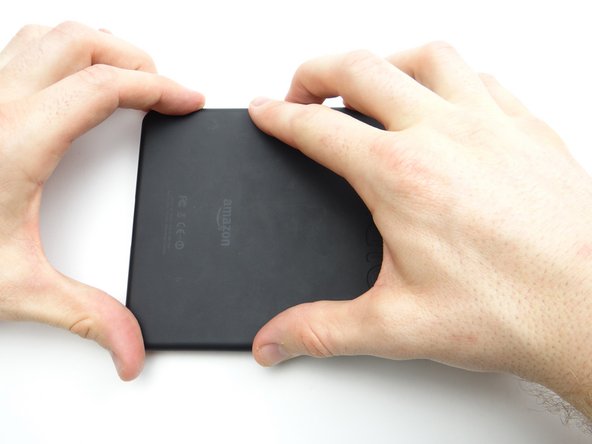
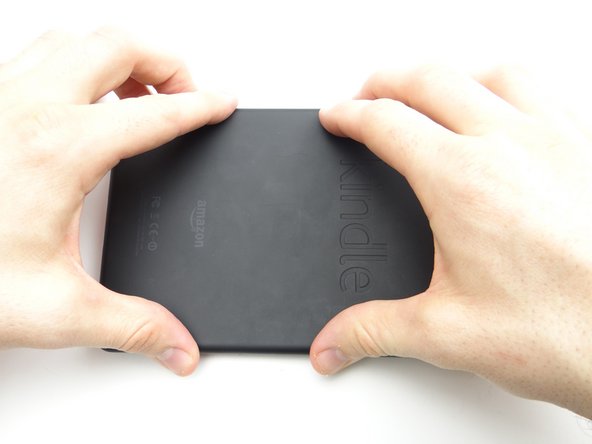
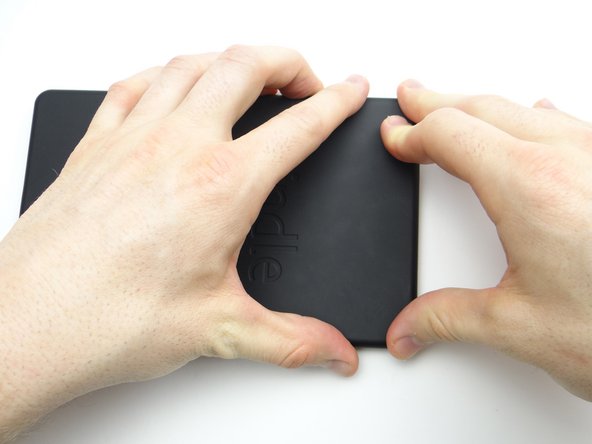
1. In the next few steps, you'll be opening the Kindle by freeing the clips marked in Picture 2. In the next few steps, you'll be opening the Kindle by freeing the clips marked in Picture 2.
    • In the next few steps, you'll be opening the Kindle by freeing the clips marked in Picture 2.

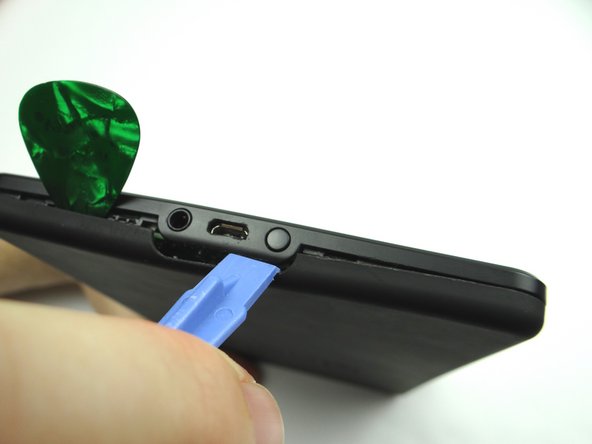
  2. Picture 1: Insert the blue pry tool directly under the charging port. Picture 2: Slide the blue pry tool slightly left, under the headset jack. Picture 3: Pry the battery cover open just enough to insert a guitar pick left of the headset jack.
    • Picture 1: Insert the blue pry tool directly under the charging port.

    • Picture 2: Slide the blue pry tool slightly left, under the headset jack.

    • Picture 3: Pry the battery cover open just enough to insert a guitar pick left of the headset jack.

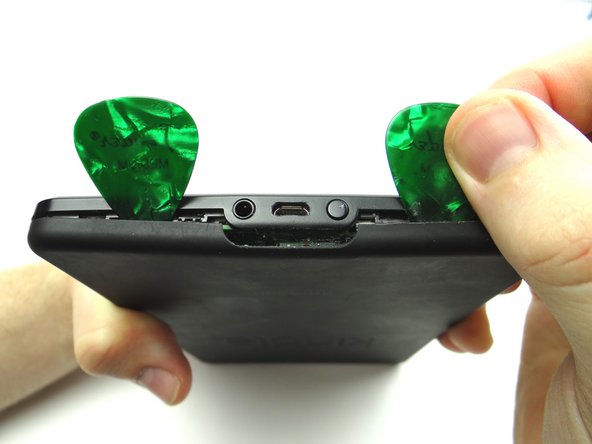
  3. Picture 1: Slide the blue pry tool right, under the power button. Picture 2: Pry the battery cover open just enough to insert a guitar pick right of the power button.
    • Picture 1: Slide the blue pry tool right, under the power button.

    • Picture 2: Pry the battery cover open just enough to insert a guitar pick right of the power button.

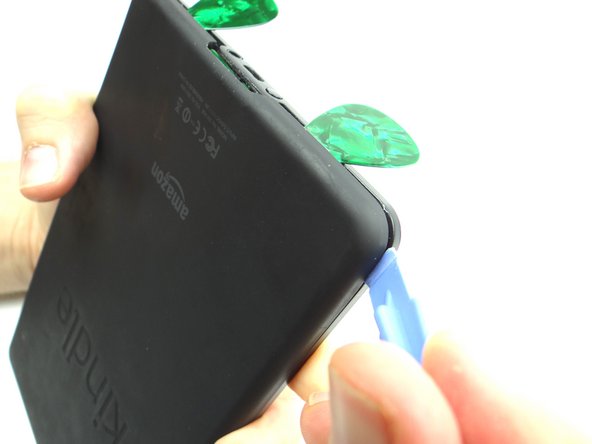
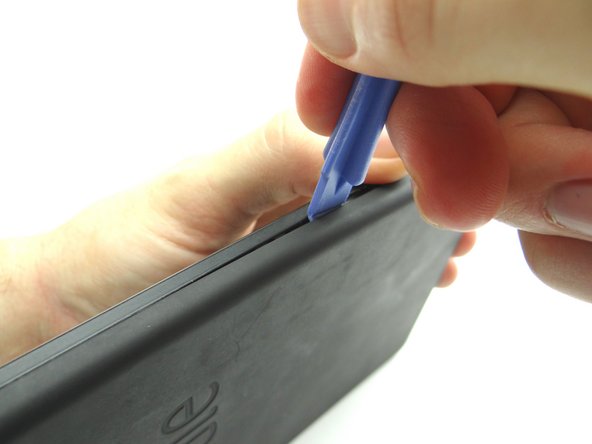
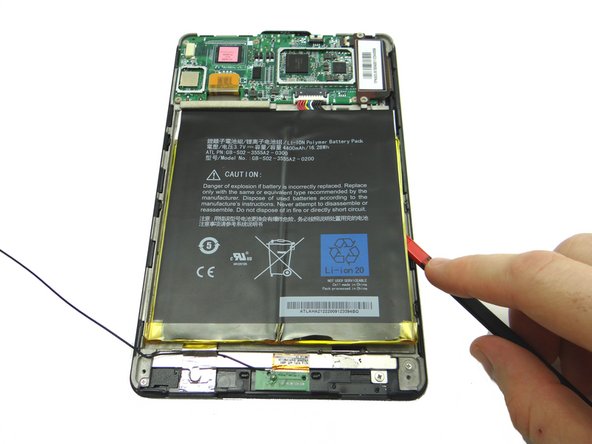
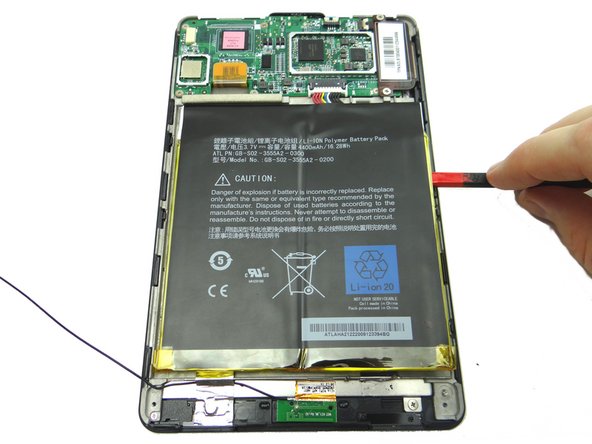
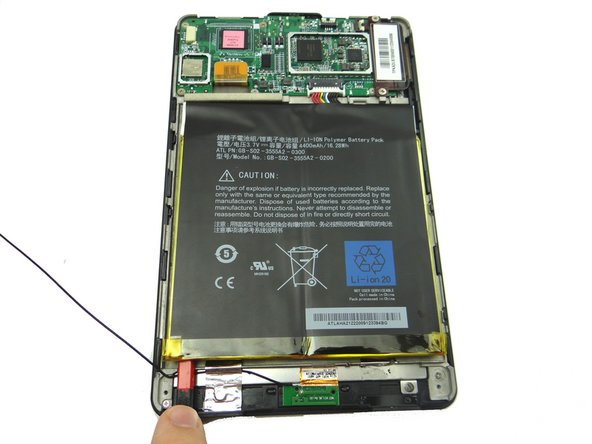
  4. Pry from the bottom of the Kindle to the top to release the battery cover clips. Pry up the other side.
    • Pry from the bottom of the Kindle to the top to release the battery cover clips.

    • Pry up the other side.

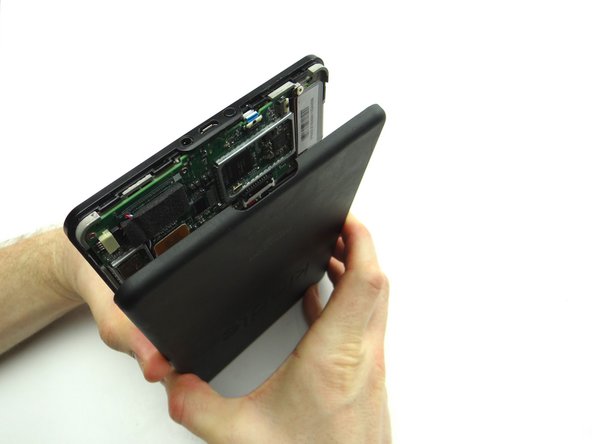
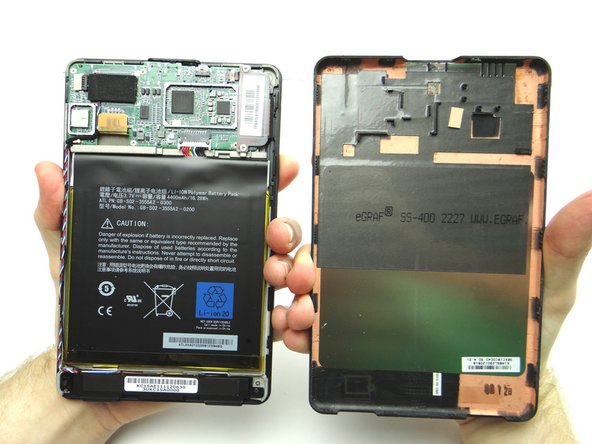
  5. With the Kindle upside down (charging port at top), use your hands to separate the battery cover from the Kindle.  Start at the charging port and work your way down. Place battery cover in ZONE V.
    • With the Kindle upside down (charging port at top), use your hands to separate the battery cover from the Kindle. Start at the charging port and work your way down.

    • Place battery cover in ZONE V.

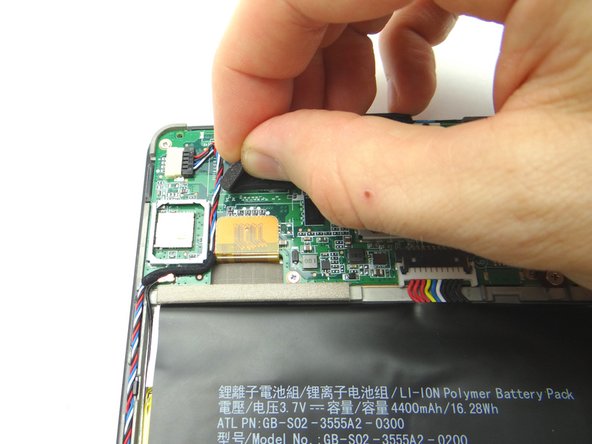
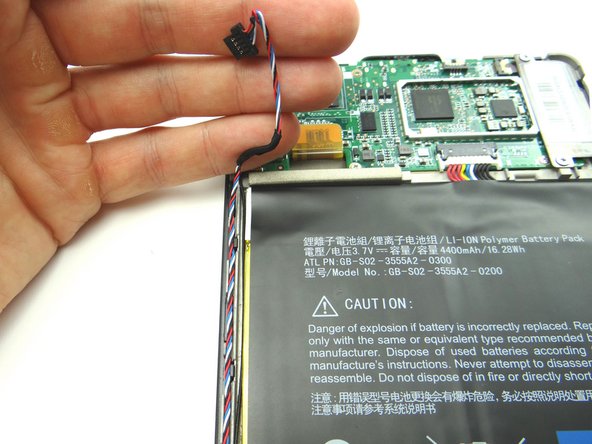
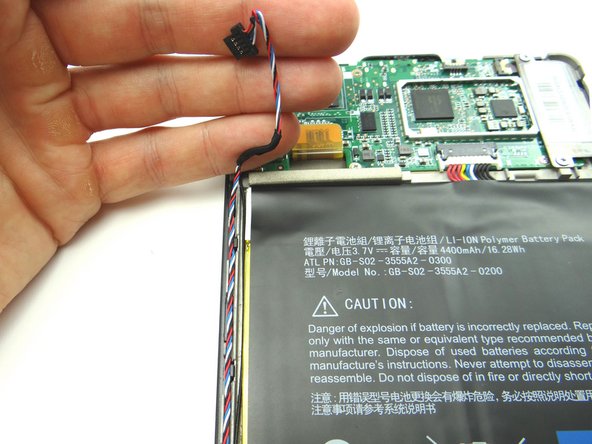
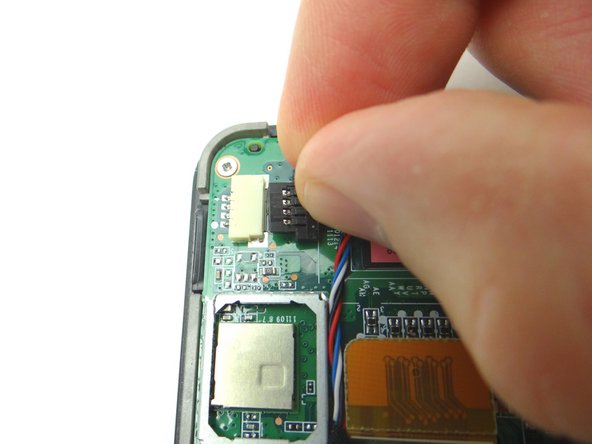
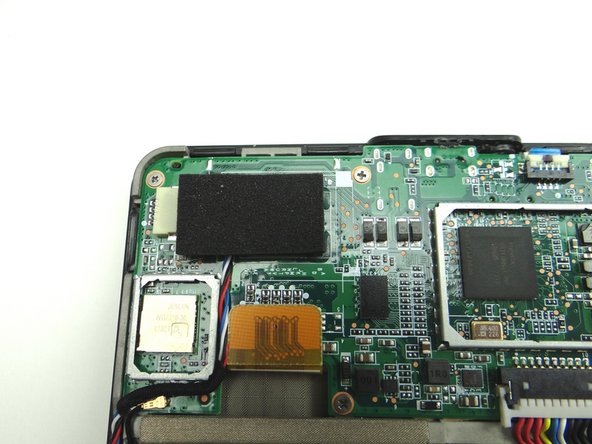
  6. Picture 1: Peel up foam tape covering the speaker connector.  Place in COMPARTMENT A. Picture 2: Wedge your fingers in the notches between the black speaker cable head and the white speaker connector.  Pull the black speaker cable head free. Use a blue pry tool if you can't fit your fingers in the notches.
    • Picture 1: Peel up foam tape covering the speaker connector. Place in COMPARTMENT A.

    • Picture 2: Wedge your fingers in the notches between the black speaker cable head and the white speaker connector. Pull the black speaker cable head free.

    • Use a blue pry tool if you can't fit your fingers in the notches.

    • Picture 3: Unthread the speaker cable.

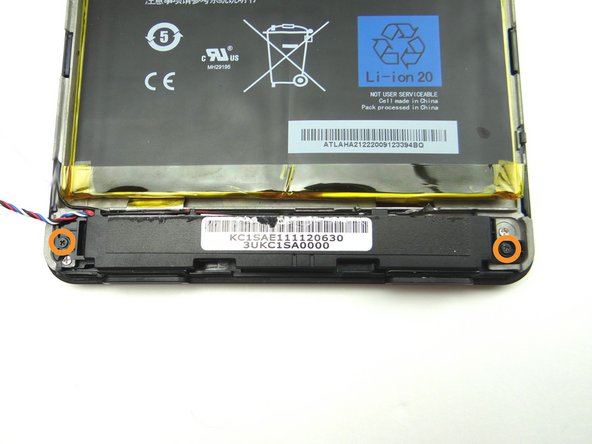
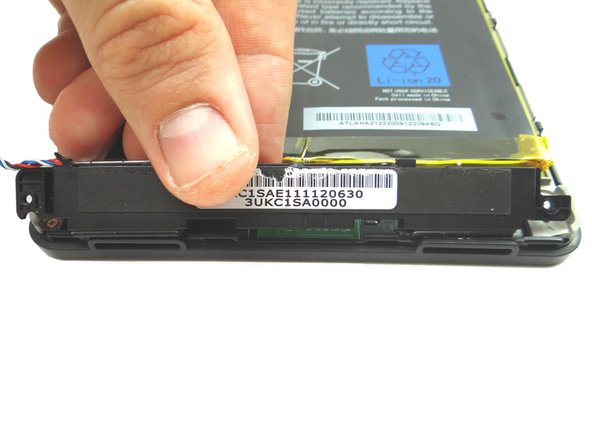
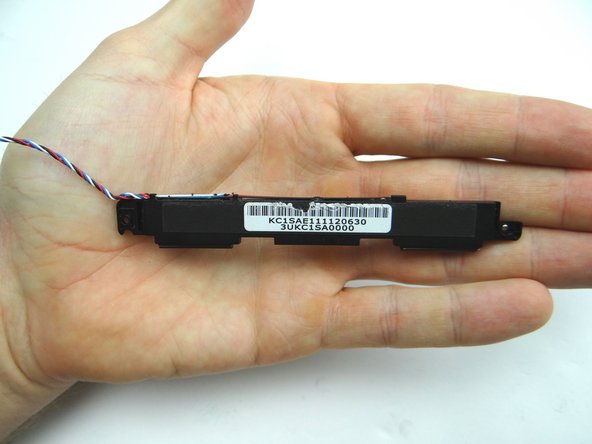
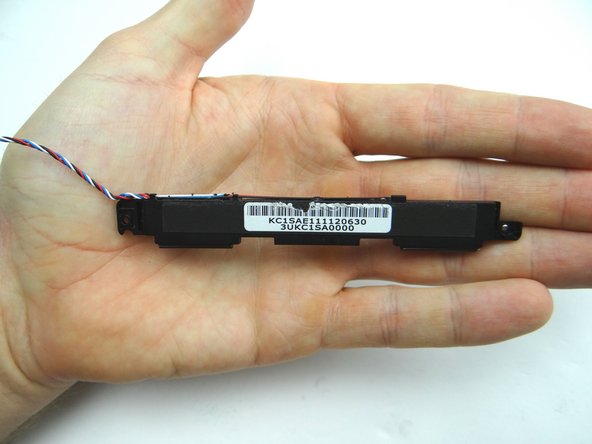
  7. Remove two 3.3 mm Phillips #00 screws securing the speaker assembly.  Place in SLOT 1. Remove speaker assembly and place in ZONE I. Remove speaker assembly and place in ZONE I.
    • Remove two 3.3 mm Phillips #00 screws securing the speaker assembly. Place in SLOT 1.

    • Remove speaker assembly and place in ZONE I.

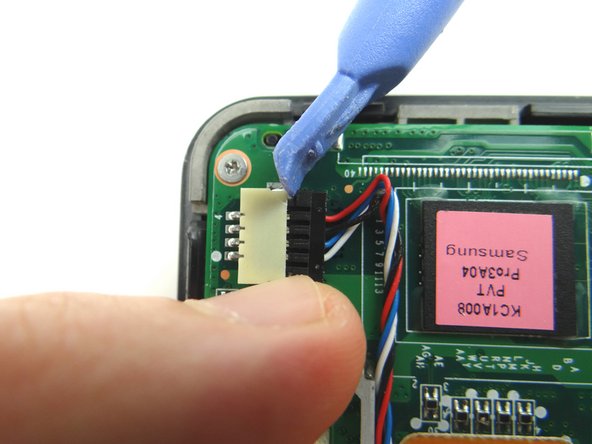
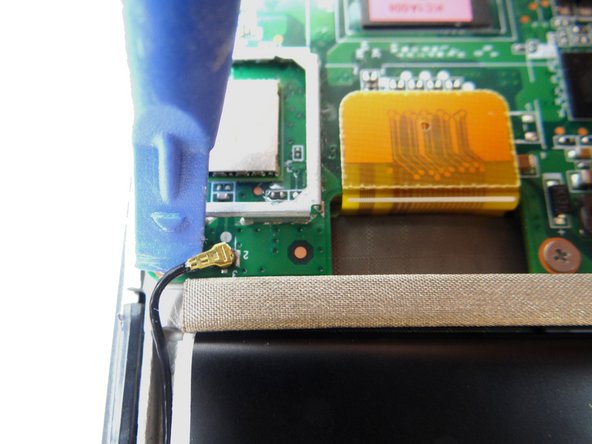
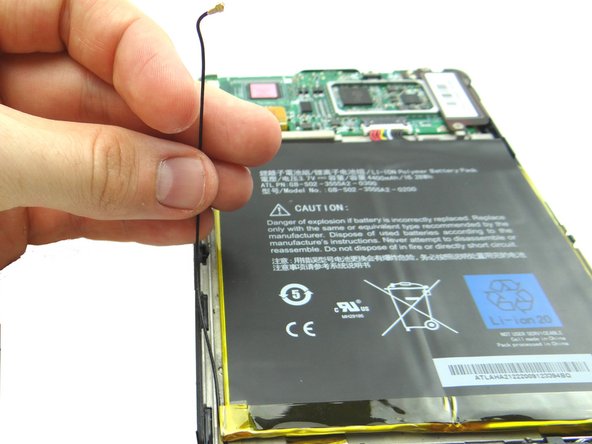
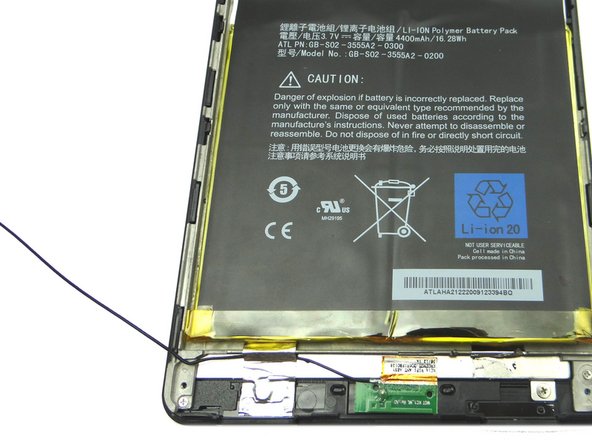
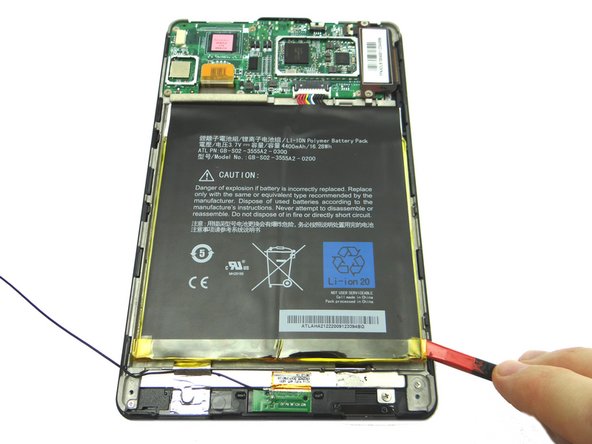
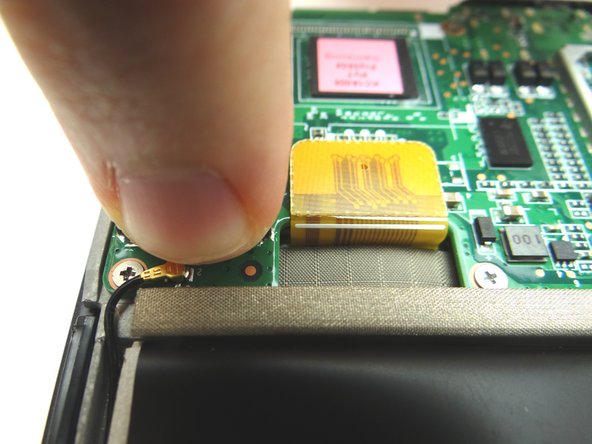
  8. Use the blue pry tool to disconnect the antenna cable head. Unthread antenna cable, but don't try to remove it. Unthread antenna cable, but don't try to remove it.
    • Use the blue pry tool to disconnect the antenna cable head.

    • Unthread antenna cable, but don't try to remove it.

  9. Picture 1: Wedge the spudger under the lower-right corner of the battery. Pictures 2 & 3: Work your way up the right side. Pictures 2 & 3: Work your way up the right side.
    • Picture 1: Wedge the spudger under the lower-right corner of the battery.

    • Pictures 2 & 3: Work your way up the right side.

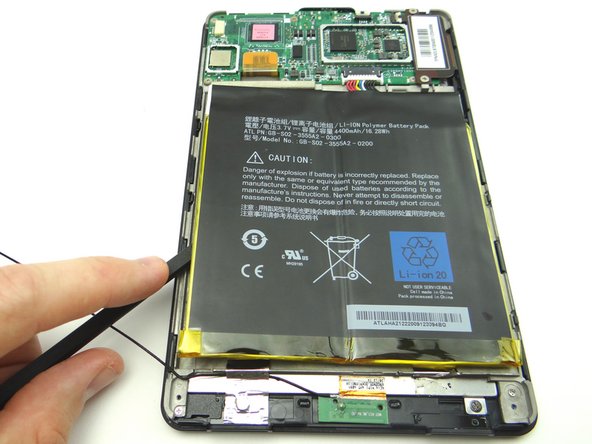
  10. Picture 1: Wedge the spudger under the lower-left corner of the battery as shown. Pictures 2 & 3: Work your way up the left side. Pictures 2 & 3: Work your way up the left side.
    • Picture 1: Wedge the spudger under the lower-left corner of the battery as shown.

    • Pictures 2 & 3: Work your way up the left side.

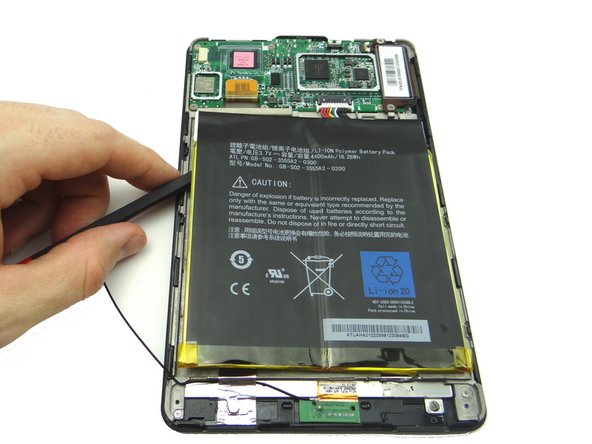
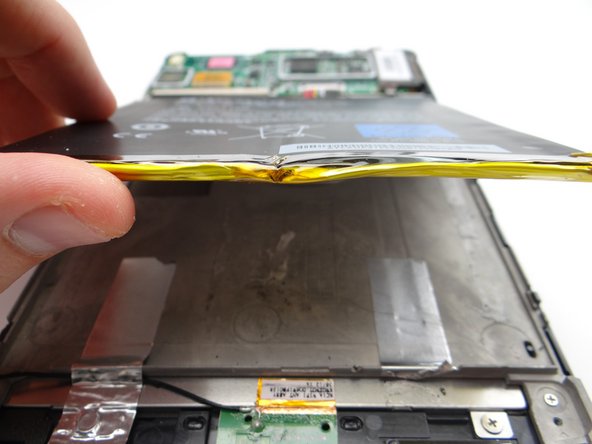
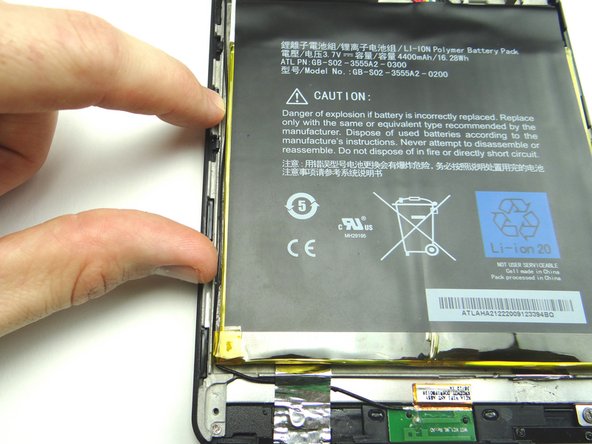
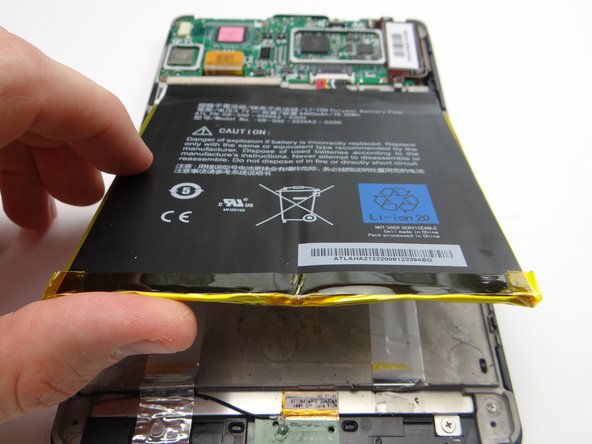
  11. Don't try to remove the battery as it's still connected to the logic board: Lift the battery up from the bottom to free it from the adhesive.
    • Don't try to remove the battery as it's still connected to the logic board:

    • Lift the battery up from the bottom to free it from the adhesive.

    • Lift it to a 45° angle.

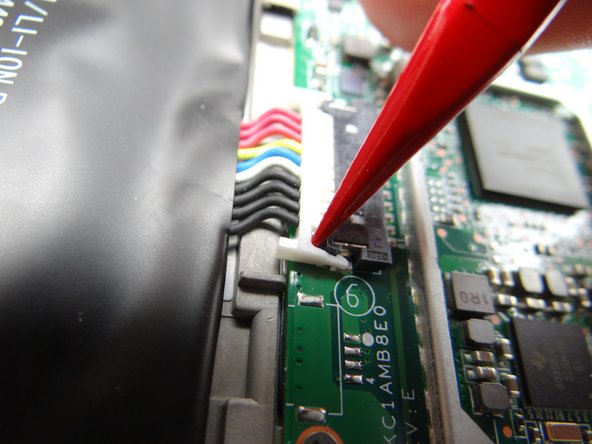
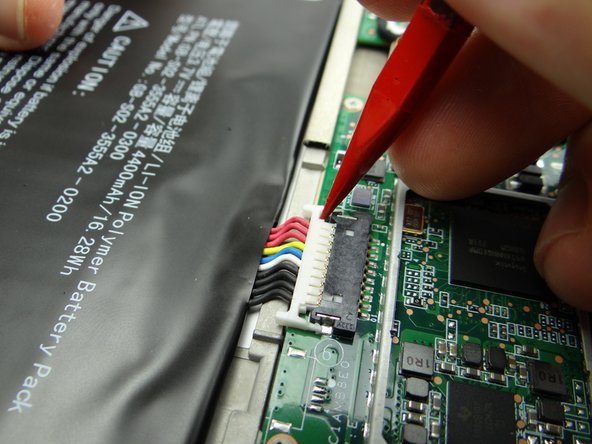
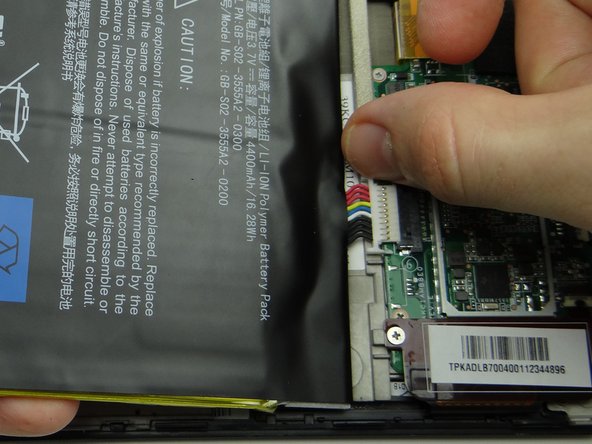
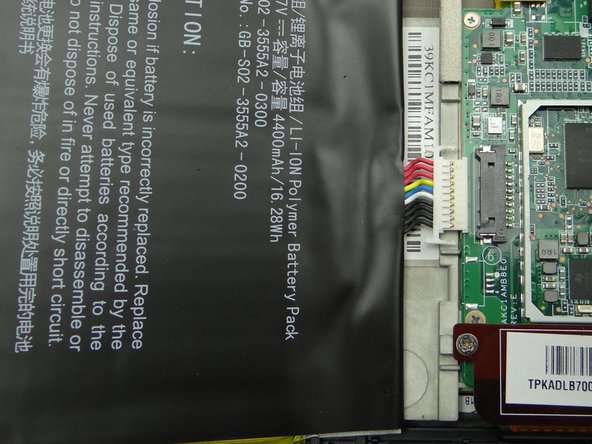
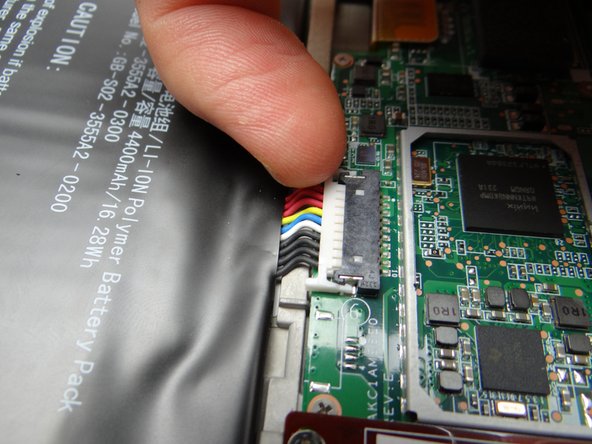
  12. Disconnect the battery: Pictures 1 & 2: Wedge the pointed end of the spudger on either side of the battery connector to unhook it. Picture 3: Make sure both sides are unhooked while pulling the battery up and away from the Kindle.  Place the battery in ZONE V with the battery cover.
    • Disconnect the battery:

    • Pictures 1 & 2: Wedge the pointed end of the spudger on either side of the battery connector to unhook it.

    • Picture 3: Make sure both sides are unhooked while pulling the battery up and away from the Kindle. Place the battery in ZONE V with the battery cover.

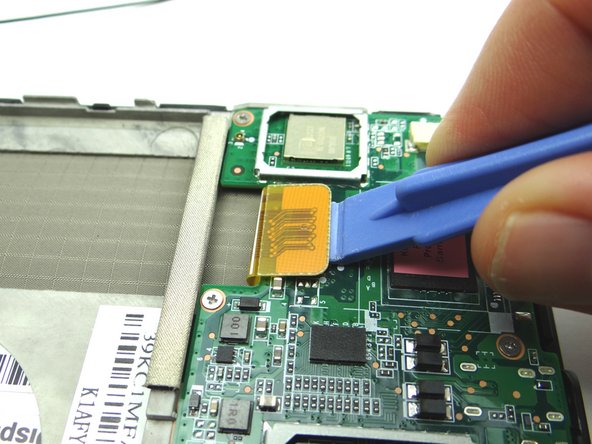
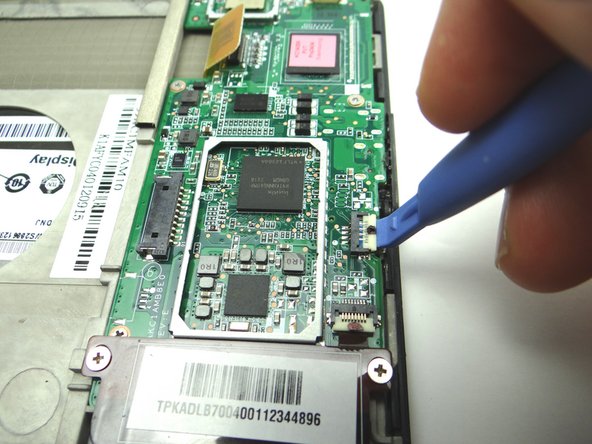
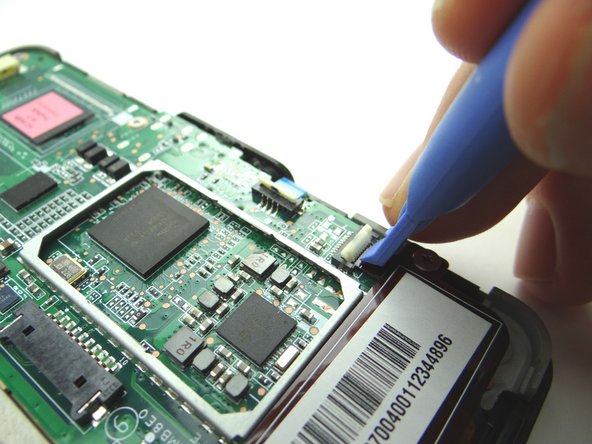
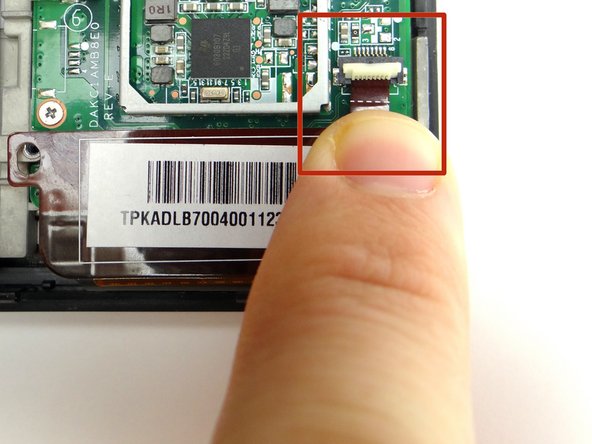
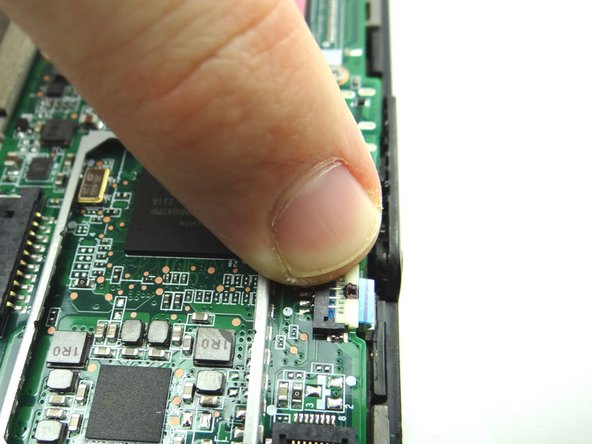
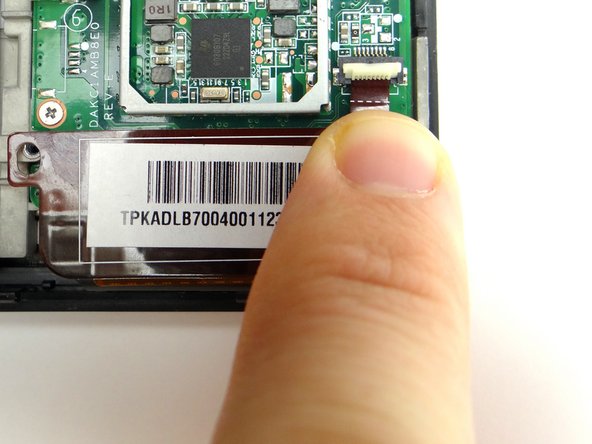
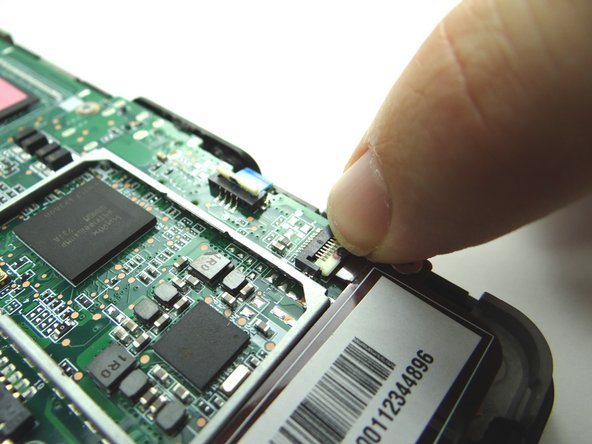
  13. Picture 1: Use a wide blue pry tool to disconnect the LCD cable. Picture 2: Open the ZIF connector securing the power button cable. Picture 3: Open the ZIF connector securing the digitizer cable.
    • Picture 1: Use a wide blue pry tool to disconnect the LCD cable.

    • Picture 2: Open the ZIF connector securing the power button cable.

    • Picture 3: Open the ZIF connector securing the digitizer cable.

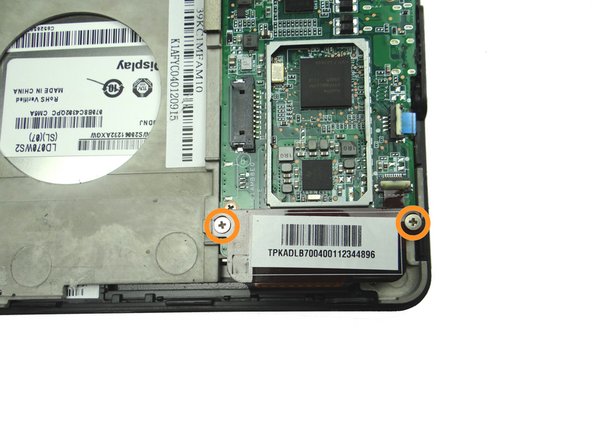
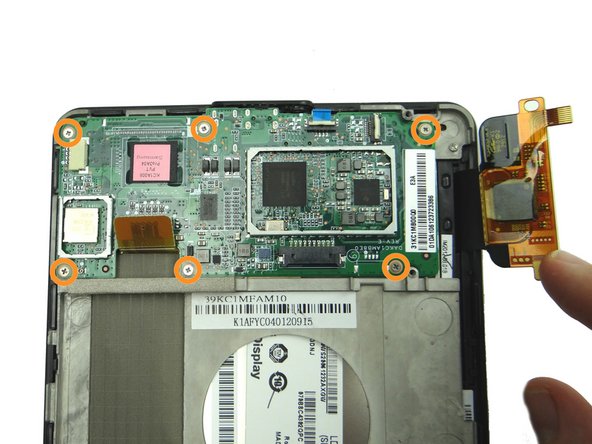
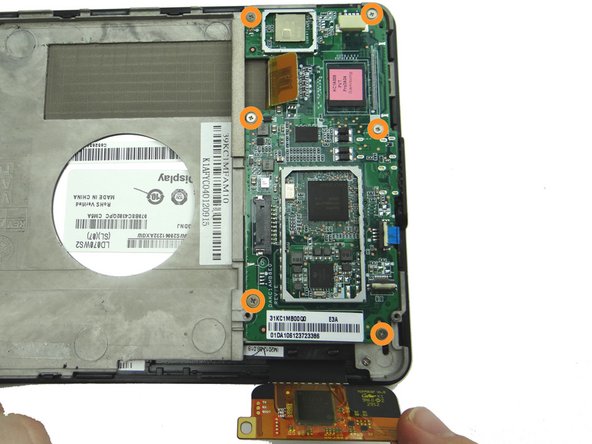
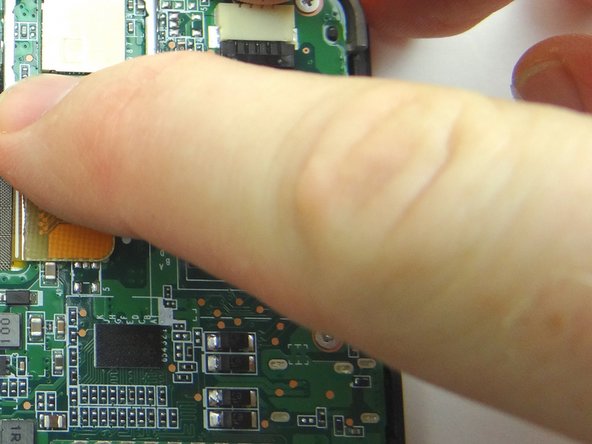
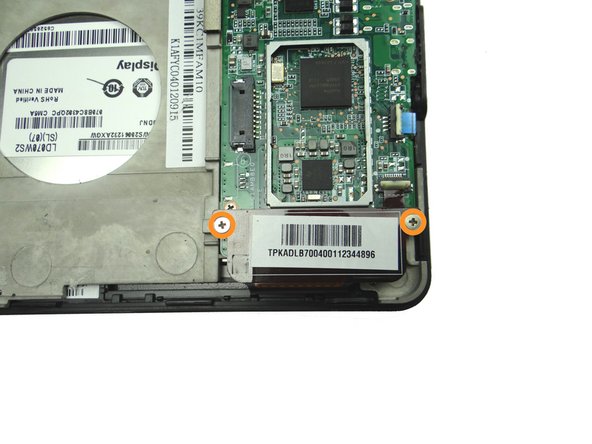
  14. Picture 1: Remove two 2.3 mm Phillips screws holding down the digitizer cable.  Place in SLOT 2. Picture 2: Slide the digitizer cable connector out with your finger. Picture 3: Remove six 2.6 mm Phillips screws securing the motherboard.  Place screws in SLOT 3.
    • Picture 1: Remove two 2.3 mm Phillips screws holding down the digitizer cable. Place in SLOT 2.

    • Picture 2: Slide the digitizer cable connector out with your finger.

    • Picture 3: Remove six 2.6 mm Phillips screws securing the motherboard. Place screws in SLOT 3.

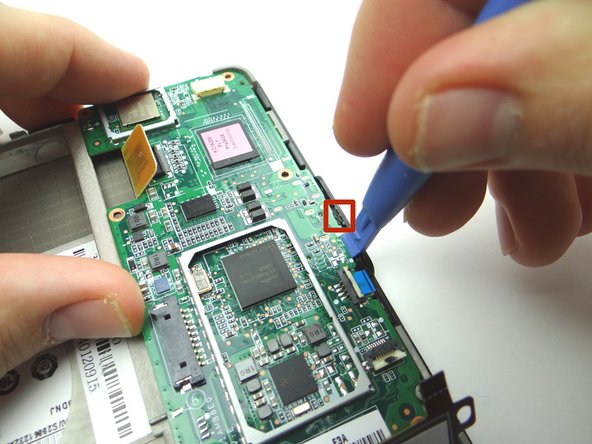
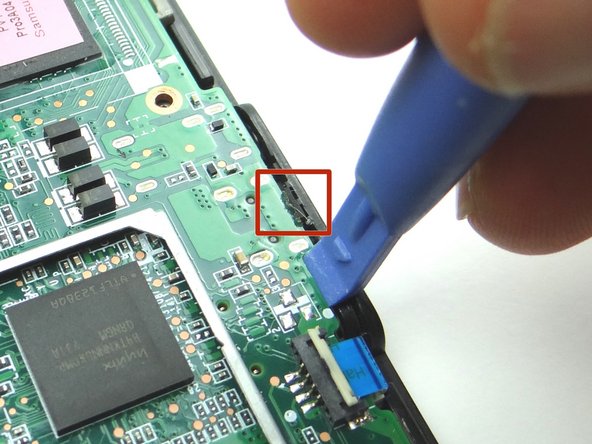
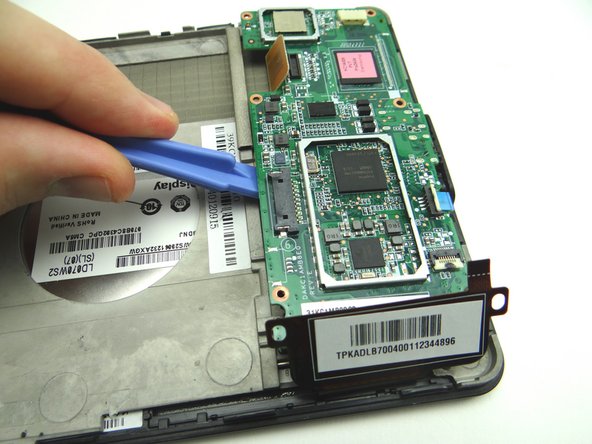
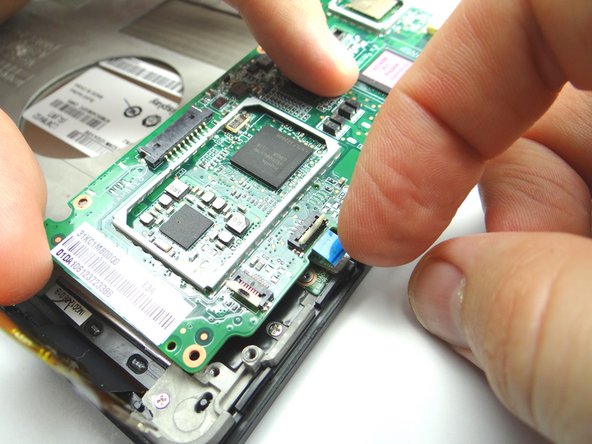
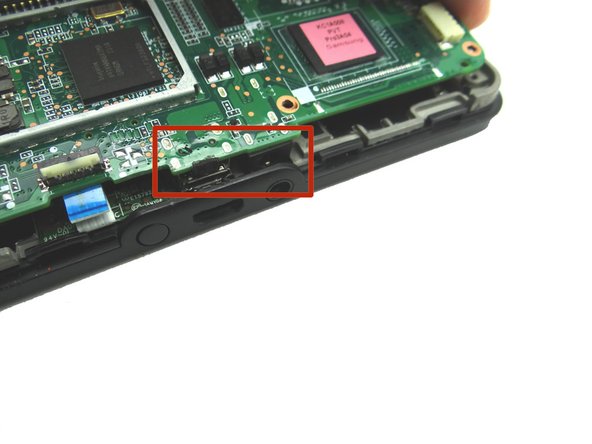
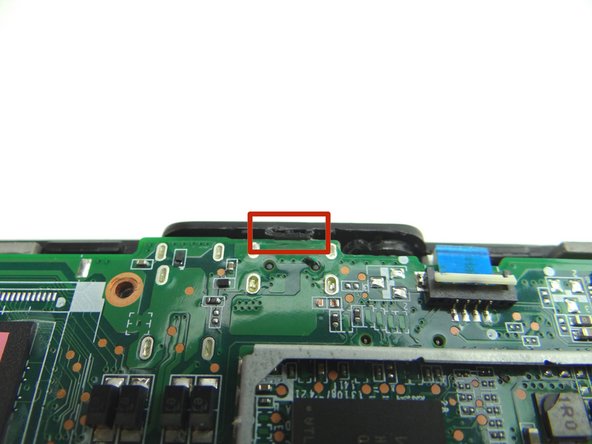
  15. Pictures 1 & 2: Wedge the blue pry tool between the logic board and front panel exactly where shown.  Pry just enough to pivot the logic board around the notch in the red square. Picture 3: The bottom of the logic board is lightly adhered to the mid-plate.  Wedge the wide blue pry tool exactly where shown.  Gently twist counter-clockwise to lift the bottom of the board. Picture 3: The bottom of the logic board is lightly adhered to the mid-plate.  Wedge the wide blue pry tool exactly where shown.  Gently twist counter-clockwise to lift the bottom of the board.
    • Pictures 1 & 2: Wedge the blue pry tool between the logic board and front panel exactly where shown. Pry just enough to pivot the logic board around the notch in the red square.

    • Picture 3: The bottom of the logic board is lightly adhered to the mid-plate. Wedge the wide blue pry tool exactly where shown. Gently twist counter-clockwise to lift the bottom of the board.

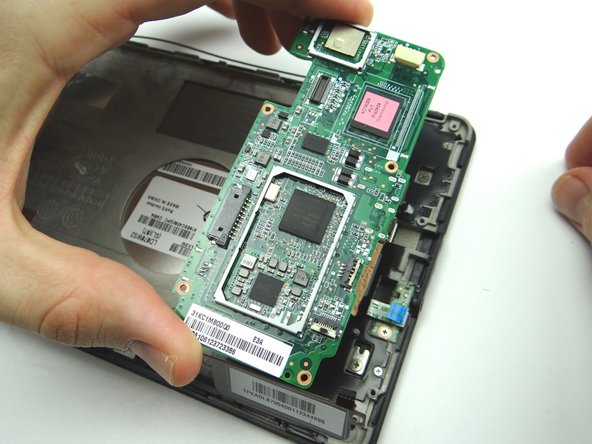
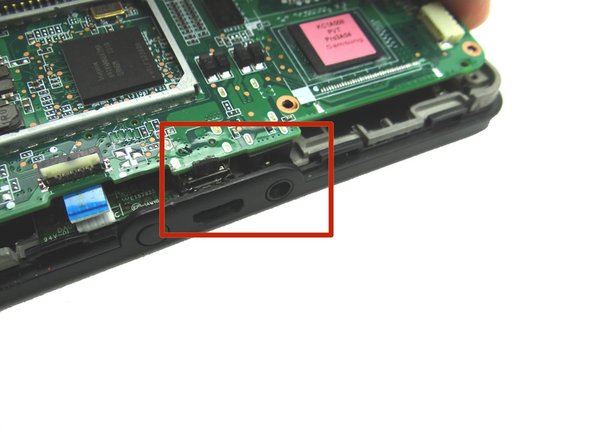
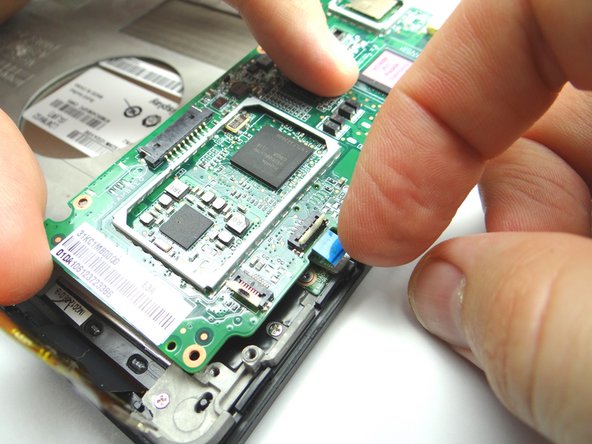
  16. Picture 1: Lift the bottom edge of the logic board while sliding the power button cable free. Picture 2: Carefully guide the charging port and headset jack (soldered to the bottom of the logic board) free. Picture 3: Lift the logic board away from the device.  Place in ZONES II & III.
    • Picture 1: Lift the bottom edge of the logic board while sliding the power button cable free.

    • Picture 2: Carefully guide the charging port and headset jack (soldered to the bottom of the logic board) free.

    • Picture 3: Lift the logic board away from the device. Place in ZONES II & III.

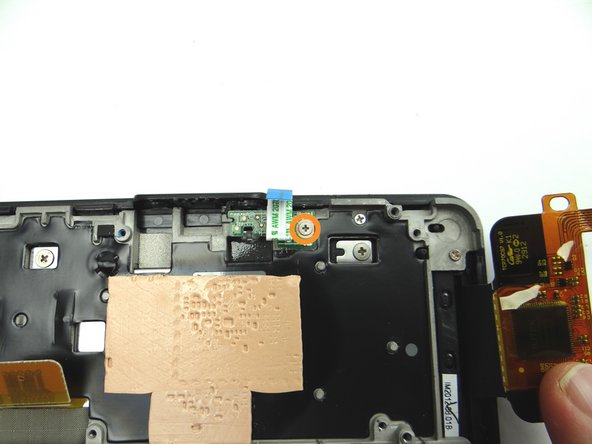
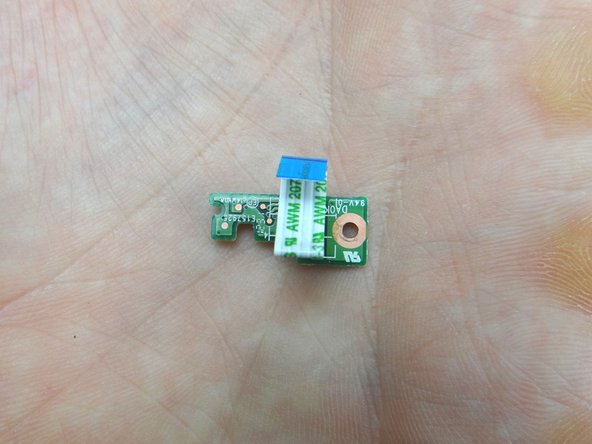
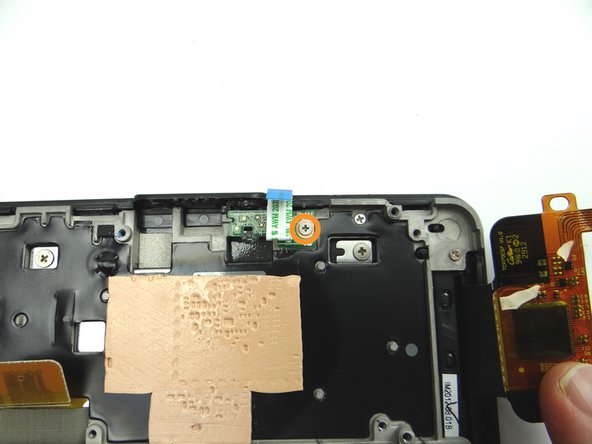
  17. Remove the 2.5 mm Phillips scew securing the power button cable.  Place screw in SLOT 4. Peel up power button cable with your fingers and place in COMPARTMENT B.
    • Remove the 2.5 mm Phillips scew securing the power button cable. Place screw in SLOT 4.

    • Peel up power button cable with your fingers and place in COMPARTMENT B.

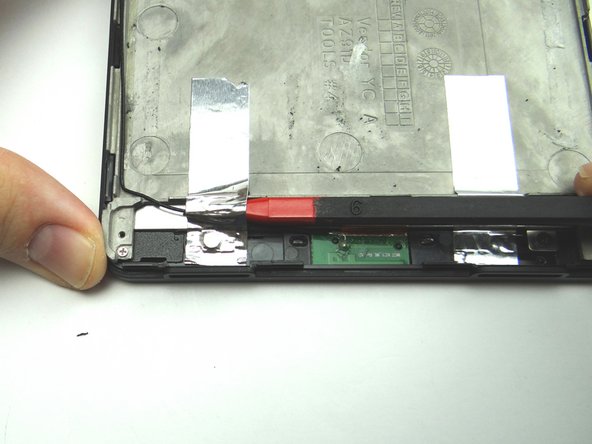
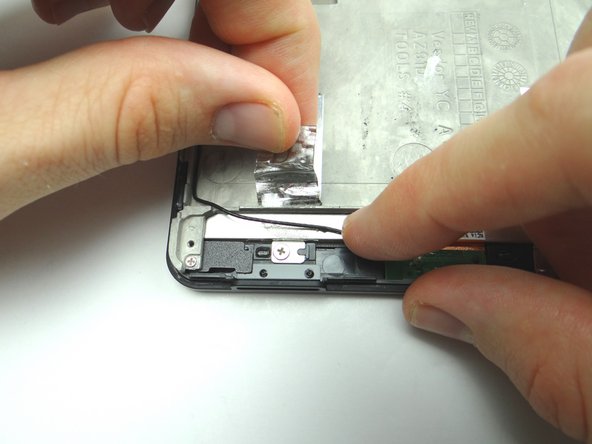
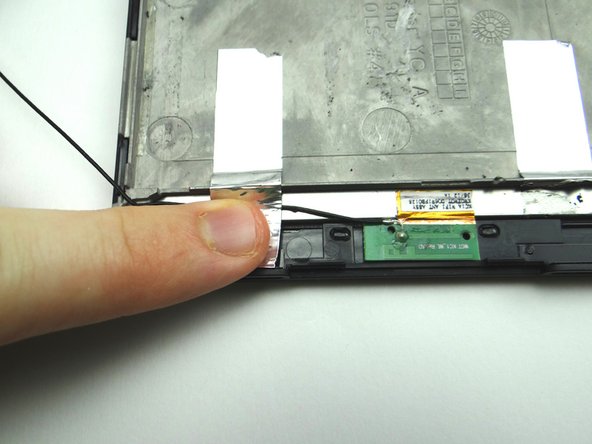
  18. Use the pointed end of the spudger to peel up silver tape securing antenna cable. Fold the tape out of the way.
    • Use the pointed end of the spudger to peel up silver tape securing antenna cable.

    • Fold the tape out of the way.

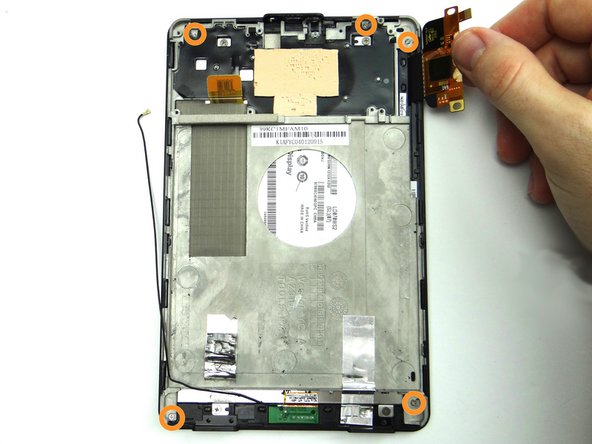
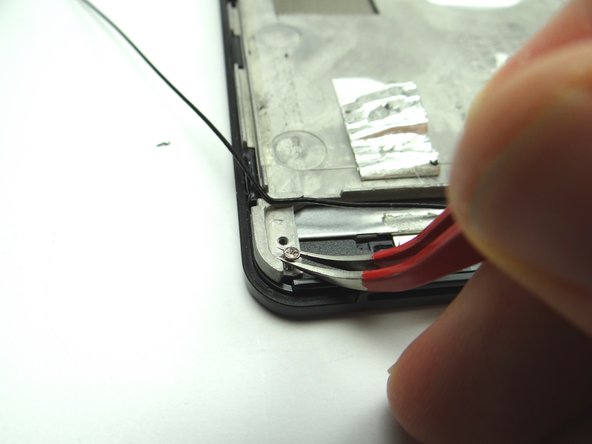
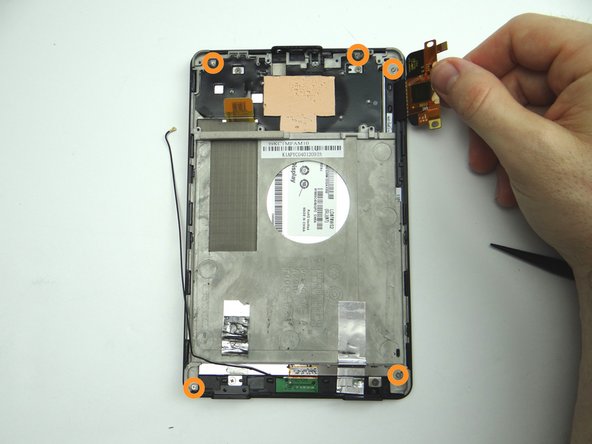
  19. Remove five 3.6 mm Phillips screws securing the mid-plate.  Place in SLOT 5. Use curved-tip tweezers to finish pulling up the screws if they get stuck.
    • Remove five 3.6 mm Phillips screws securing the mid-plate. Place in SLOT 5.

    • Use curved-tip tweezers to finish pulling up the screws if they get stuck.

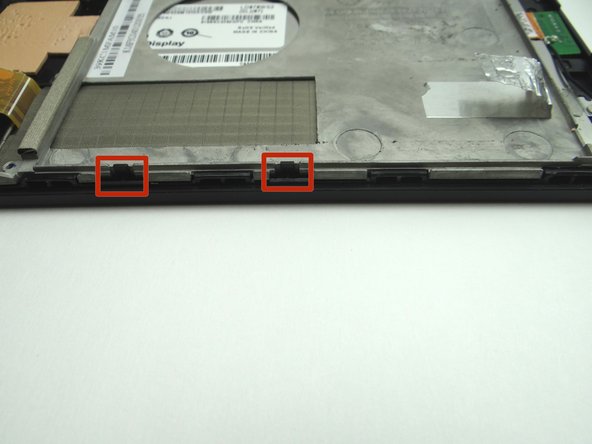
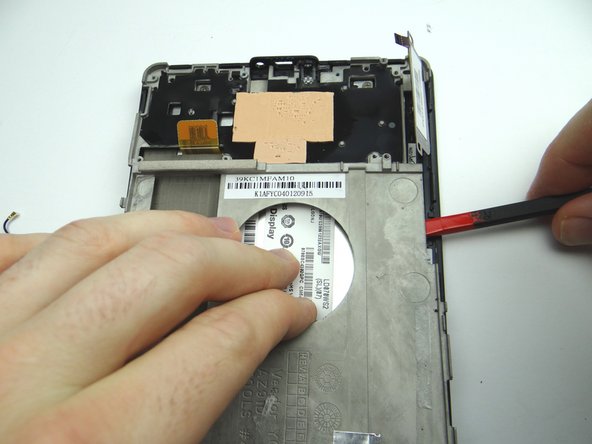
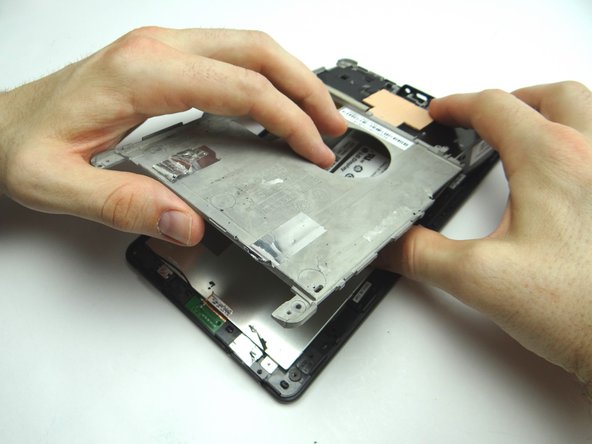
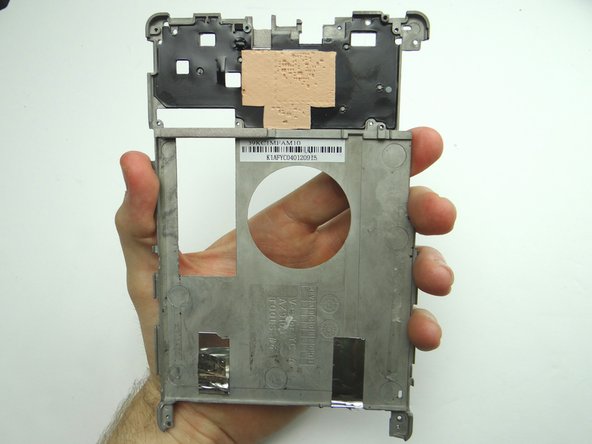
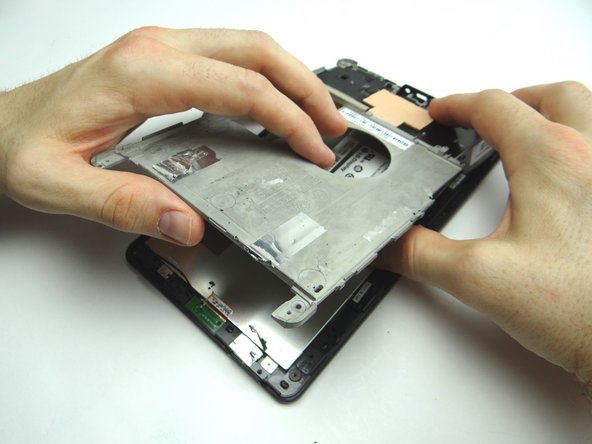
  20. Pictures 1 & 2: Clips on either side of the front panel hold the mid-plate in place. Picture 3: Wedge the flat end of the spudger between the mid-plate and front panel.  Pry up the mid-plate using the spudger in your right hand while pulling up with your left. Picture 3: Wedge the flat end of the spudger between the mid-plate and front panel.  Pry up the mid-plate using the spudger in your right hand while pulling up with your left.
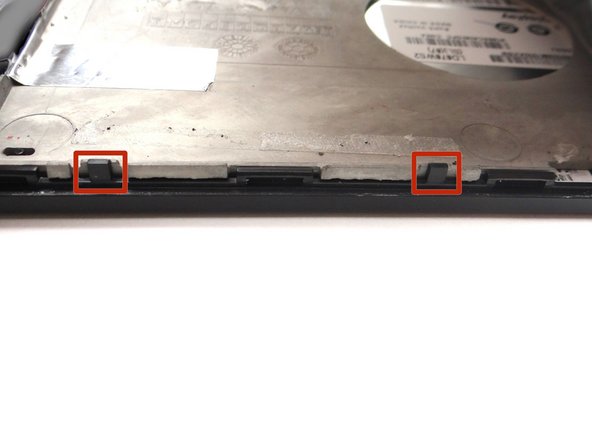
    • Pictures 1 & 2: Clips on either side of the front panel hold the mid-plate in place.

    • Picture 3: Wedge the flat end of the spudger between the mid-plate and front panel. Pry up the mid-plate using the spudger in your right hand while pulling up with your left.

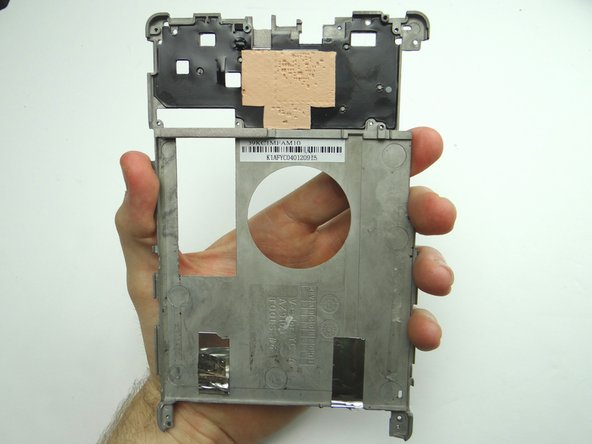
  21. Continue pulling up the mid-plate with your hands. Place in ZONE V.
    • Continue pulling up the mid-plate with your hands.

    • Place in ZONE V.

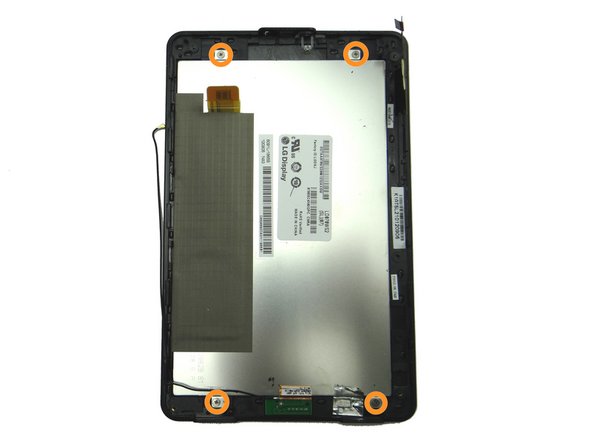
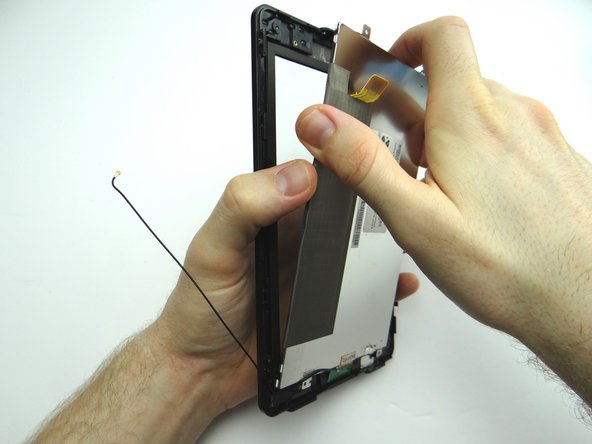
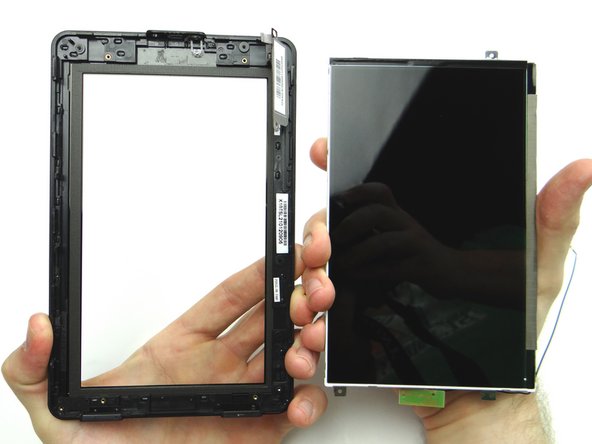
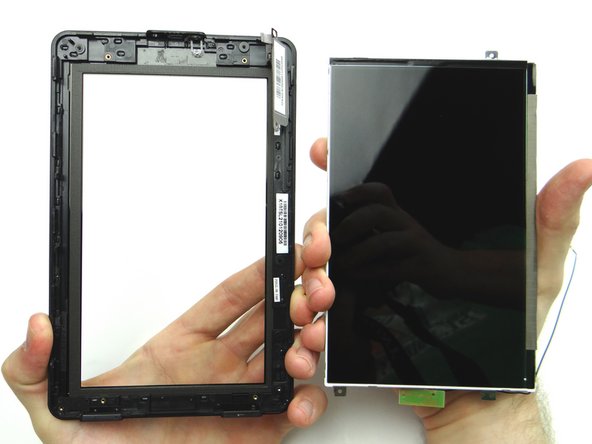
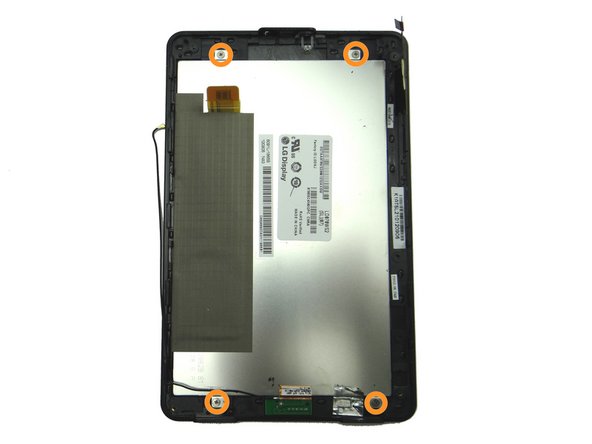
  22. Remove four 2.4 mm Phillips screws holding the LCD to the front glass frame.  Place in SLOT 6. Separate the LCD from the front glass. Separate the LCD from the front glass.
    • Remove four 2.4 mm Phillips screws holding the LCD to the front glass frame. Place in SLOT 6.

    • Separate the LCD from the front glass.

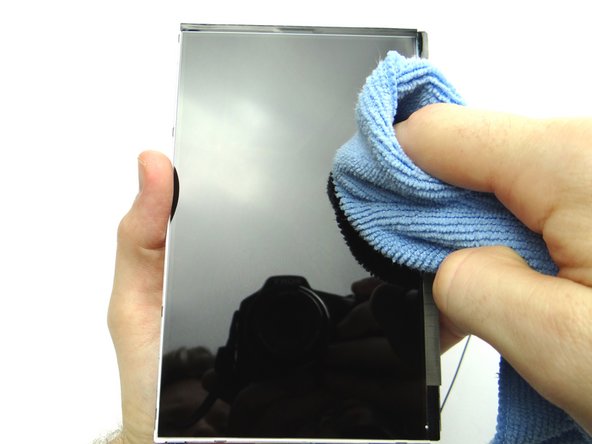
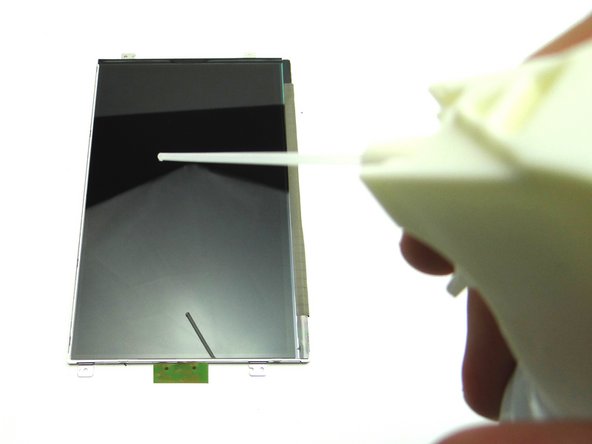
  23. Check the LCD for fingerprints or particulates.  Clean with a chamois cloth and dust-off. Check the LCD for fingerprints or particulates.  Clean with a chamois cloth and dust-off.
    • Check the LCD for fingerprints or particulates. Clean with a chamois cloth and dust-off.

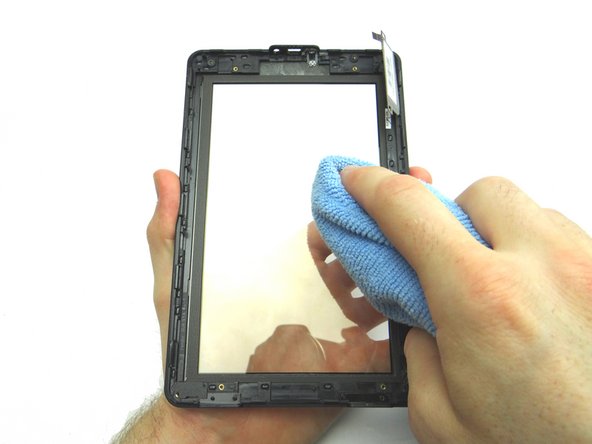
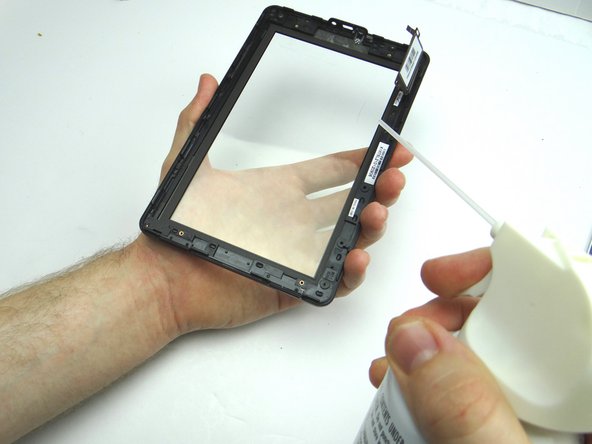
  24. If necessary, clean the inside of the front glass with a chamois cloth and dust-off. If necessary, clean the inside of the front glass with a chamois cloth and dust-off.
    • If necessary, clean the inside of the front glass with a chamois cloth and dust-off.

  25. Seat LCD in front glass frame. From SLOT 6, replace four 2.4 mm Phillips screws holding the LCD to the front glass frame.
    • Seat LCD in front glass frame.

    • From SLOT 6, replace four 2.4 mm Phillips screws holding the LCD to the front glass frame.

  26. From ZONE V, seat mid-plate on front panel. Make sure antenna cable is out of the way. Make sure antenna cable is out of the way.
    • From ZONE V, seat mid-plate on front panel.

    • Make sure antenna cable is out of the way.

  27. Make sure the mid-plate is seated under the clips on the front panel. Make sure the mid-plate is seated under the clips on the front panel.
    • Make sure the mid-plate is seated under the clips on the front panel.

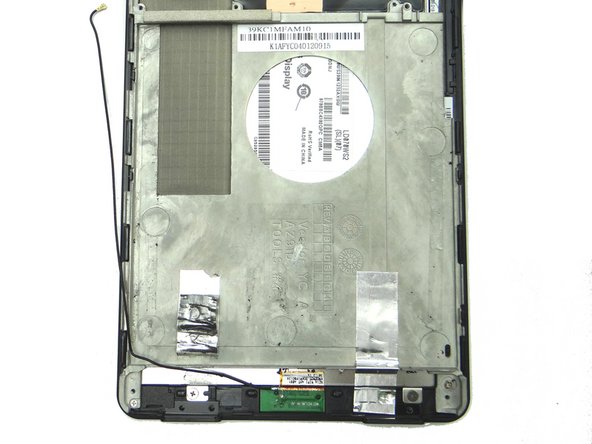
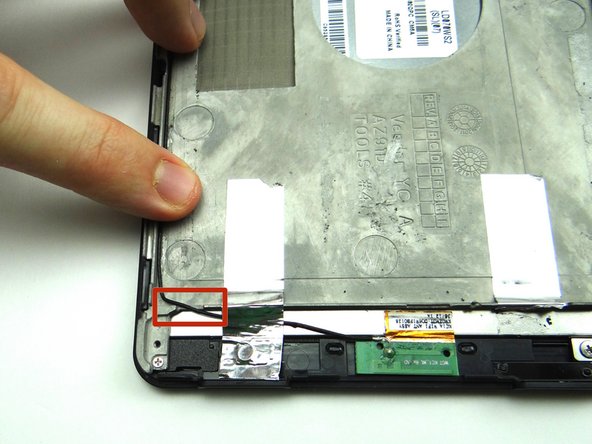
  28. Picture 1: From SLOT 5, replace the five 3.6 mm Phillips screws securing the mid-plate. Picture 2: Fold tape down on top of antenna cable. Picture 3: Place antenna cable along the left edge of the mid-plate.  Note the placement of the cable through the notch inside the red square.
    • Picture 1: From SLOT 5, replace the five 3.6 mm Phillips screws securing the mid-plate.

    • Picture 2: Fold tape down on top of antenna cable.

    • Picture 3: Place antenna cable along the left edge of the mid-plate. Note the placement of the cable through the notch inside the red square.

  29. Replace power button cable from COMPARTMENT B. From SLOT 4, replace the 2.5 mm Phillips screw to secure the power button cable.
    • Replace power button cable from COMPARTMENT B.

    • From SLOT 4, replace the 2.5 mm Phillips screw to secure the power button cable.

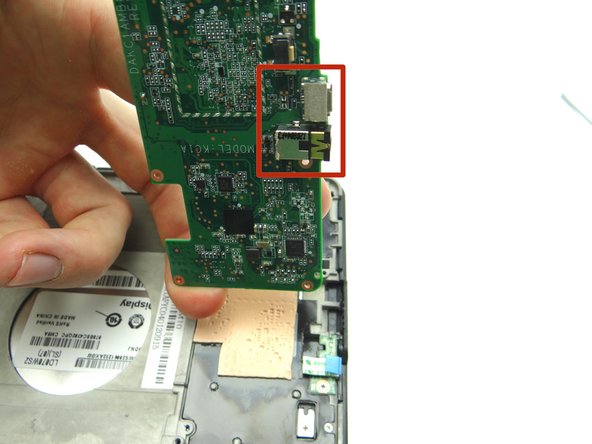
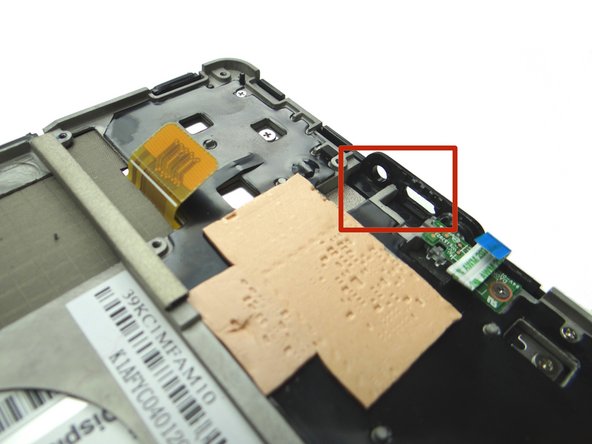
  30. Replace logic board from ZONES II & III.  Guide the charging port and headset jack in first: Picture 1: Shows the charging port and headset jack on the bottom of the logic board. Picture 2: Shows the openings for the headset jack and charging port.
    • Replace logic board from ZONES II & III. Guide the charging port and headset jack in first:

    • Picture 1: Shows the charging port and headset jack on the bottom of the logic board.

    • Picture 2: Shows the openings for the headset jack and charging port.

    • Picture 3: Guide the charging port and headset jack in.

    • Make sure the power button cable doesn't get stuck under the logic board.

  31. Pictures 1 & 2: Seat power button cable then gently push the logic board into place. Make sure the logic board is situated under the clip marked in Picture 2. Picture 3: From SLOT 3, replace six 2.6 mm Phillips screws. Picture 3: From SLOT 3, replace six 2.6 mm Phillips screws.
    • Pictures 1 & 2: Seat power button cable then gently push the logic board into place. Make sure the logic board is situated under the clip marked in Picture 2.

    • Picture 3: From SLOT 3, replace six 2.6 mm Phillips screws.

  32. Make sure power button cable is pushed in all the way. Close ZIF connector. Seat LCD cable.
    • Make sure power button cable is pushed in all the way. Close ZIF connector.

    • Seat LCD cable.

  33. Picture 1: Guide digitizer cable into ZIF connector. Picture 2: From SLOT 2, replace two 2.3 mm Phillips screws to secure the digitizer cable. Picture 3: Close ZIF connector.
    • Picture 1: Guide digitizer cable into ZIF connector.

    • Picture 2: From SLOT 2, replace two 2.3 mm Phillips screws to secure the digitizer cable.

    • Picture 3: Close ZIF connector.

  34. Seat the battery from ZONE V while guiding the battery connector into its socket. Push connector in until it snaps into place.
    • Seat the battery from ZONE V while guiding the battery connector into its socket.

    • Push connector in until it snaps into place.

  35. Thread antenna along the left edge of the battery. Seat antenna on logic board.
    • Thread antenna along the left edge of the battery.

    • Seat antenna on logic board.

  36. Replace speaker assembly from ZONE I. Replace two 3.3 mm Phillips #00 screws securing the speaker assembly from SLOT 1. Replace two 3.3 mm Phillips #00 screws securing the speaker assembly from SLOT 1.
    • Replace speaker assembly from ZONE I.

    • Replace two 3.3 mm Phillips #00 screws securing the speaker assembly from SLOT 1.

  37. Picture 1: Thread speaker cable through the track just left of the battery. Picture 2: Push speaker cable connector into place. Replace foam tape from COMPARTMENT A.
    • Picture 1: Thread speaker cable through the track just left of the battery.

    • Picture 2: Push speaker cable connector into place.

    • Replace foam tape from COMPARTMENT A.

  38. From ZONE V, secure the battery cover to the Kindle. Start with the two tabs on either side of the charging port. Start with the two tabs on either side of the charging port.
    • From ZONE V, secure the battery cover to the Kindle.

    • Start with the two tabs on either side of the charging port.

  39. Push the bottom into place and work your way to the top. Push the bottom into place and work your way to the top. Push the bottom into place and work your way to the top.
    • Push the bottom into place and work your way to the top.

  40. Power up the device and test the replacement part or parts.
    • Power up the device and test the replacement part or parts.

Finish Line
James Linder

Member since: 01/24/2013

71,591 Reputation

217 Guides authored

0 Comments

Add Comment

View Statistics:

Past 24 Hours: 0

Past 7 Days: 0

Past 30 Days: 0

All Time: 54

CELL PHONE SANDBOX