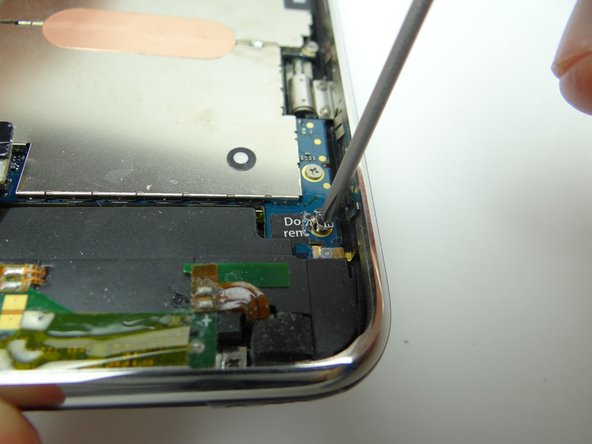
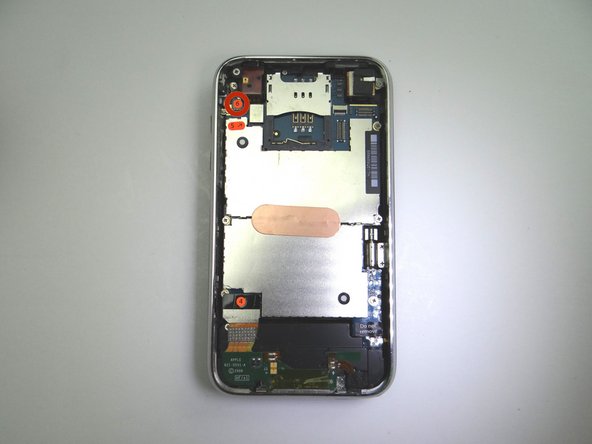
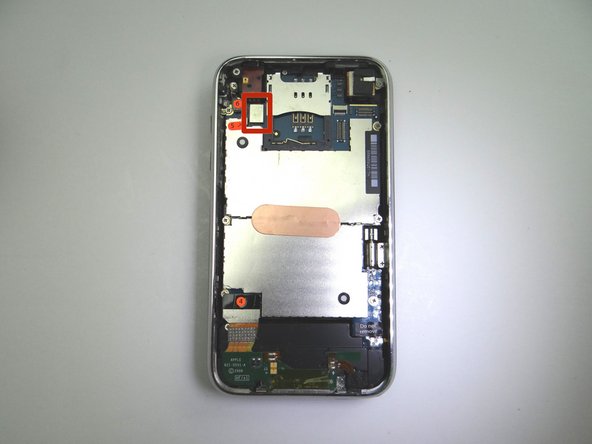
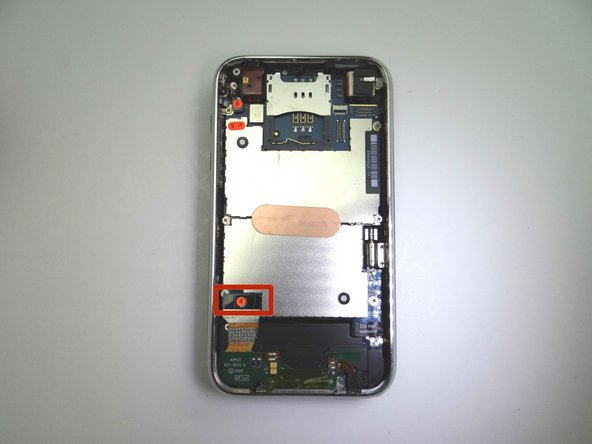
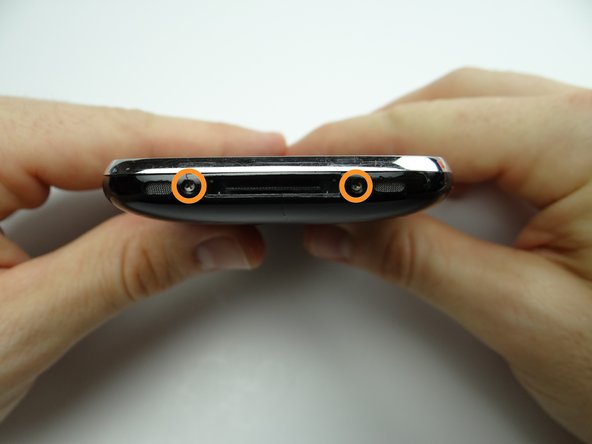
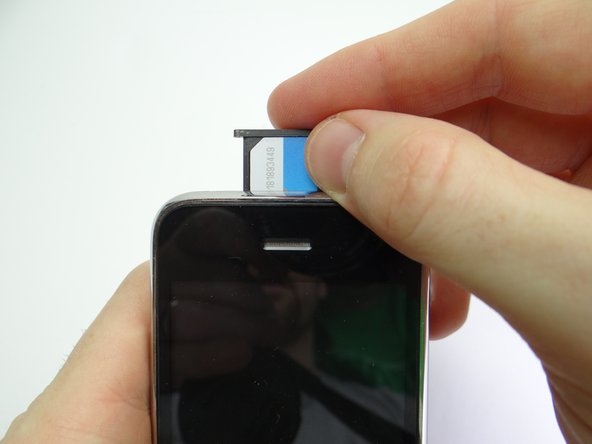
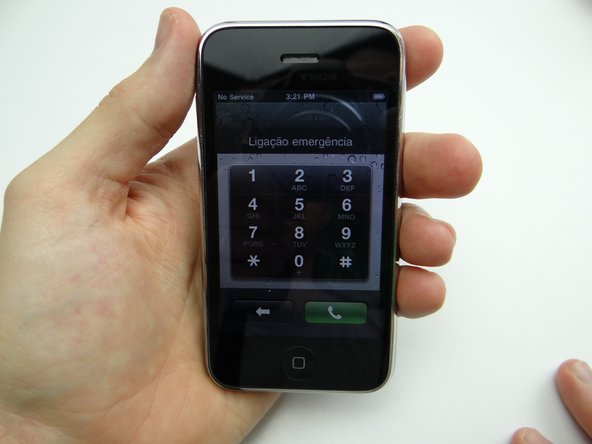
1. Remove the SIM Card Tray and SIM Card.  Place in COMPARTMENT A Remove two Phillips #00 screws and place in SLOT 1. Remove two Phillips #00 screws and place in SLOT 1.
    • Remove the SIM Card Tray and SIM Card. Place in COMPARTMENT A

    • Remove two Phillips #00 screws and place in SLOT 1.

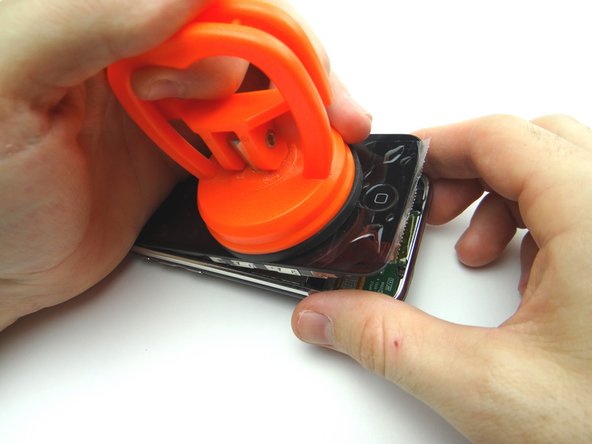
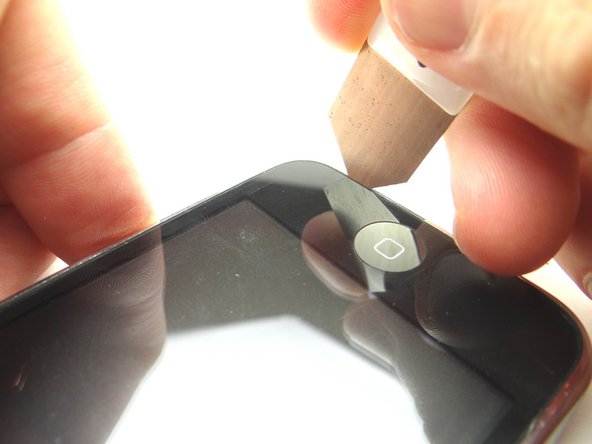
  2. Picture 1: Place the suction cup on the screen just above the home button. Picture 2: Pull the Front Panel up just enough to wedge the Blue Pry Tool in between the front panel and rear case. Picture 3: Pry up just enough to grab the screen with your fingers.  Remove the suction cup.
    • Picture 1: Place the suction cup on the screen just above the home button.

    • Picture 2: Pull the Front Panel up just enough to wedge the Blue Pry Tool in between the front panel and rear case.

    • Picture 3: Pry up just enough to grab the screen with your fingers. Remove the suction cup.

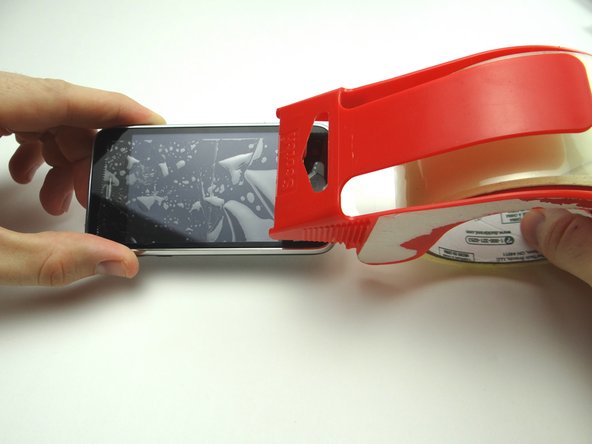
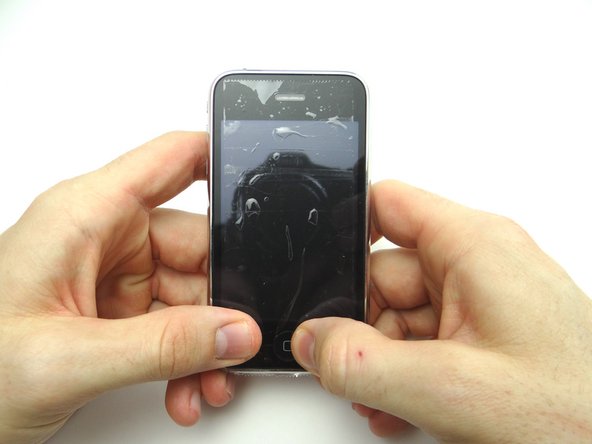
  3. Picture 1: If you're replacing a cracked display, put a strip of packing tape across the screen. Picture 2: Seal the tape over the home button to ensure it comes up with the screen. Picture 3: Pry up just enough to grab the screen with your fingers. Remove the suction cup.
    • Picture 1: If you're replacing a cracked display, put a strip of packing tape across the screen.

    • Picture 2: Seal the tape over the home button to ensure it comes up with the screen.

    • Picture 3: Pry up just enough to grab the screen with your fingers. Remove the suction cup.

    • If the screen still won't open, there's still another option for opening it in the next step.

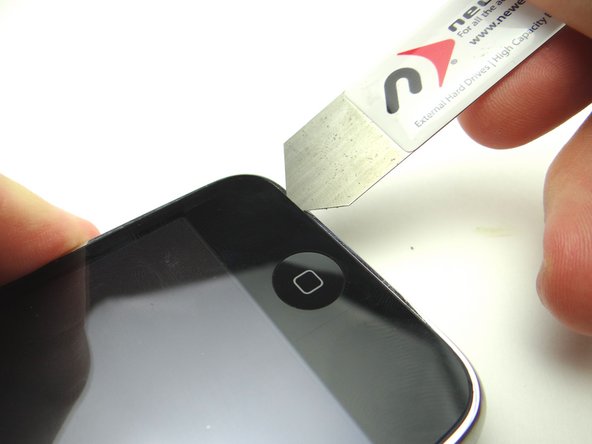
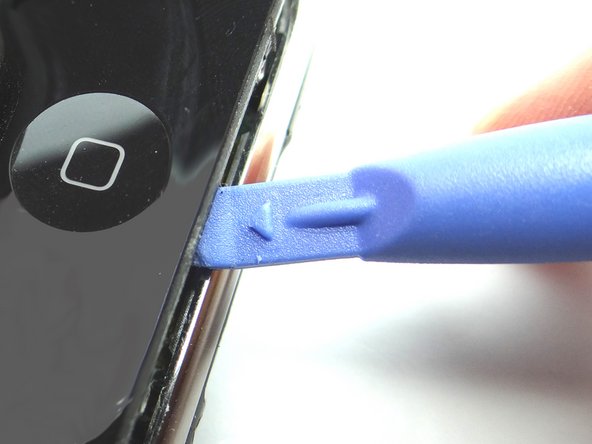
  4. If you're still unable to open the iPhone, use an iSesamo tool as a last resort: Picture 1: Wedge the iSesamo along the bottom edge of the iPhone near the corner. Picture 2: Pry up just enough to insert the blue pry tool.
    • If you're still unable to open the iPhone, use an iSesamo tool as a last resort:

    • Picture 1: Wedge the iSesamo along the bottom edge of the iPhone near the corner.

    • Picture 2: Pry up just enough to insert the blue pry tool.

    • Picture 3: Use the blue pry tool to continue prying up the screen.

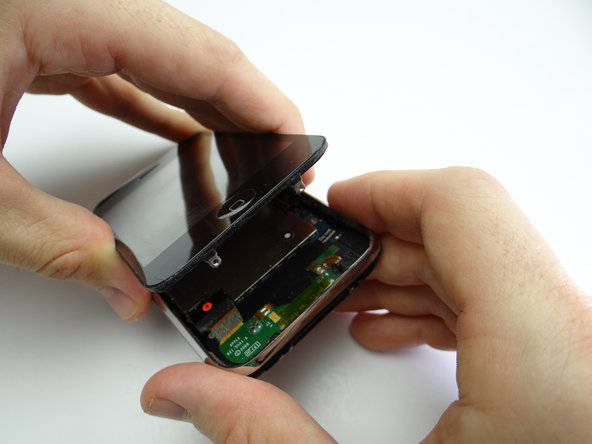
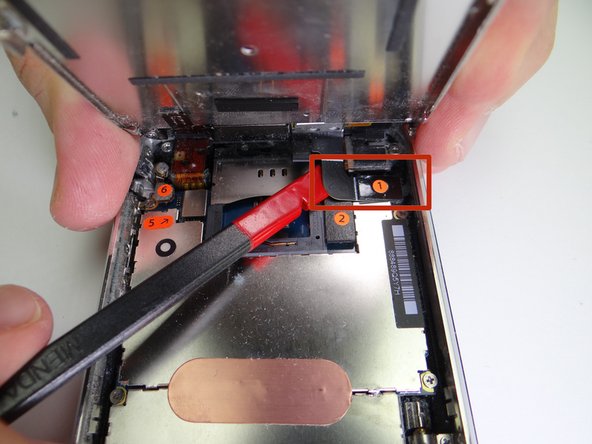
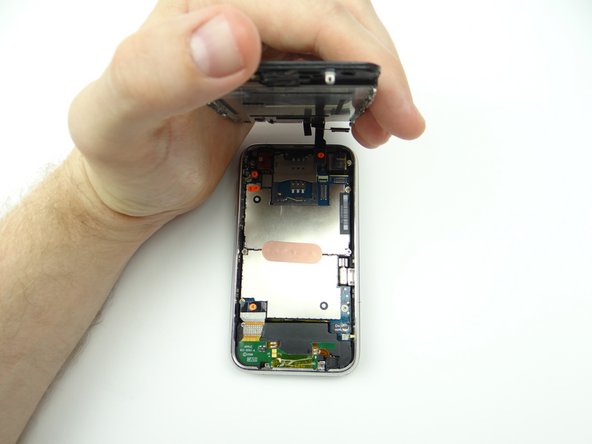
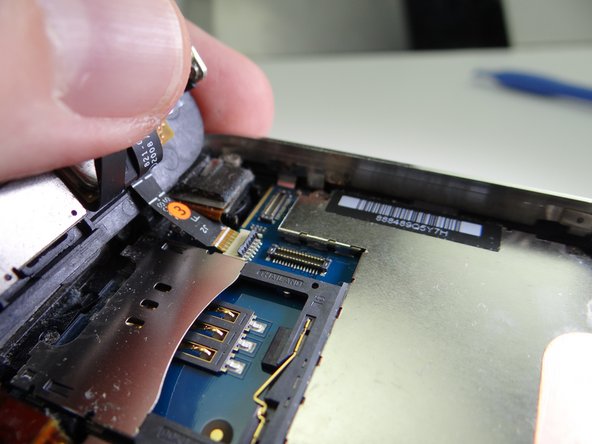
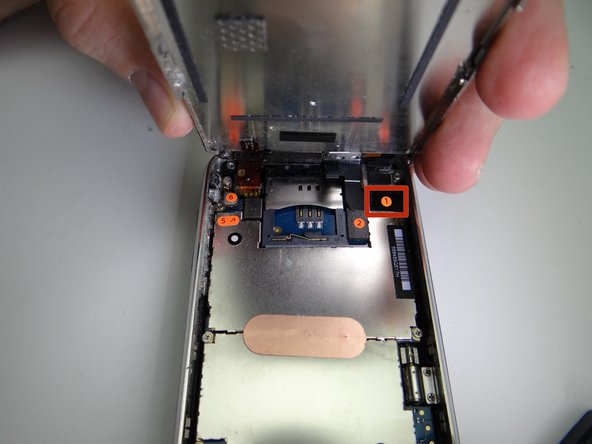
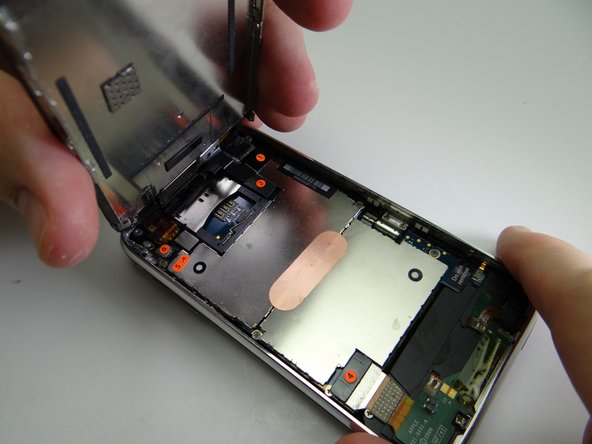
  5. Pictures 1 & 2: Carefully continue pulling up the front panel until it reaches a 45° angle. Picture 3: While holding the front panel at a 45° angle, wedge spudger under cable '1' and rotate counter-clockwise until cable head is free. Picture 3: While holding the front panel at a 45° angle, wedge spudger under cable '1' and rotate counter-clockwise until cable head is free.
    • Pictures 1 & 2: Carefully continue pulling up the front panel until it reaches a 45° angle.

    • Picture 3: While holding the front panel at a 45° angle, wedge spudger under cable '1' and rotate counter-clockwise until cable head is free.

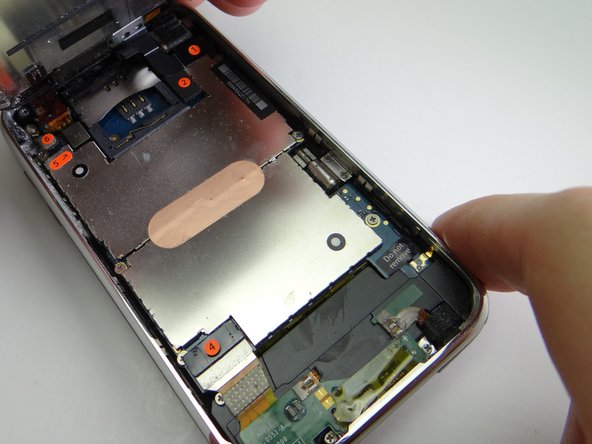
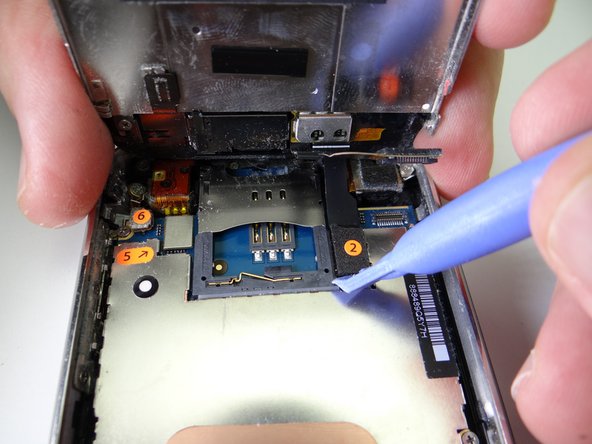
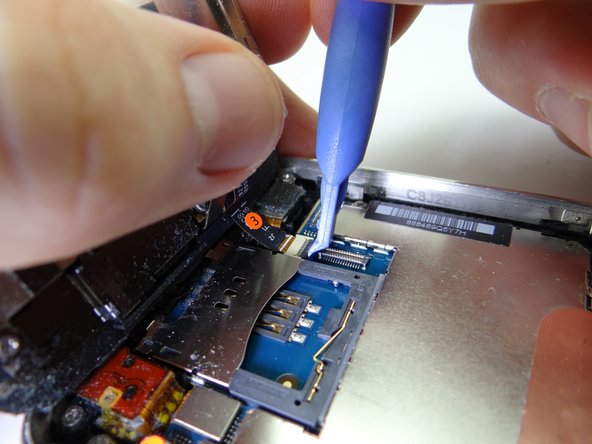
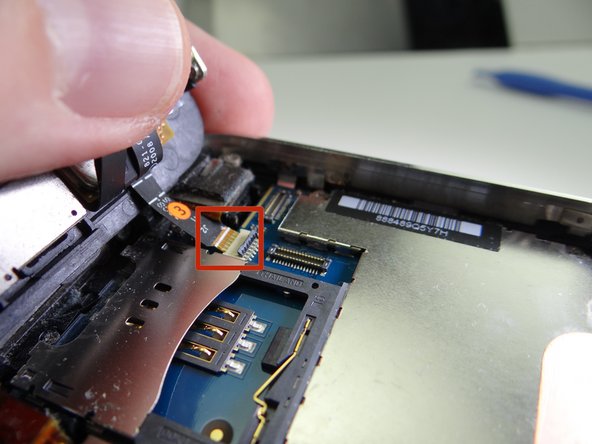
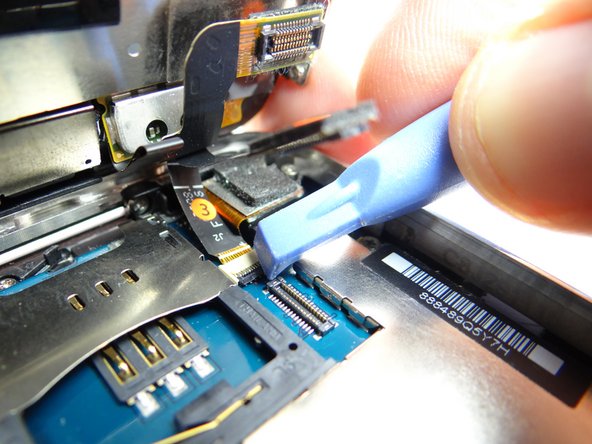
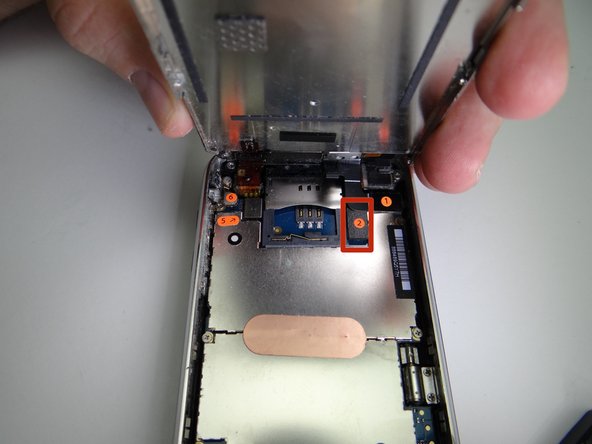
  6. Picture 1: Use blue pry tool to lift cable 2 from its socket.  You can now open the phone to a 90* angle. Pictures 2 & 3: Use the blue pry tool to flip the ZIF connector into the upright 'open' position to release the ribbon cable marked '3'. Use your thumb to gently guide the ribbon cable out of the ZIF connector.
    • Picture 1: Use blue pry tool to lift cable 2 from its socket. You can now open the phone to a 90* angle.

    • Pictures 2 & 3: Use the blue pry tool to flip the ZIF connector into the upright 'open' position to release the ribbon cable marked '3'.

    • Use your thumb to gently guide the ribbon cable out of the ZIF connector.

    • Cable '3' should come out with very little pressure. Double-check the ZIF connector latch if you feel tension.

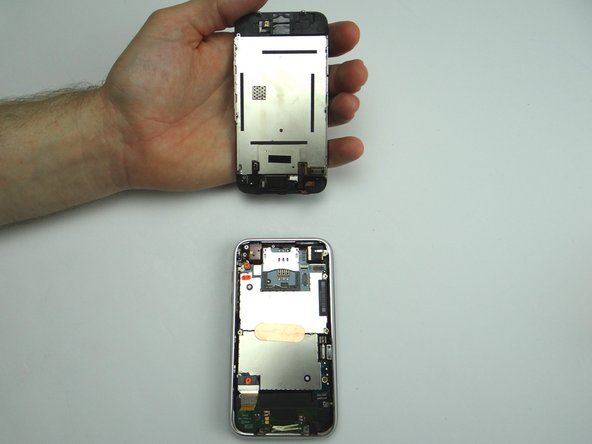
  7. Separate the front panel from the rear case.
    • Separate the front panel from the rear case.

    • Place front and rear panels in ZONES I & II.

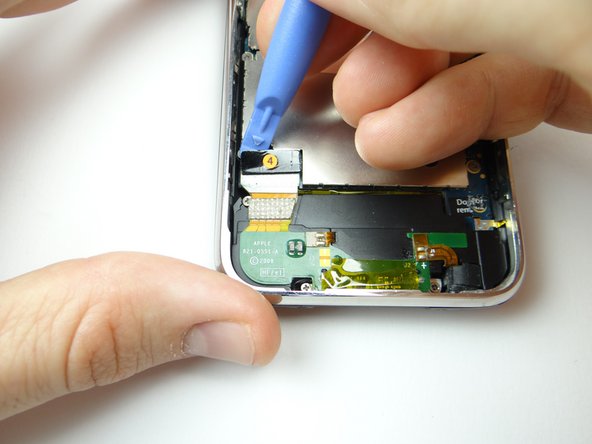
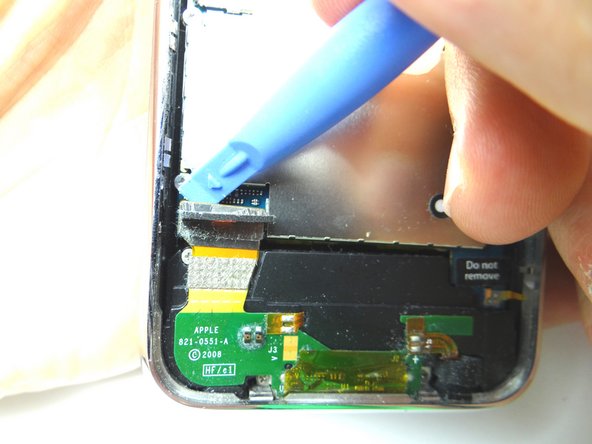
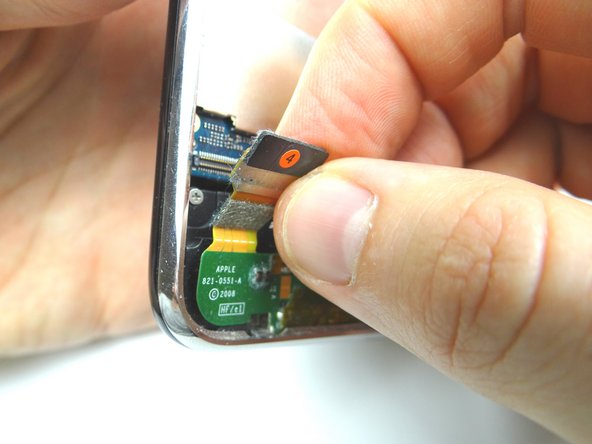
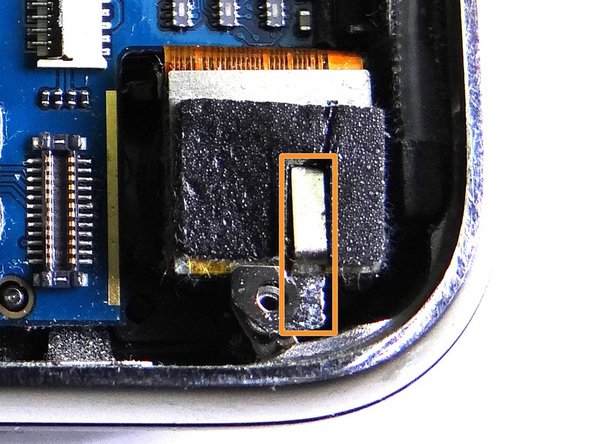
  8. Picture 1: Use the blue pry tool to pull up foam piece covering cable 4 connector. Picture 2: Pry up cable 4 connector with the blue pry tool. Picture 3: Squeeze foam back onto cable connector.
    • Picture 1: Use the blue pry tool to pull up foam piece covering cable 4 connector.

    • Picture 2: Pry up cable 4 connector with the blue pry tool.

    • Picture 3: Squeeze foam back onto cable connector.

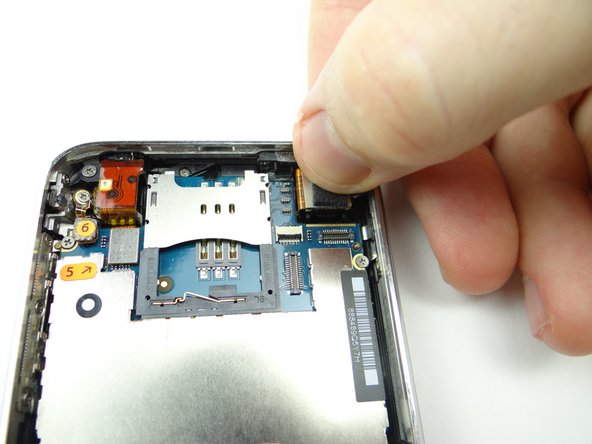
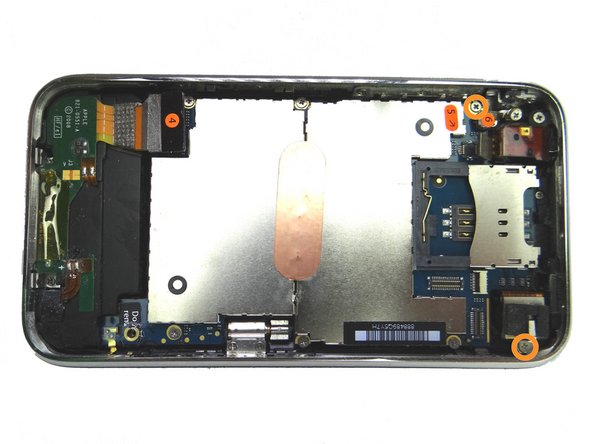
  9. Use blue pry tool to disconnect cables 5 & 6. Use blue pry tool to disconnect cables 5 & 6.
    • Use blue pry tool to disconnect cables 5 & 6.

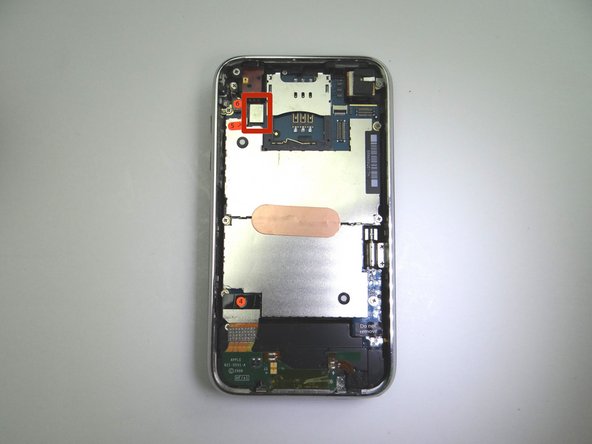
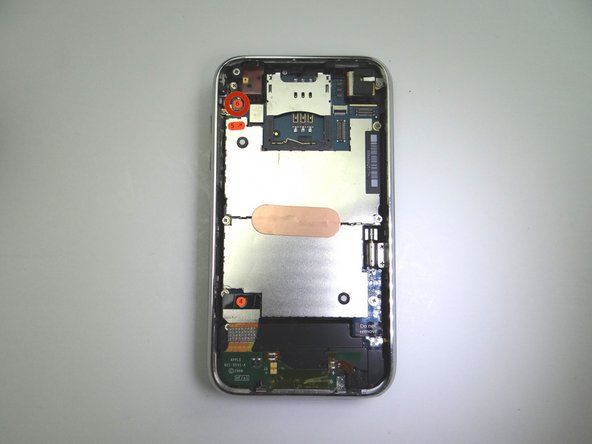
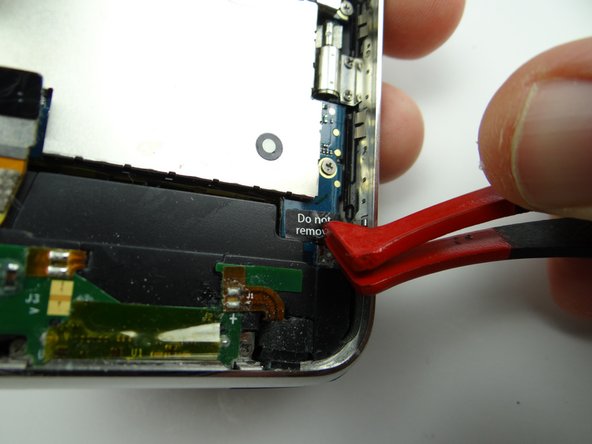
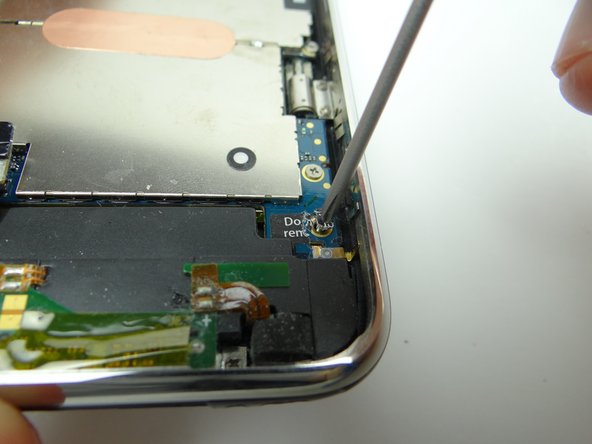
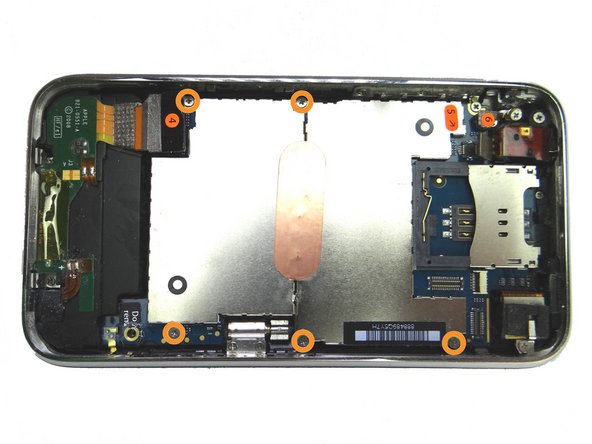
  10. Use plastic tweezers to peel up 'Do not remove' sticker. Remove 3 mm Phillips screw hidden by the sticker.  Place in SLOT 4.
    • Use plastic tweezers to peel up 'Do not remove' sticker.

    • Remove 3 mm Phillips screw hidden by the sticker. Place in SLOT 4.

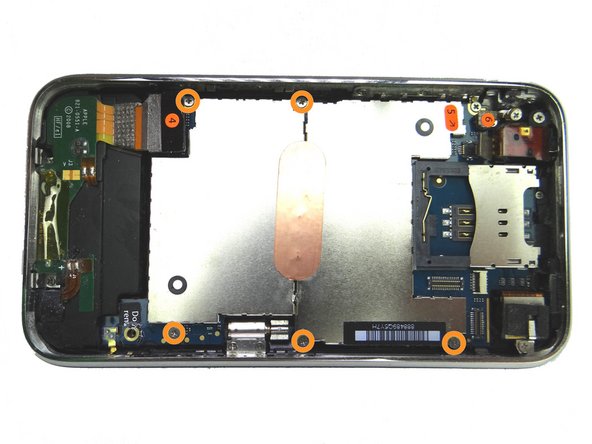
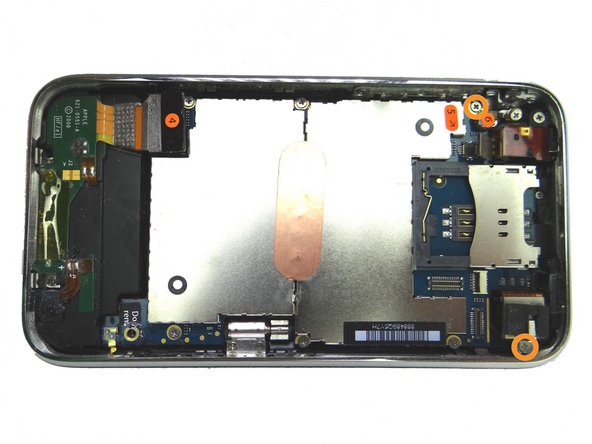
  11. Picture 1: Remove two 2.3 mm Phillips screws.  Place in SLOT 5. Picture 2: The camera screw holds down a metal bracket.  Remove the bracket and place in SLOT 5. Picture 3: Remove five 2.3 mm Phillips screws.  Place in SLOT 6.
    • Picture 1: Remove two 2.3 mm Phillips screws. Place in SLOT 5.

    • Picture 2: The camera screw holds down a metal bracket. Remove the bracket and place in SLOT 5.

    • Picture 3: Remove five 2.3 mm Phillips screws. Place in SLOT 6.

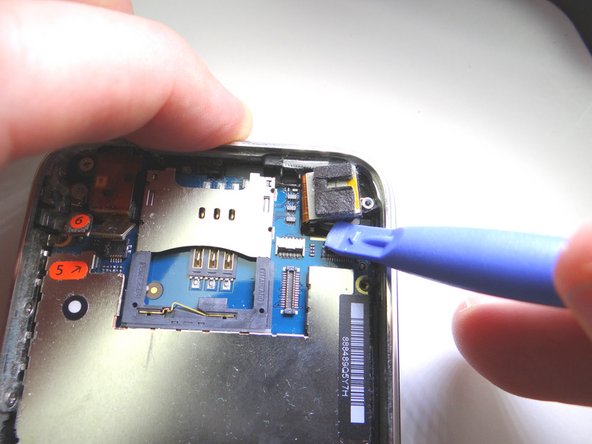
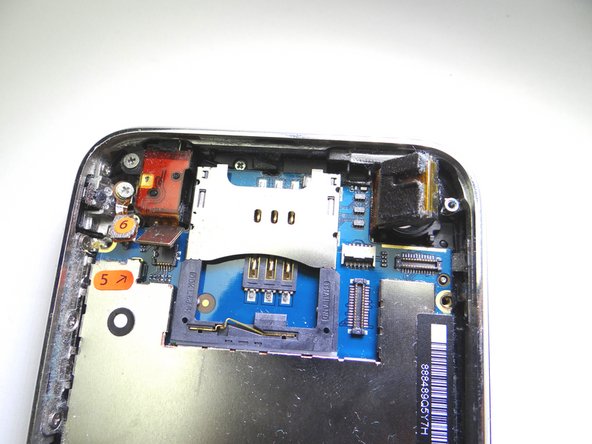
  12. Pictures 1 & 2: Use blue pry tool to lift the camera slightly out of its socket, as shown in Picture 2. DO NOT TRY TO REMOVE THE CAMERA.  It's still attached to the underside of the logic board.
    • Pictures 1 & 2: Use blue pry tool to lift the camera slightly out of its socket, as shown in Picture 2.

    • DO NOT TRY TO REMOVE THE CAMERA. It's still attached to the underside of the logic board.

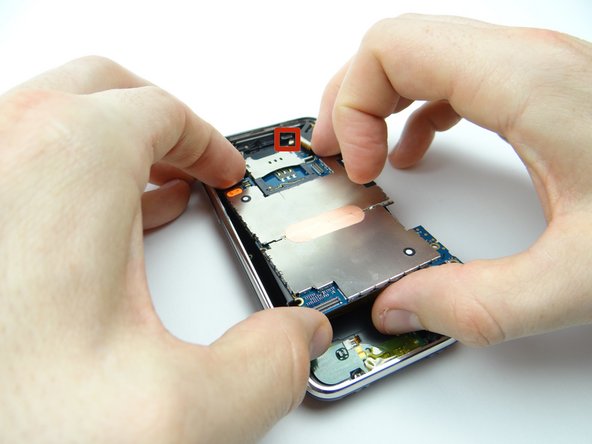
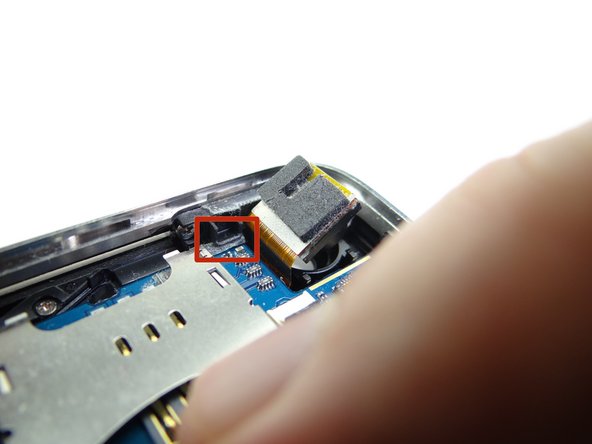
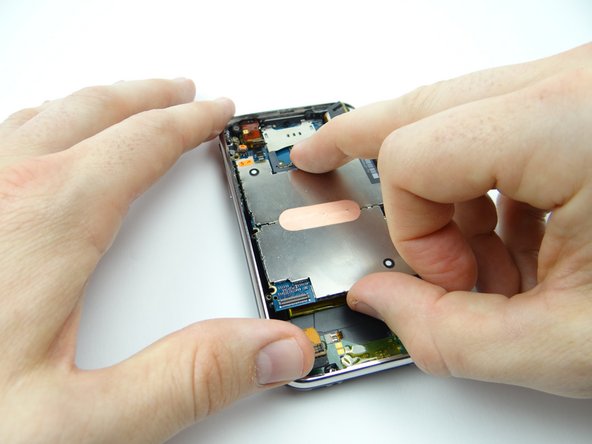
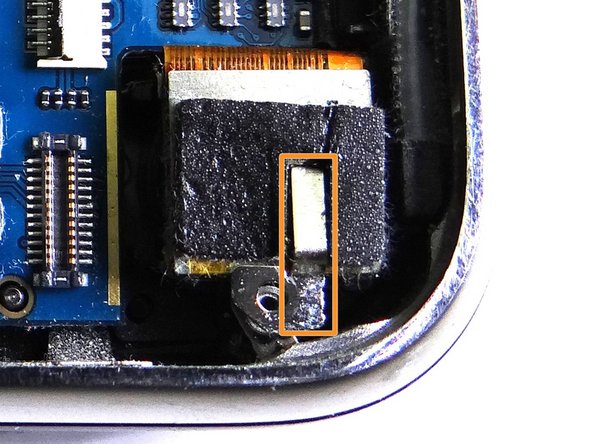
  13. Picture 1: Use blue pry tool to lift the logic board up from the rear case just enough to grab it with your fingers. Picture 2: Make sure you clear the ledge (red square) as you gently guide the logic board towards the bottom of the phone to remove it. Place logic board in ZONE III.
    • Picture 1: Use blue pry tool to lift the logic board up from the rear case just enough to grab it with your fingers.

    • Picture 2: Make sure you clear the ledge (red square) as you gently guide the logic board towards the bottom of the phone to remove it.

    • Place logic board in ZONE III.

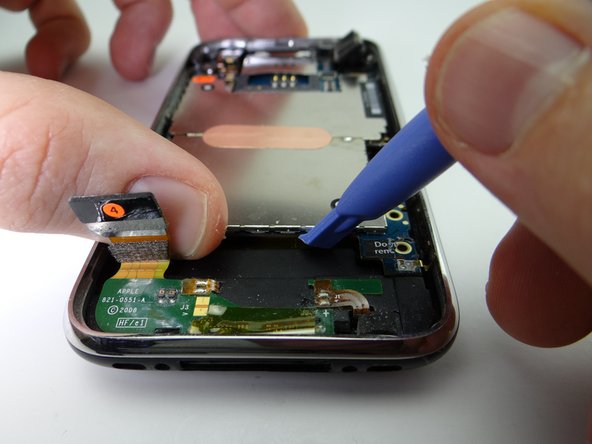
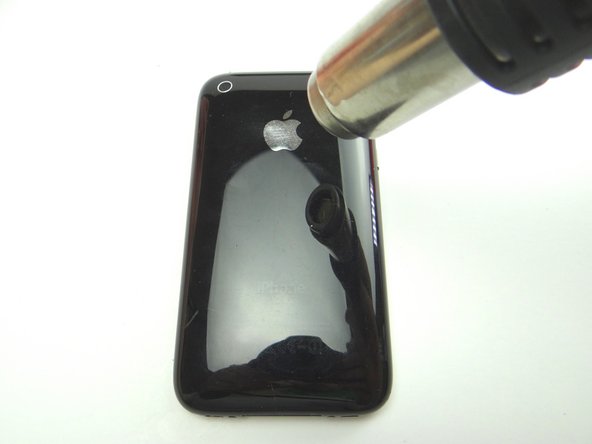
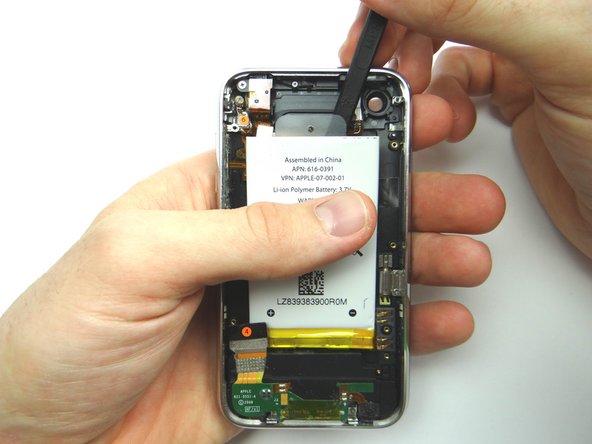
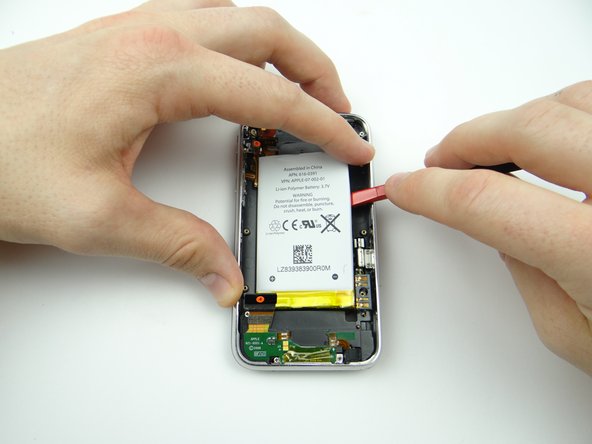
  14. Picture 1: Adhesive around the perimeter of the battery holds it to the rear case.  Apply low-level heat (100° Celsius) to the underside of the rear case for 30 seconds to loosen the adhesive. Picture 2: Use the spudger to push through the adhesive under the battery. Picture 3: Work your way around the upper-right corner.
    • Picture 1: Adhesive around the perimeter of the battery holds it to the rear case. Apply low-level heat (100° Celsius) to the underside of the rear case for 30 seconds to loosen the adhesive.

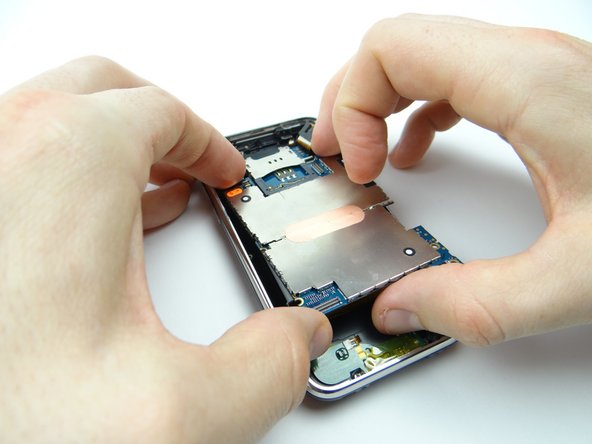
    • Picture 2: Use the spudger to push through the adhesive under the battery.

    • Picture 3: Work your way around the upper-right corner.

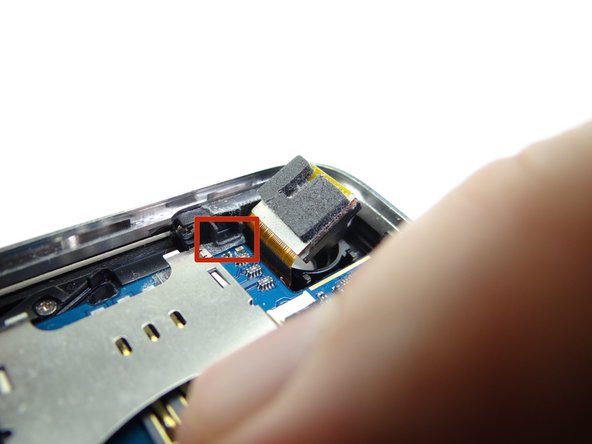
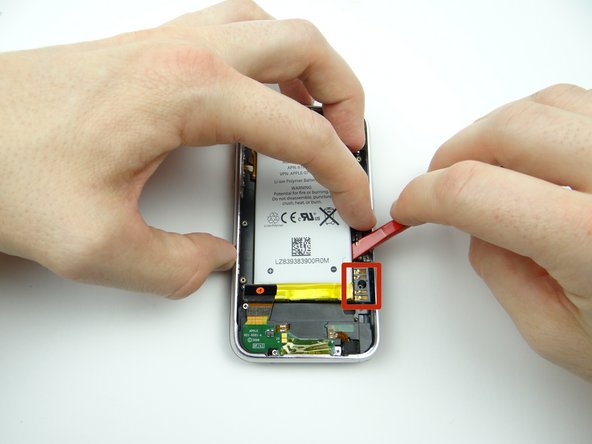
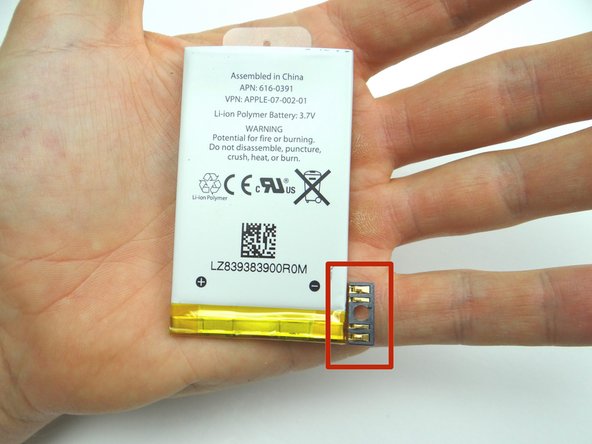
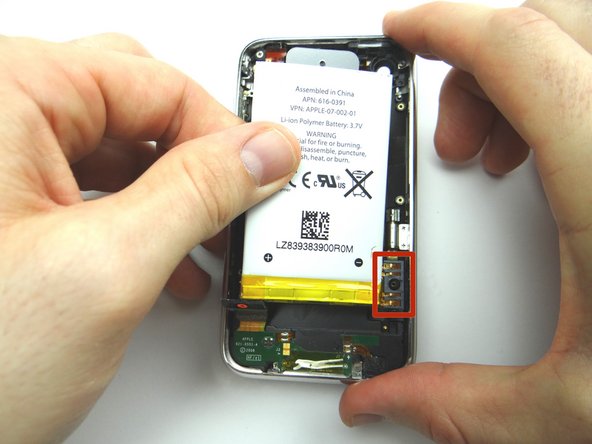
  15. Work your way down to the battery connector (red square). Work the battery up without warping the battery or damaging the connector.
    • Work your way down to the battery connector (red square).

    • Work the battery up without warping the battery or damaging the connector.

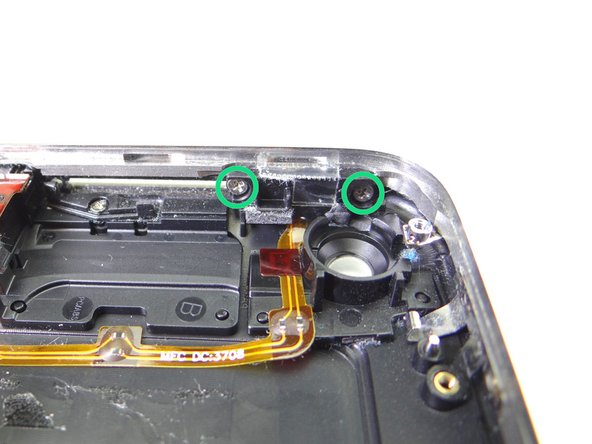
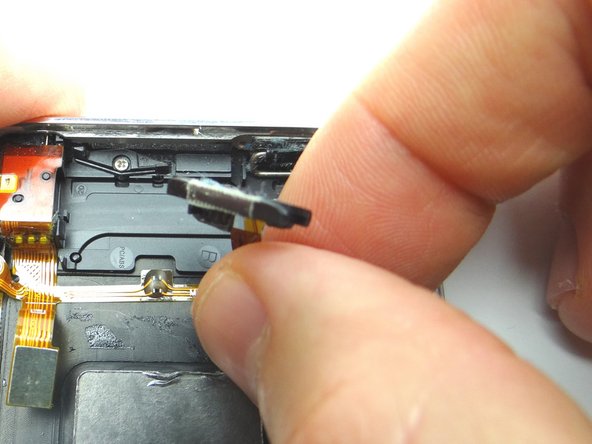
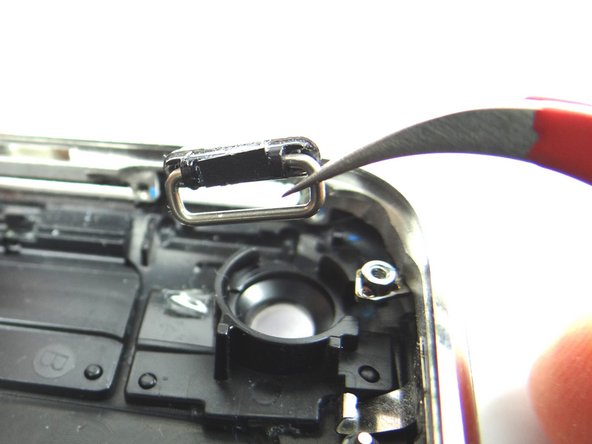
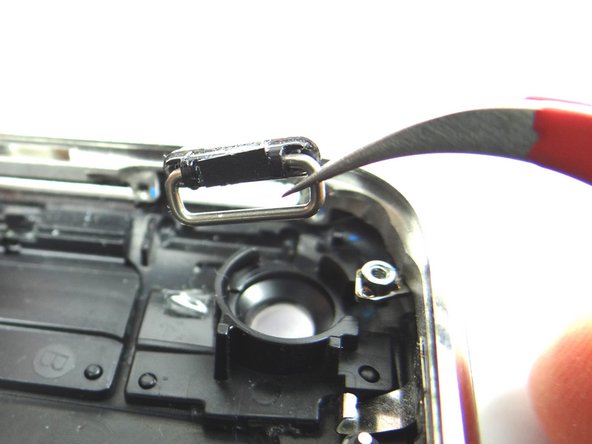
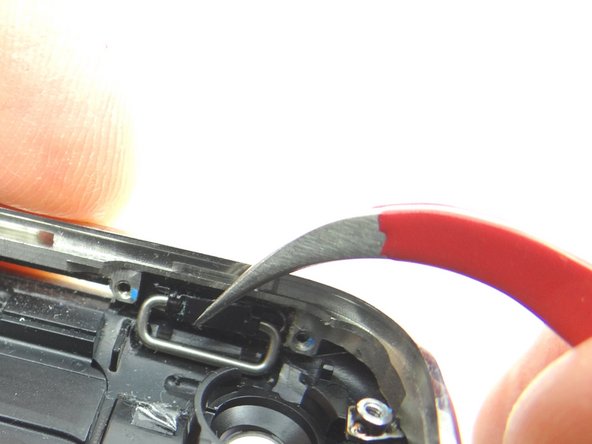
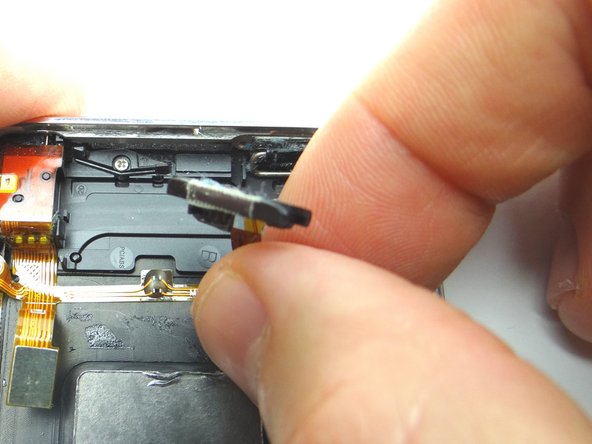
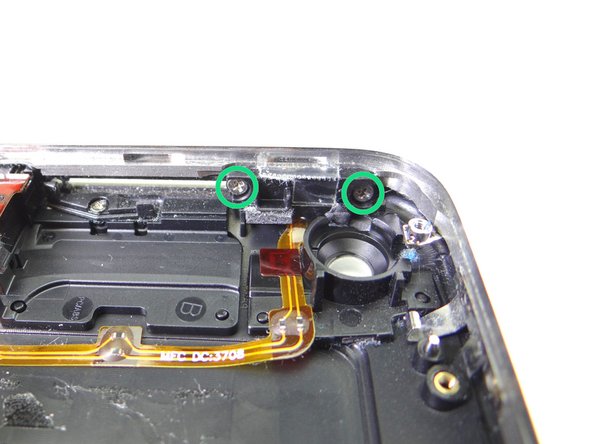
  16. Picture 1: Remove two 1.9 mm Phillips screws.  Place in COMPARTMENT C. Picture 2: Peel power button cable away just enough to access the power button. Picture 3: Remove power button with curved tip tweezers.  Place with screws in COMPARTMENT C.
    • Picture 1: Remove two 1.9 mm Phillips screws. Place in COMPARTMENT C.

    • Picture 2: Peel power button cable away just enough to access the power button.

    • Picture 3: Remove power button with curved tip tweezers. Place with screws in COMPARTMENT C.

  17. From COMPARTMENT C, use curved-tip tweezers to place the power button. Push the power button into place.  The pictures show the correct orientation.
    • From COMPARTMENT C, use curved-tip tweezers to place the power button.

    • Push the power button into place. The pictures show the correct orientation.

  18. Seat the power button cable and bracket. FROM COMPARTMENT C, replace two 1.9 mm Phillips screws.
    • Seat the power button cable and bracket.

    • FROM COMPARTMENT C, replace two 1.9 mm Phillips screws.

    • The power button should have some play without feeling loose or tight: After tightening the screws, press the power button a few times. Loosen or tighten the screws a quarter turn as needed.

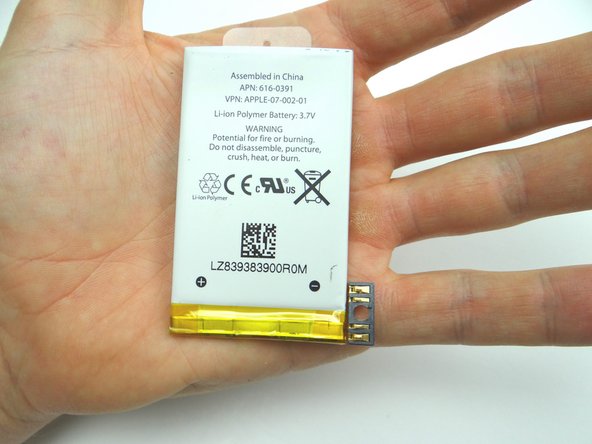
  19. Place the battery in the rear case: seat the contact pad first, then continue seating the battery. Place the battery in the rear case: seat the contact pad first, then continue seating the battery.
    • Place the battery in the rear case: seat the contact pad first, then continue seating the battery.

  20. Pictures 1 & 2: From ZONE III, seat top of logic board first.  Make sure the logic board is situated below the ledge shown in the red square. Picture 3: Hold the charging port cable out of the way while seating the bottom of the logic board. Picture 3: Hold the charging port cable out of the way while seating the bottom of the logic board.
    • Pictures 1 & 2: From ZONE III, seat top of logic board first. Make sure the logic board is situated below the ledge shown in the red square.

    • Picture 3: Hold the charging port cable out of the way while seating the bottom of the logic board.

  21. Seat the camera.
    • Seat the camera.

  22. Picture 1: From SLOT 6, replace five 2.3 mm screws. Picture 2: From SLOT 5, seat metal camera bracket. Picture 3: From SLOT 5, replace two 2.3 mm screws.
    • Picture 1: From SLOT 6, replace five 2.3 mm screws.

    • Picture 2: From SLOT 5, seat metal camera bracket.

    • Picture 3: From SLOT 5, replace two 2.3 mm screws.

  23. Picture 1: From SLOT 4, replace the 3 mm 'Do not remove' screw. Picture 2: Use your finger to seat cable #6. Picture 3: Use your finger to seat cable #5.
    • Picture 1: From SLOT 4, replace the 3 mm 'Do not remove' screw.

    • Picture 2: Use your finger to seat cable #6.

    • Picture 3: Use your finger to seat cable #5.

  24. Use your finger to seat cable #4.
    • Use your finger to seat cable #4.

  25. Picture 1: Reattach front panel to rear case: Picture 2: Guide cable '3' into the ZIF connector. Picture 3: Use the blue pry tool to sweep down black swing bar to close ZIF connector.
    • Picture 1: Reattach front panel to rear case:

    • Picture 2: Guide cable '3' into the ZIF connector.

    • Picture 3: Use the blue pry tool to sweep down black swing bar to close ZIF connector.

  26. Use your finger to reconnect cable '2' then cable '1'. Use your finger to reconnect cable '2' then cable '1'.
    • Use your finger to reconnect cable '2' then cable '1'.

  27. Picture 1: Fold the front panel into the rear case. Picture 2: From SLOT 1, replace two Phillips #00 screws. Picture 3: Replace SIM card and tray from COMPARTMENT A.
    • Picture 1: Fold the front panel into the rear case.

    • Picture 2: From SLOT 1, replace two Phillips #00 screws.

    • Picture 3: Replace SIM card and tray from COMPARTMENT A.

  28. Power up and test the device.
    • Power up and test the device.

Finish Line
James Linder

Member since: 01/24/2013

71,591 Reputation

217 Guides authored

0 Comments

Add Comment

View Statistics:

Past 24 Hours: 0

Past 7 Days: 0

Past 30 Days: 0

All Time: 44

CELL PHONE SANDBOX