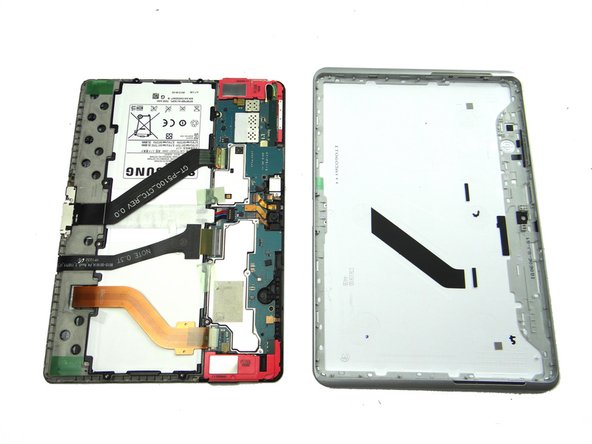
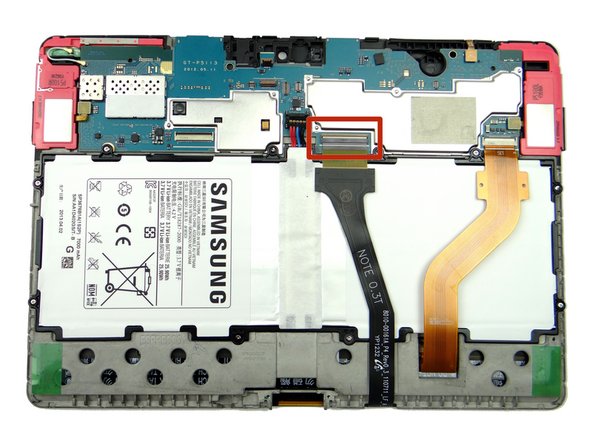
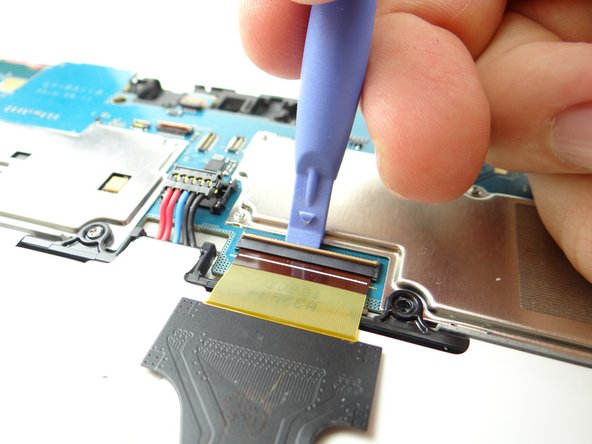
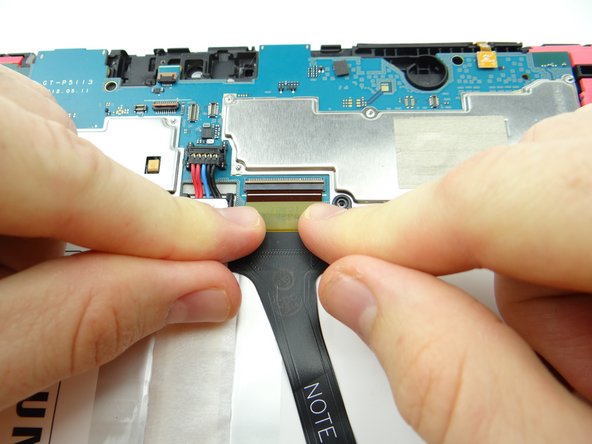
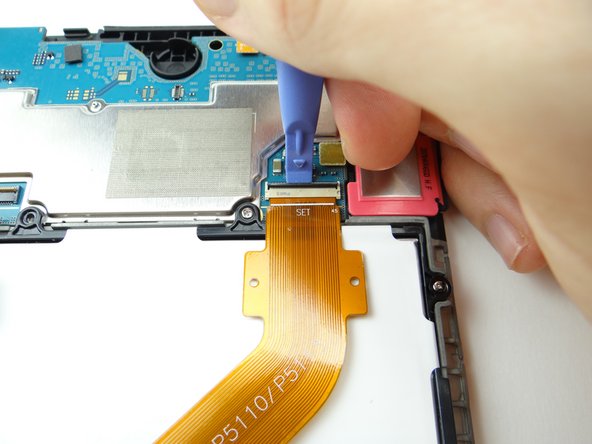
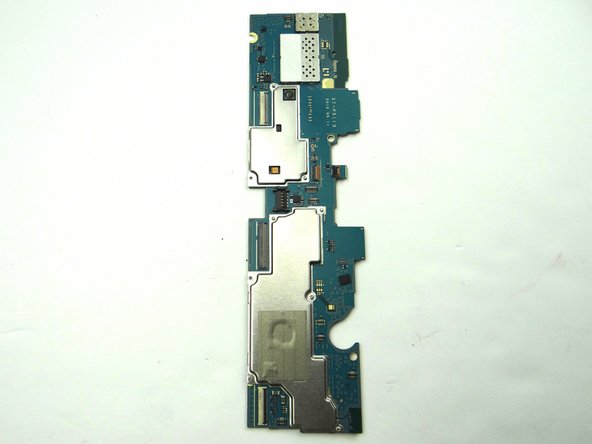
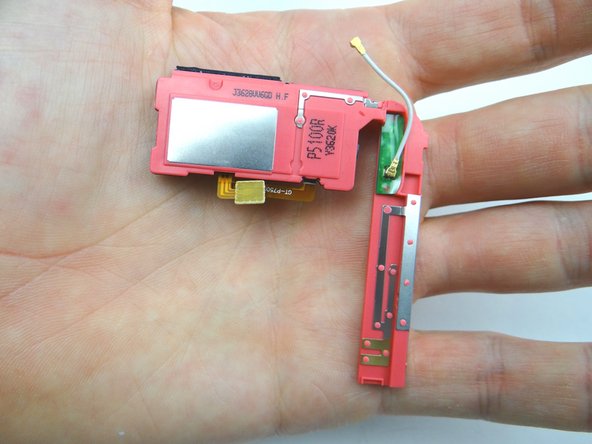
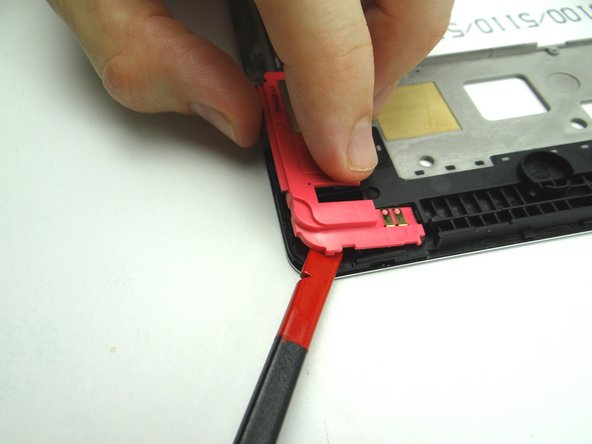
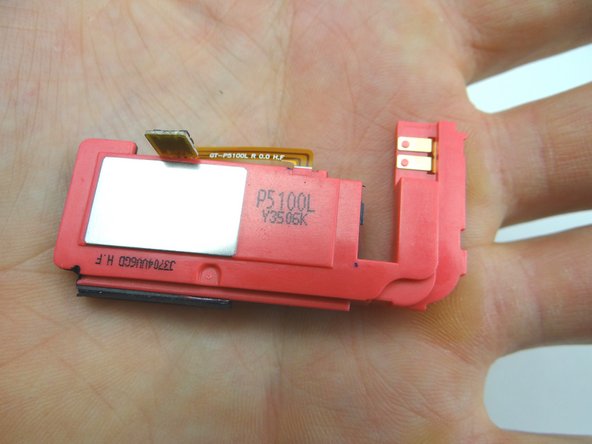
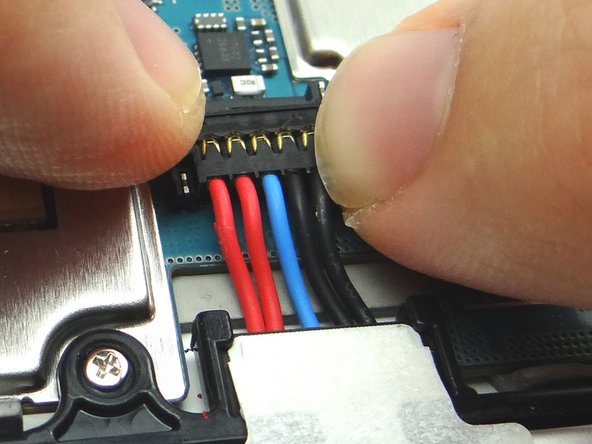
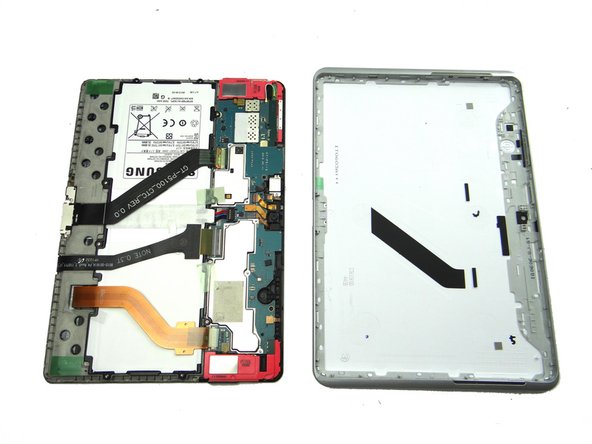
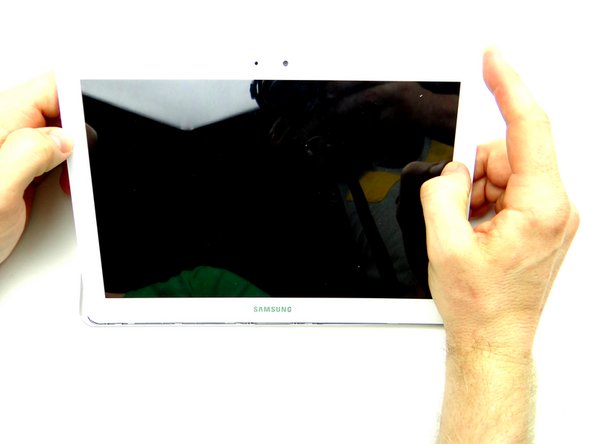
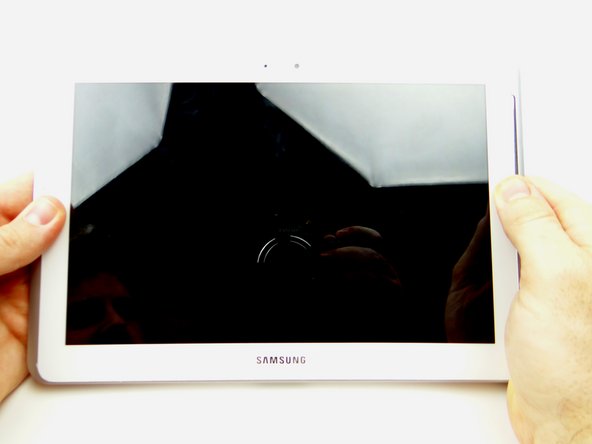
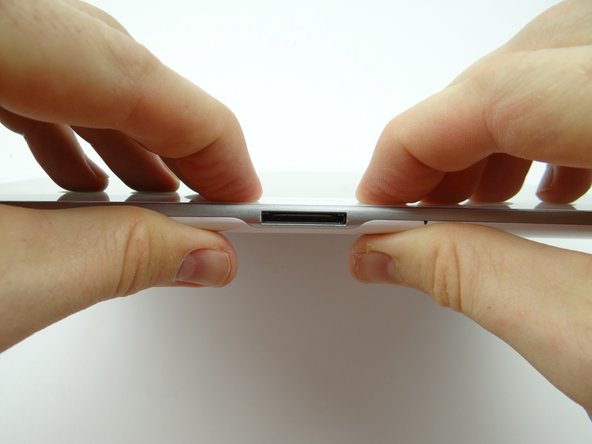
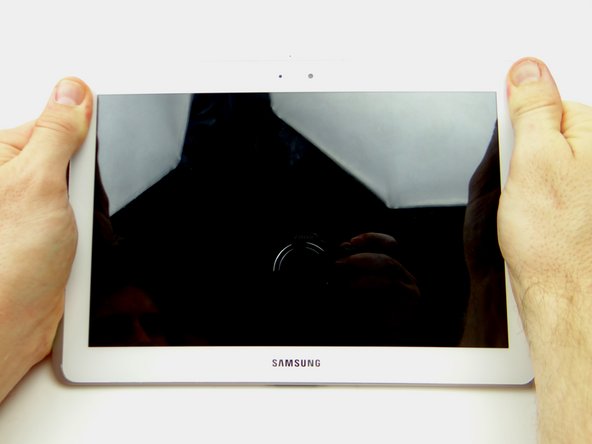
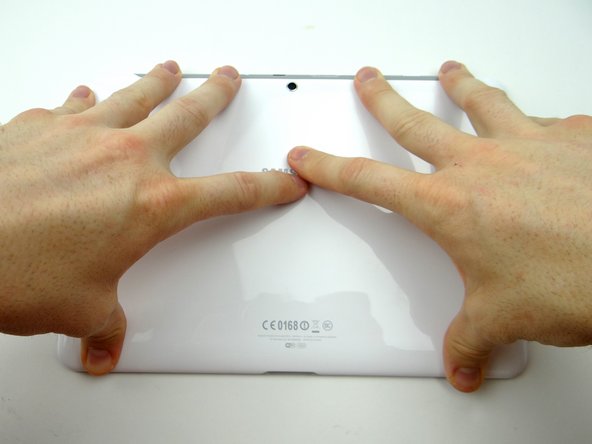
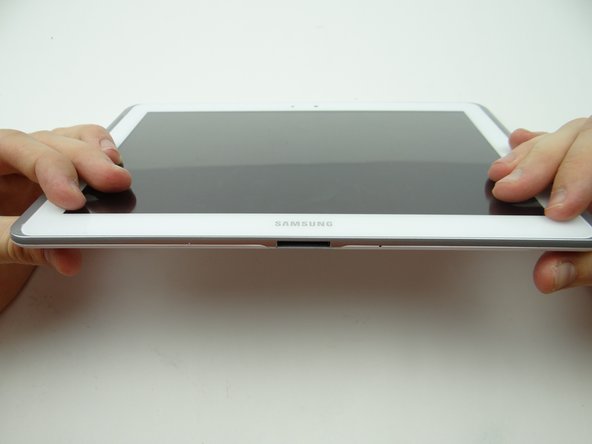
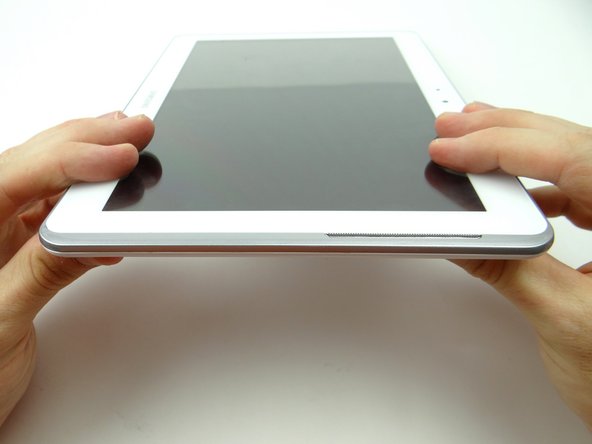
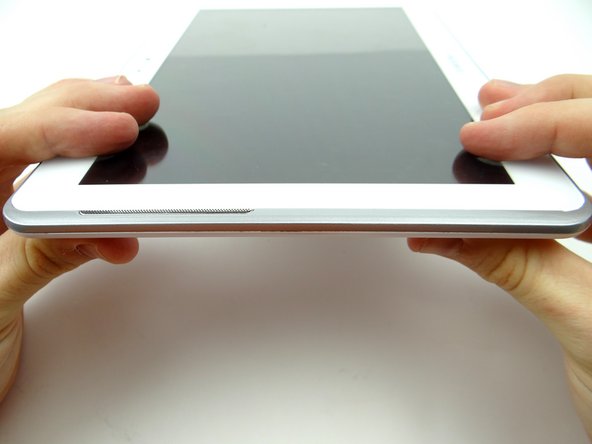
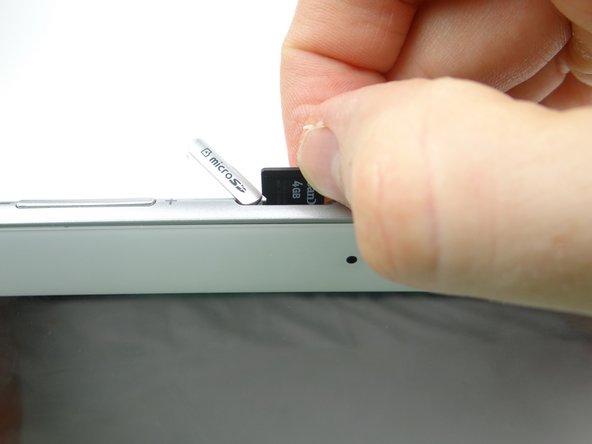
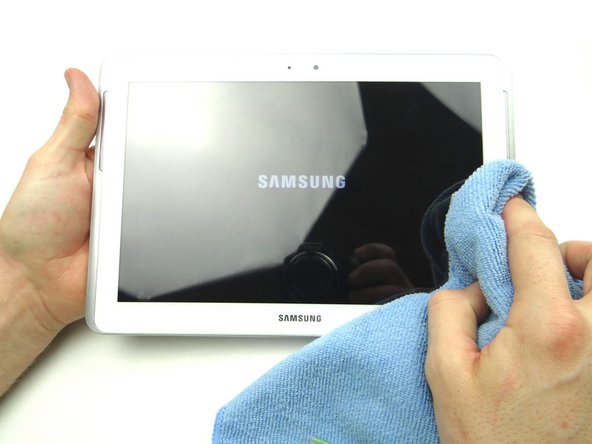
1. Power down the device. Remove SD card and place in COMPARTMENT A.
    • Power down the device.

    • Remove SD card and place in COMPARTMENT A.

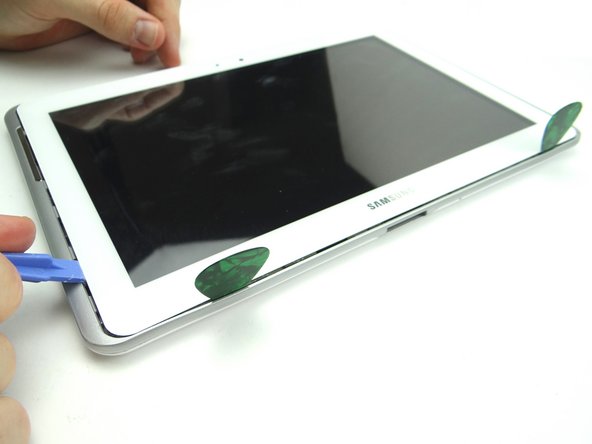
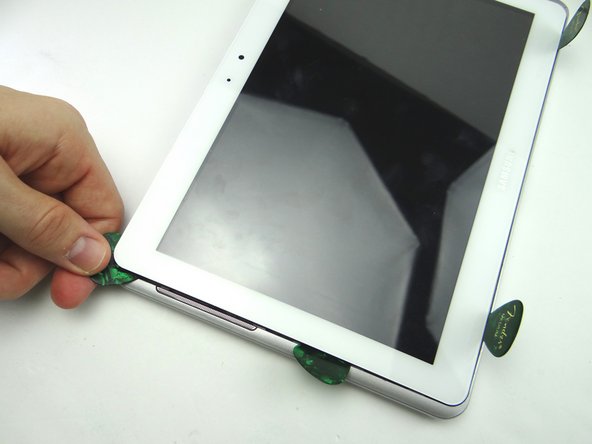
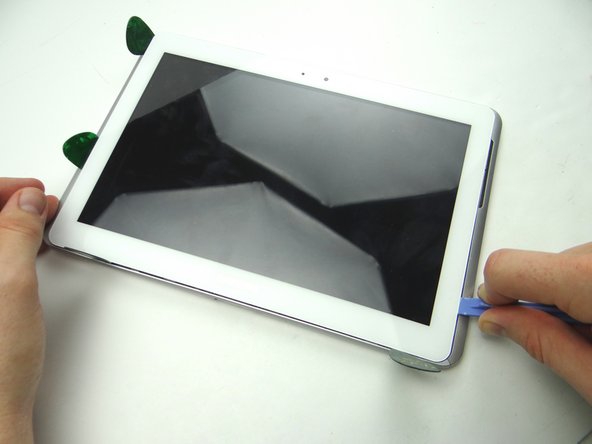
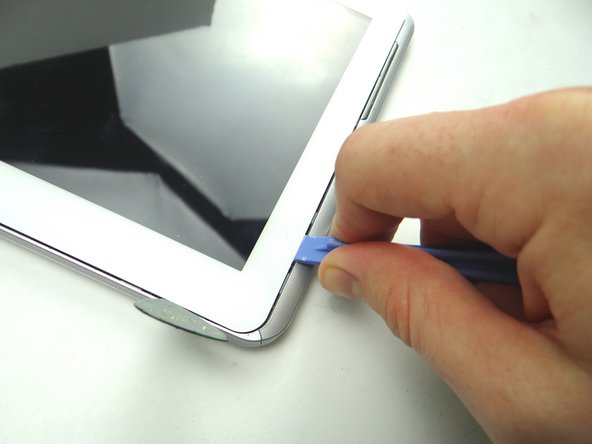
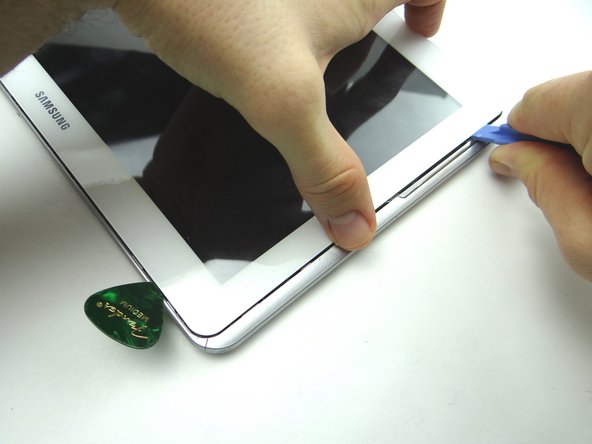
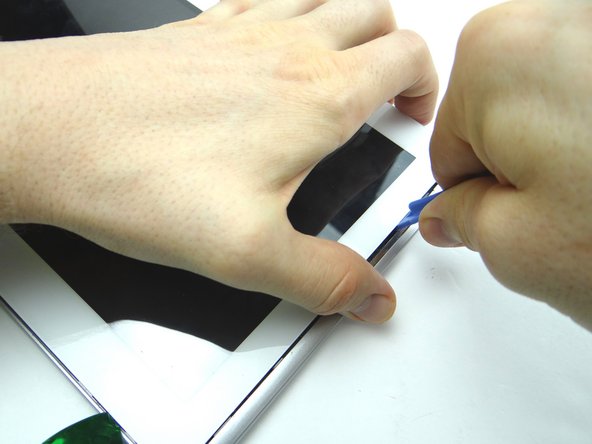
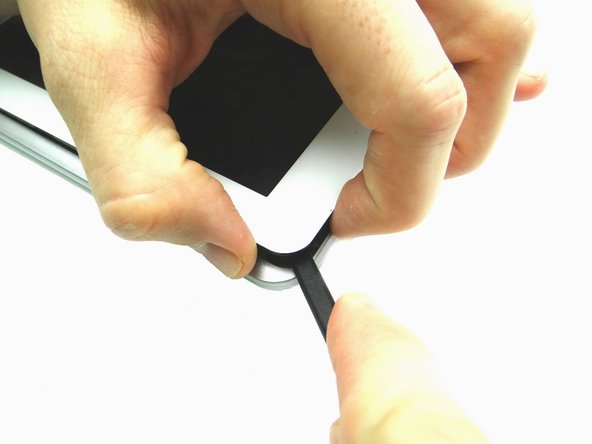
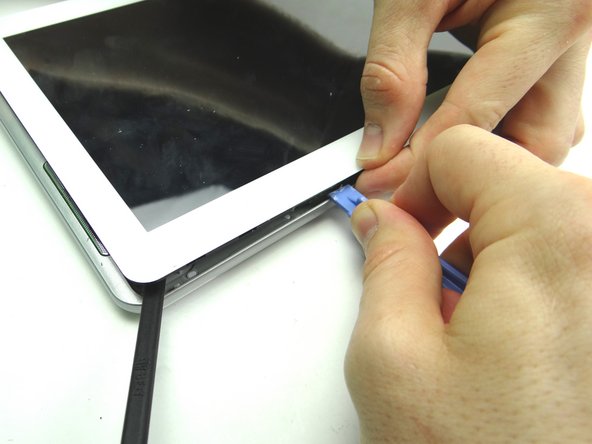
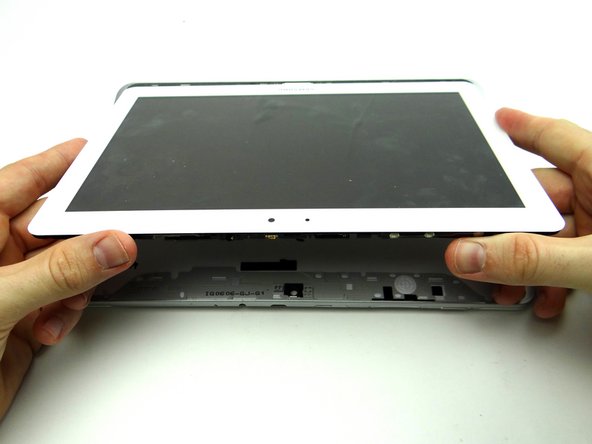
  2. Pictures 1 & 2: Insert a wide blue pry tool between the rear case and front panel at the bottom of the tablet, an inch left of the Samsung logo.  Sweep left, then insert a guitar pick to hold the left side open.  Work your way right with the blue pry tool. Picture 3: Insert a guitar pick to hold the right side open. Picture 3: Insert a guitar pick to hold the right side open.
    • Pictures 1 & 2: Insert a wide blue pry tool between the rear case and front panel at the bottom of the tablet, an inch left of the Samsung logo. Sweep left, then insert a guitar pick to hold the left side open. Work your way right with the blue pry tool.

    • Picture 3: Insert a guitar pick to hold the right side open.

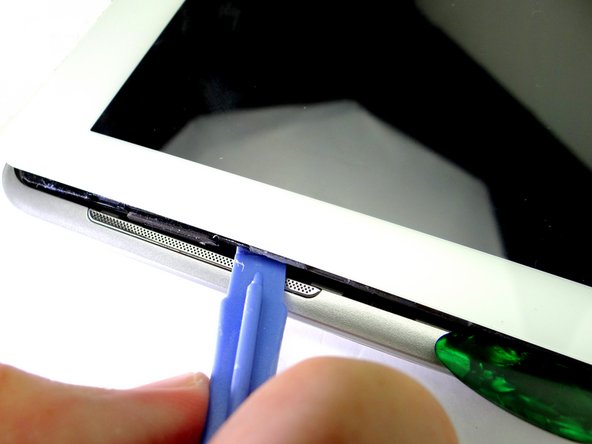
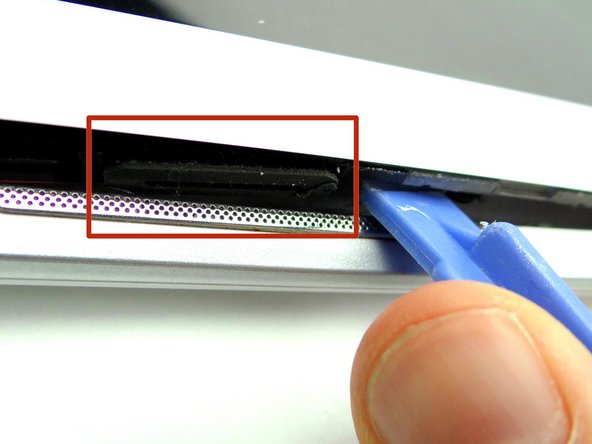
  3. Picture 1: Insert the blue pry tool in the lower-left corner. Picture 2: Work your way up to the speaker.  Insert a guitar pick an inch below the speaker. Picture 3: Continue prying up until you can see the rubber piece on the speaker (red square).
    • Picture 1: Insert the blue pry tool in the lower-left corner.

    • Picture 2: Work your way up to the speaker. Insert a guitar pick an inch below the speaker.

    • Picture 3: Continue prying up until you can see the rubber piece on the speaker (red square).

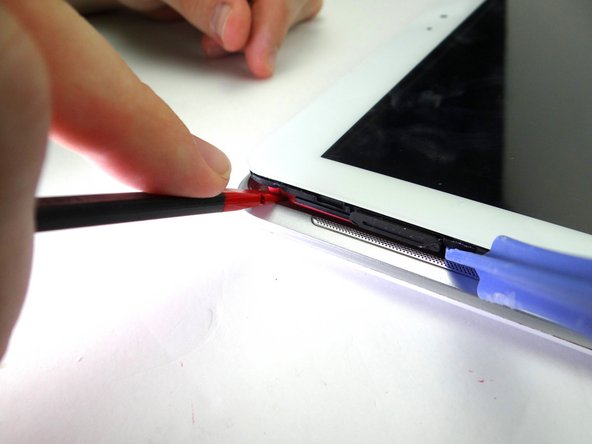
  4. Picture 1: Use spudger to pry up upper-left corner under the pink speaker. Picture 2: Put a guitar pick in place of the spudger to hold the upper-left corner open.
    • Picture 1: Use spudger to pry up upper-left corner under the pink speaker.

    • Picture 2: Put a guitar pick in place of the spudger to hold the upper-left corner open.

  5. Picture 1: Insert the blue pry tool in the lower-right corner. Picture 2:  Slowly work your way up with the blue pry tool, pivoting the front panel slightly up from the rear case. Picture 3: Create just enough space to hold the front panel just above the rear case with your fingers.
    • Picture 1: Insert the blue pry tool in the lower-right corner.

    • Picture 2: Slowly work your way up with the blue pry tool, pivoting the front panel slightly up from the rear case.

    • Picture 3: Create just enough space to hold the front panel just above the rear case with your fingers.

  6. Pictures 1 & 2: Continue lifting the upper-right corner until you can wedge the flat end of a spudger in the upper-right corner to hold it open. Picture 3: Sweep across the top with the blue pry tool, while gently pulling up the front panel with your fingers. Picture 3: Sweep across the top with the blue pry tool, while gently pulling up the front panel with your fingers.
    • Pictures 1 & 2: Continue lifting the upper-right corner until you can wedge the flat end of a spudger in the upper-right corner to hold it open.

    • Picture 3: Sweep across the top with the blue pry tool, while gently pulling up the front panel with your fingers.

  7. Remove the blue pry tools, then pivot the top edge of the front panel above the rear case. Once the top edge reaches a 45° angle, pull it away from the rear case.
    • Remove the blue pry tools, then pivot the top edge of the front panel above the rear case.

    • Once the top edge reaches a 45° angle, pull it away from the rear case.

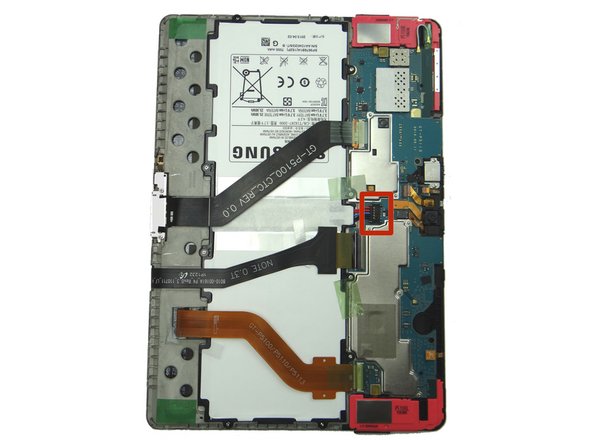
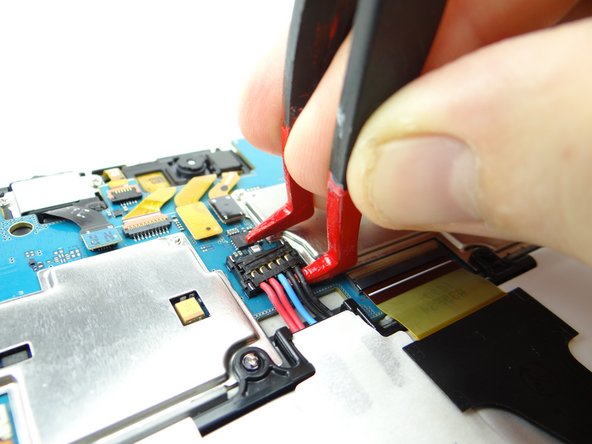
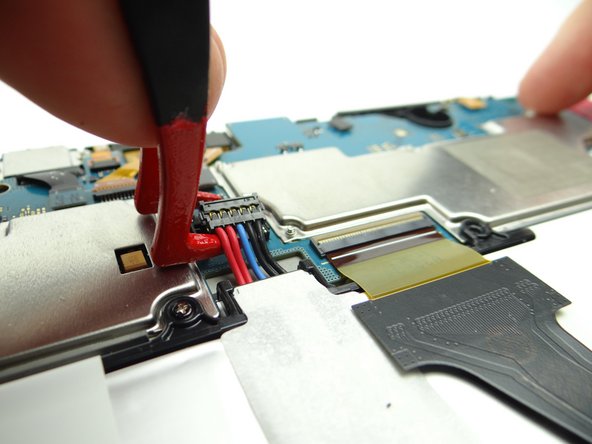
  8. Battery cable head is fragile: Use one prong of the plastic tweezers to wedge under the right side of the battery connector and pull it up slightly. Lift battery connector straight up from the left side to dislodge it.
    • Battery cable head is fragile:

    • Use one prong of the plastic tweezers to wedge under the right side of the battery connector and pull it up slightly.

    • Lift battery connector straight up from the left side to dislodge it.

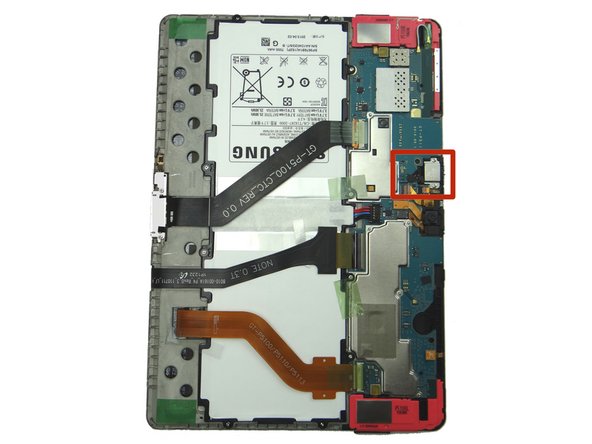
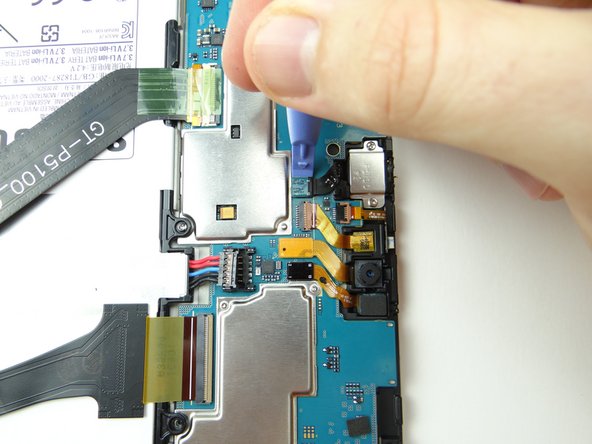
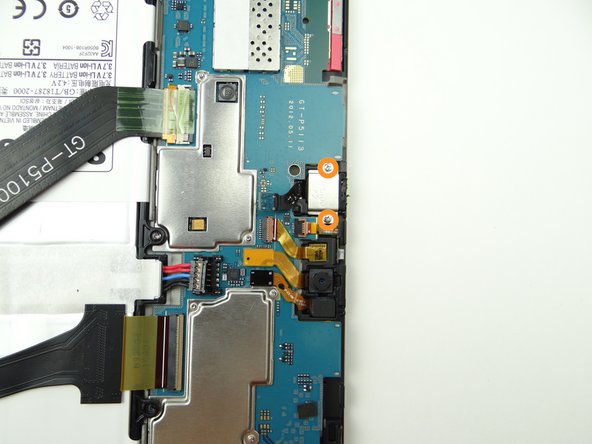
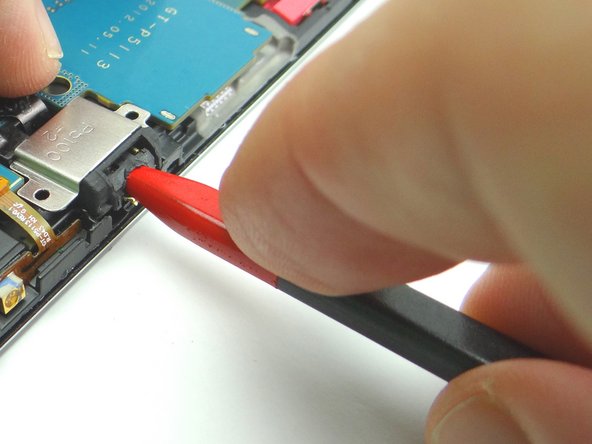
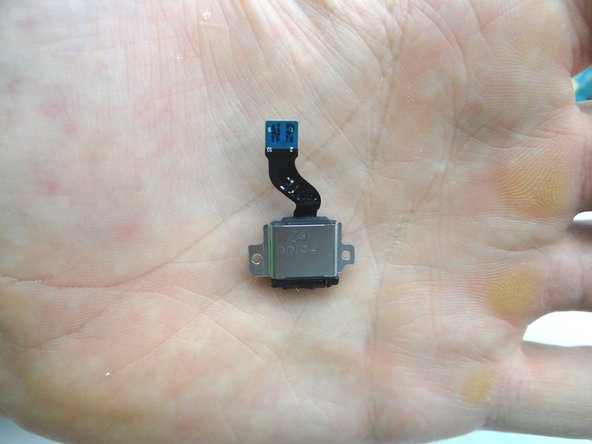
  9. Remove the headset jack: Use blue pry tool to disconnect headset jack cable. Remove two 3.0 mm #00 Phillips screws from the headset jack.  Place screws in SLOT 1.
    • Remove the headset jack:

    • Use blue pry tool to disconnect headset jack cable.

    • Remove two 3.0 mm #00 Phillips screws from the headset jack. Place screws in SLOT 1.

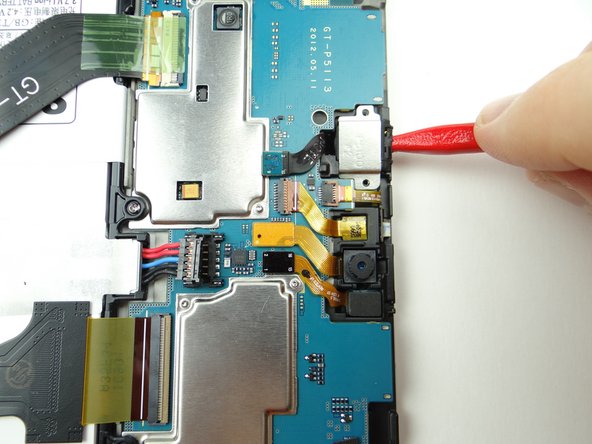
  10. Pictures 1 & 2: Use the pointed tip of the spudger to lift the headset jack out of its socket. Place in COMPARTMENT B. Place in COMPARTMENT B.
    • Pictures 1 & 2: Use the pointed tip of the spudger to lift the headset jack out of its socket.

    • Place in COMPARTMENT B.

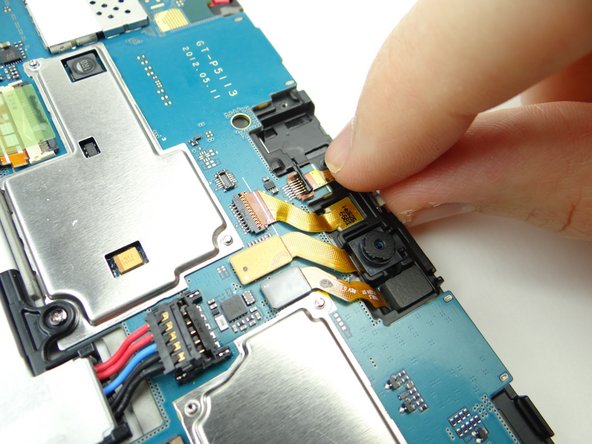
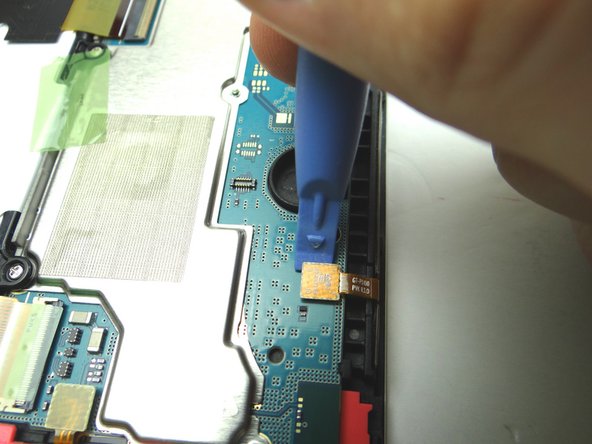
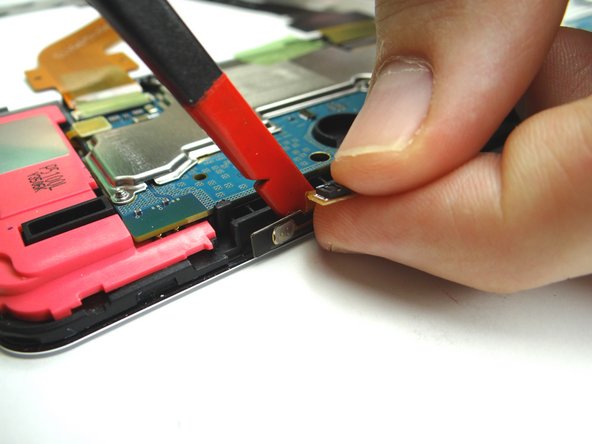
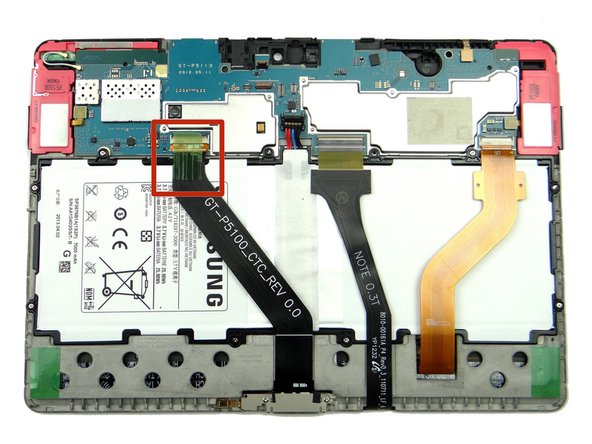
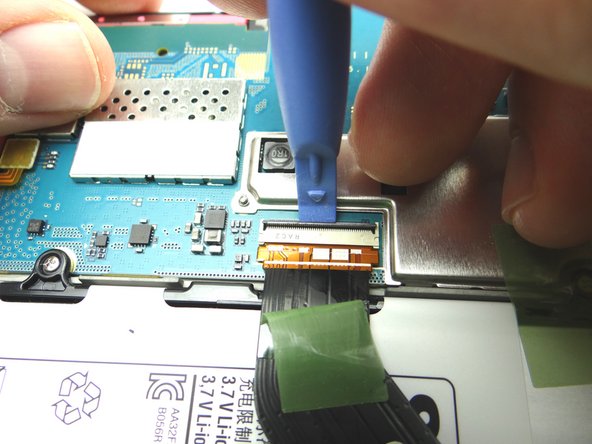
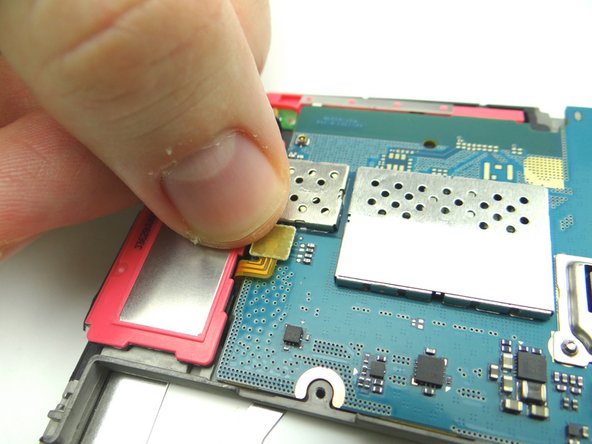
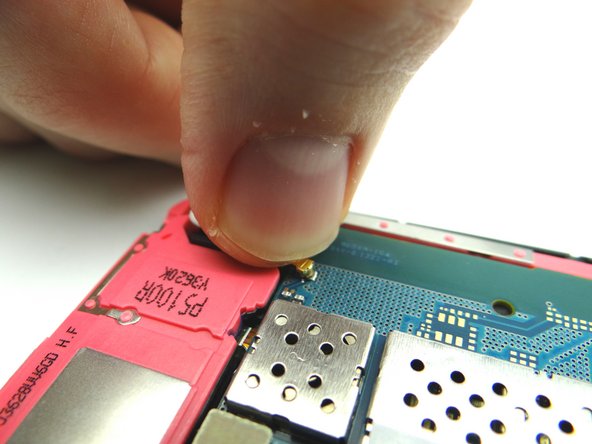
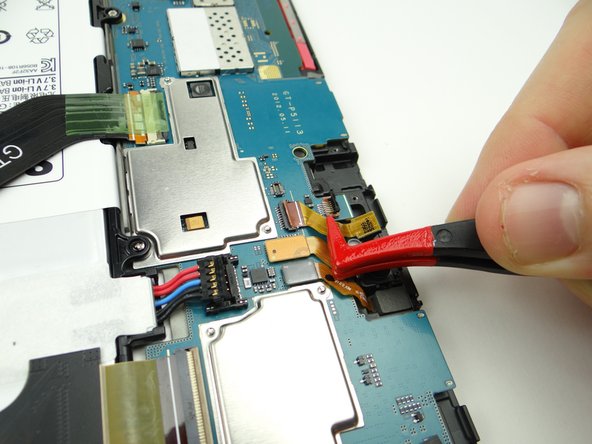
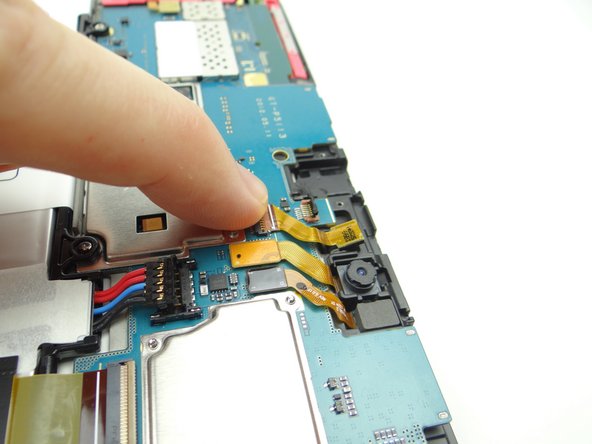
  11. Use blue pry tool to open ZIF connector holding the infrared sensor cable. With the ZIF connector open, use your finger to pull the cable free.
    • Use blue pry tool to open ZIF connector holding the infrared sensor cable.

    • With the ZIF connector open, use your finger to pull the cable free.

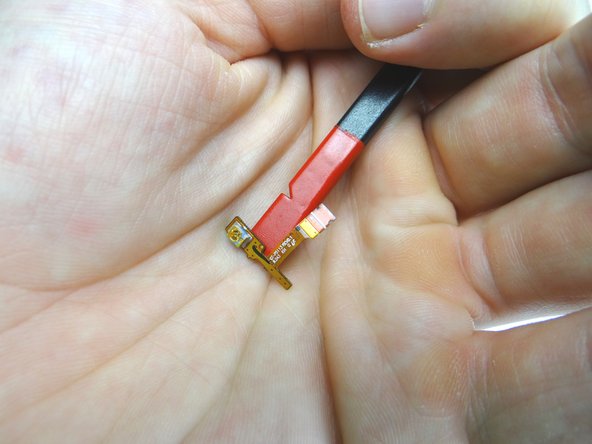
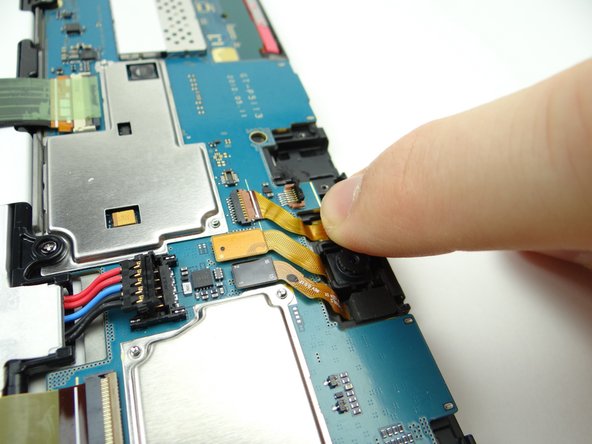
  12. Adhesive holds the infrared cable in place: Use the flat end of the spudger to separate the cable from the frame.
    • Adhesive holds the infrared cable in place:

    • Use the flat end of the spudger to separate the cable from the frame.

    • Place in COMPARTMENT C.

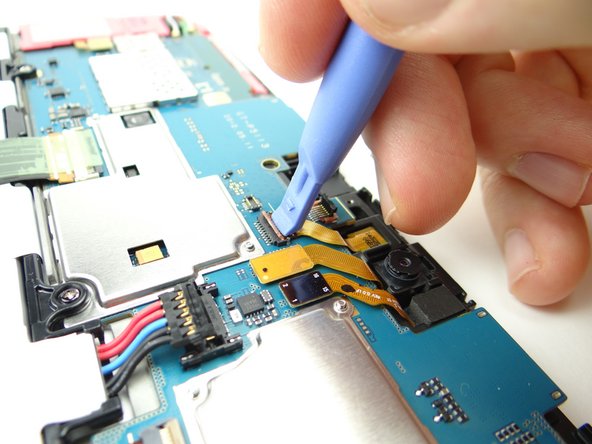
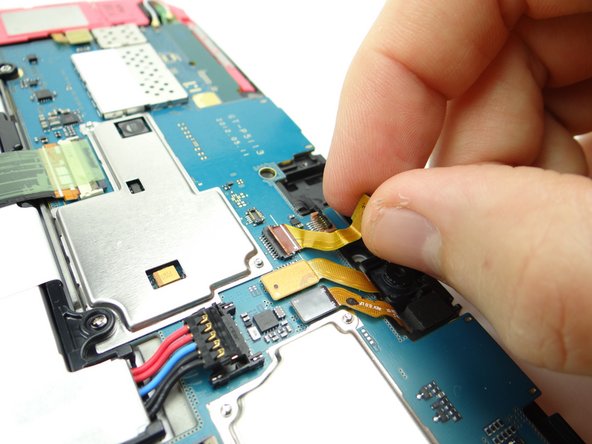
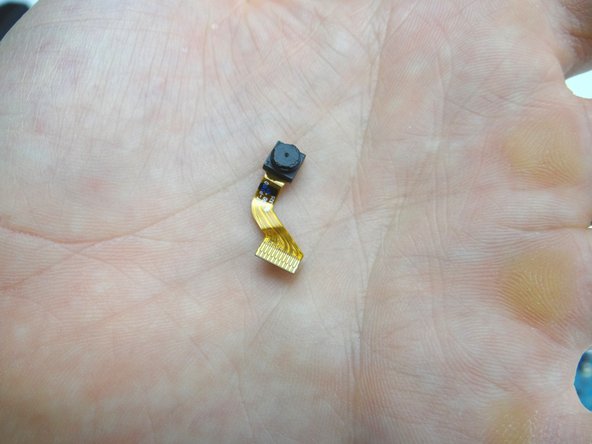
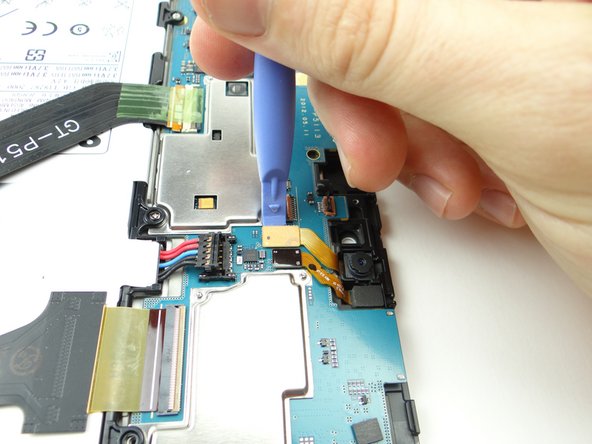
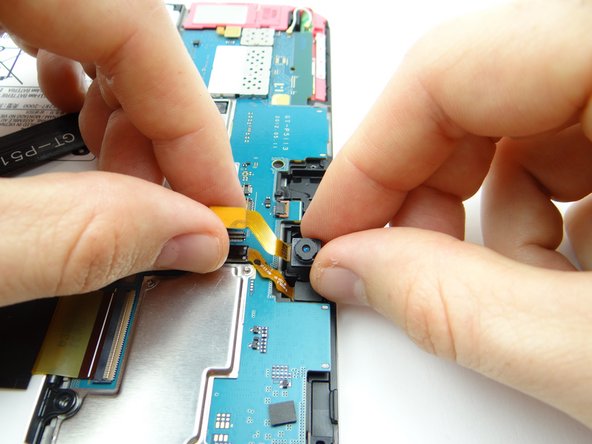
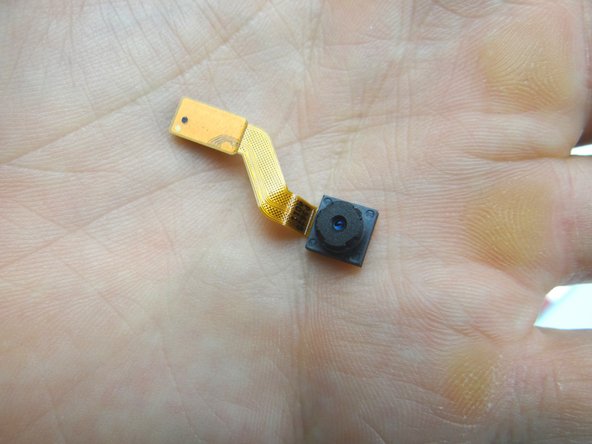
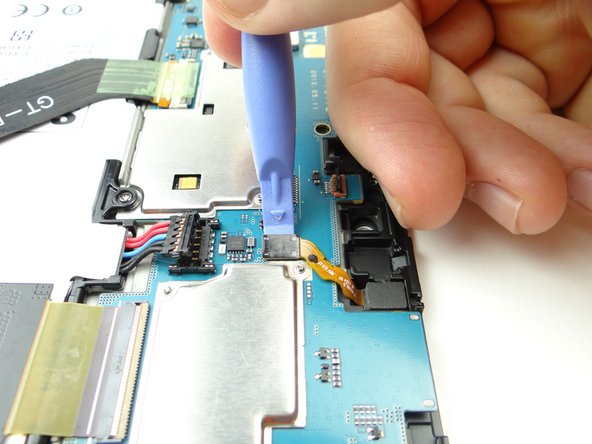
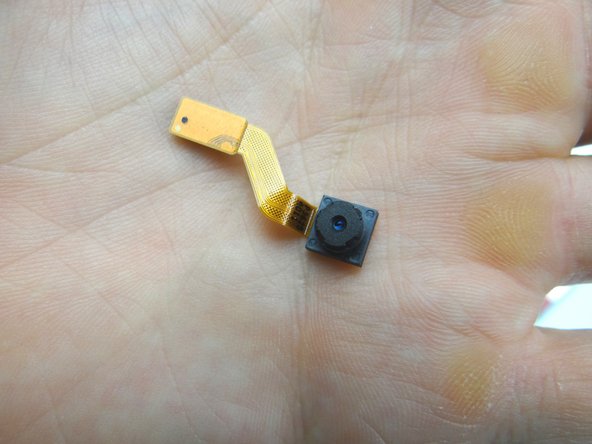
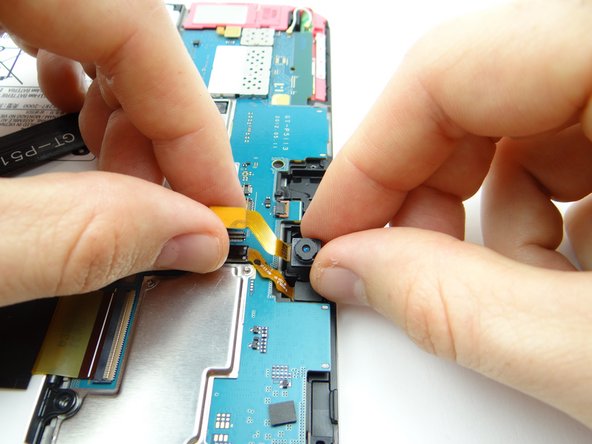
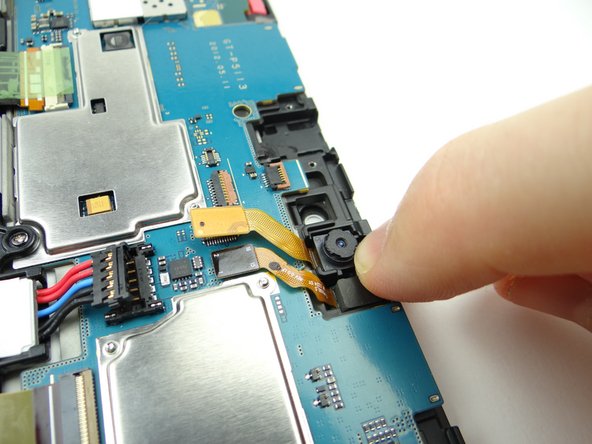
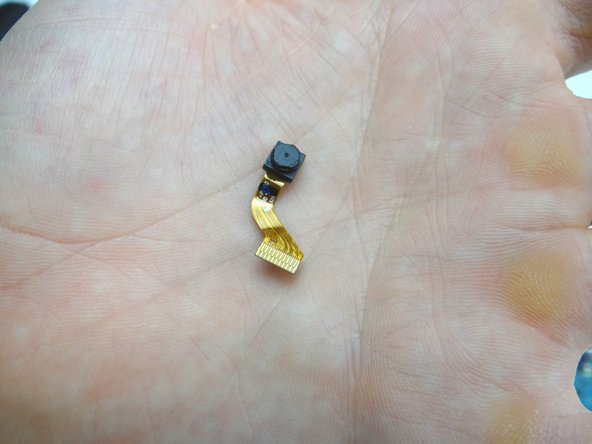
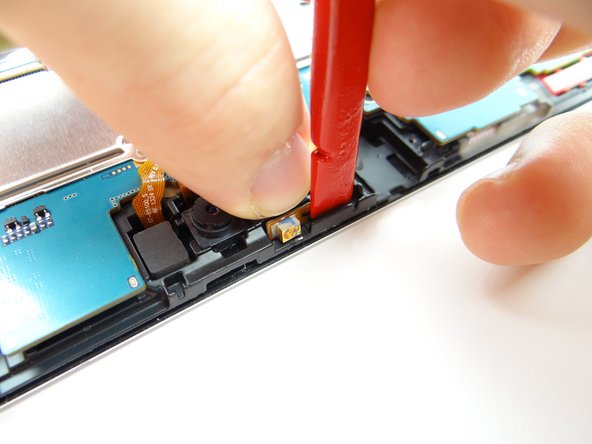
  13. Picture 1: Use the blue pry tool to push ZIF connector open. Picture 2: Lift front camera from its socket, then away from the ZIF connector. Picture 3: Place in COMPARTMENT C.
    • Picture 1: Use the blue pry tool to push ZIF connector open.

    • Picture 2: Lift front camera from its socket, then away from the ZIF connector.

    • Picture 3: Place in COMPARTMENT C.

  14. Use blue pry tool to disconnect rear camera. Remove rear camera and place in COMPARTMENT D. Remove rear camera and place in COMPARTMENT D.
    • Use blue pry tool to disconnect rear camera.

    • Remove rear camera and place in COMPARTMENT D.

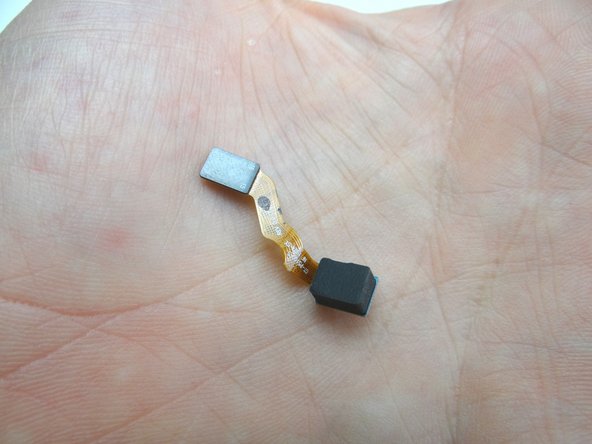
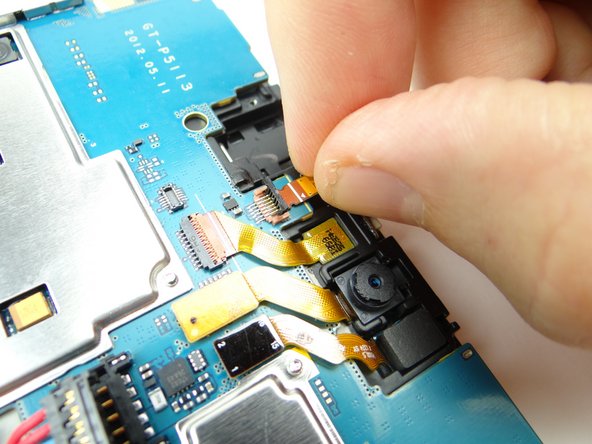
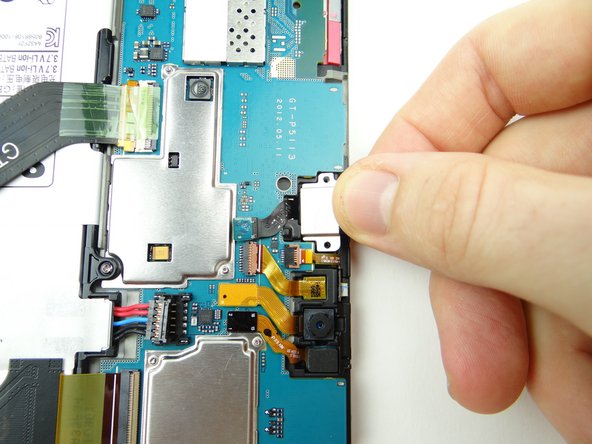
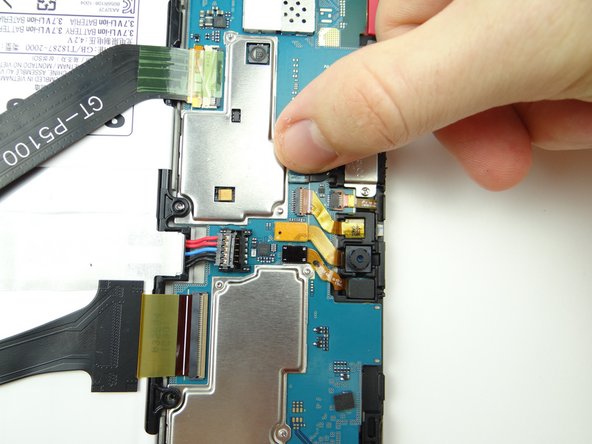
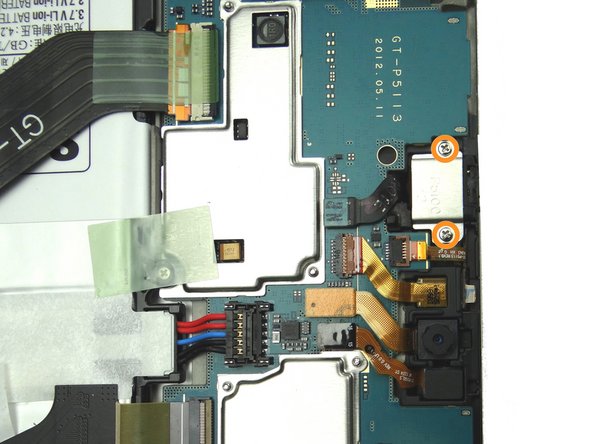
  15. Picture 1: Use blue pry tool to disconnect sensor cable. Picture 2: Pinch cable as close to sensor as possible and gently pull it free. Picture 3: Place sensor in COMPARTMENT D.
    • Picture 1: Use blue pry tool to disconnect sensor cable.

    • Picture 2: Pinch cable as close to sensor as possible and gently pull it free.

    • Picture 3: Place sensor in COMPARTMENT D.

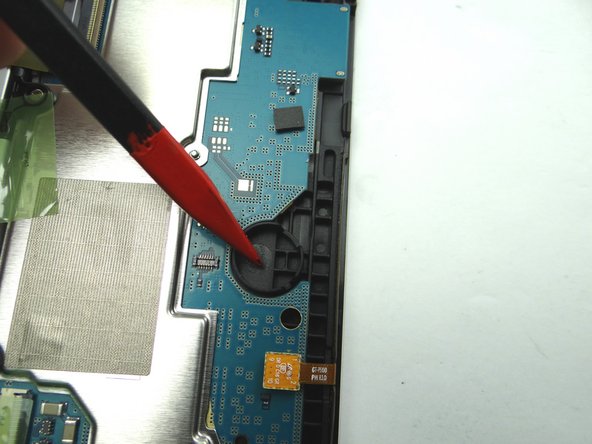
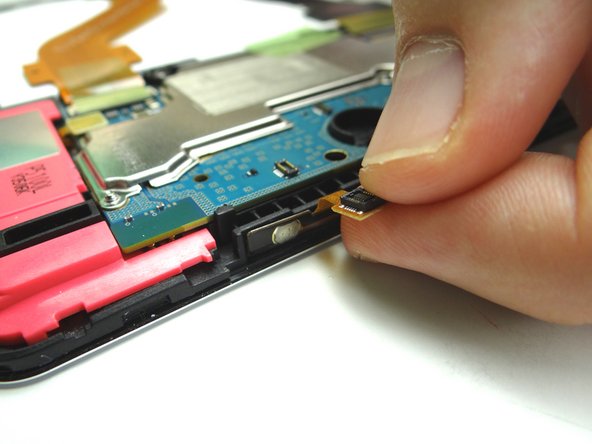
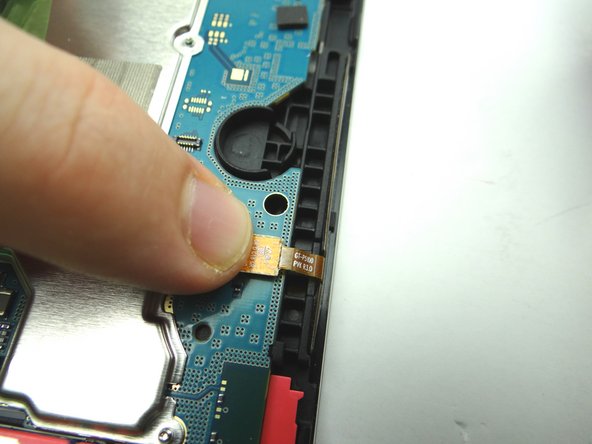
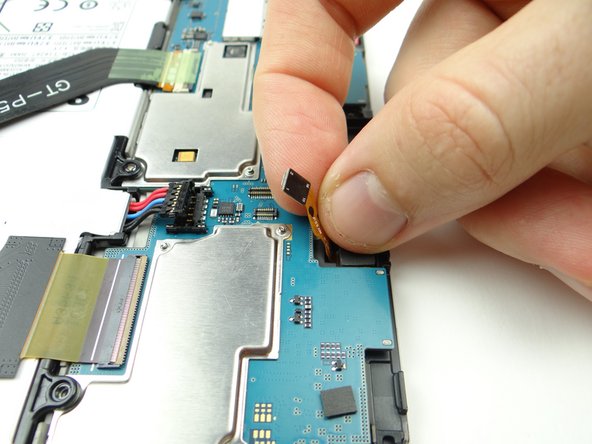
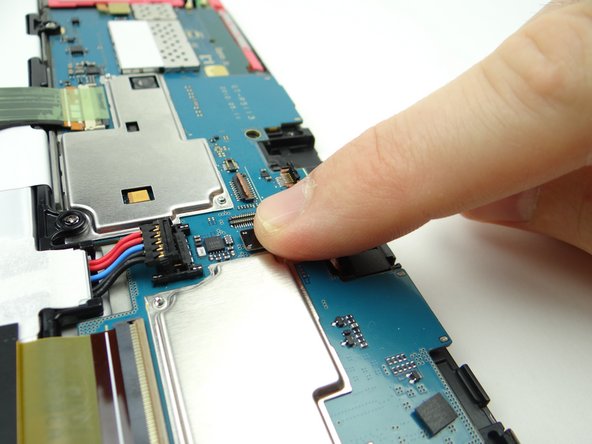
  16. Picture 1: Use blue pry tool to disconnect vibrator cable.
    • Picture 1: Use blue pry tool to disconnect vibrator cable.

    • Picture 2: Use curved-tip tweezers in the closed position to wedge underneath the vibrator. Pry it up slightly then grab it with your fingers to finish removing it.

    • Picture 3: Place it in COMPARTMENT F.

  17. Picture 1: Use blue pry tool to disconnect power / volume buttons cable. Adhesive holds the power & volume buttons cable in place: Picture 2: Use the flat end of the spudger to separate the cable from the frame.
    • Picture 1: Use blue pry tool to disconnect power / volume buttons cable.

    • Adhesive holds the power & volume buttons cable in place:

    • Picture 2: Use the flat end of the spudger to separate the cable from the frame.

    • Picture 3: Place power & volume buttons cable in COMPARTMENT E.

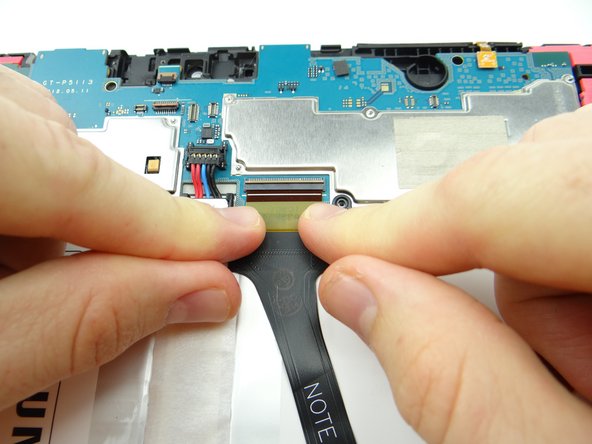
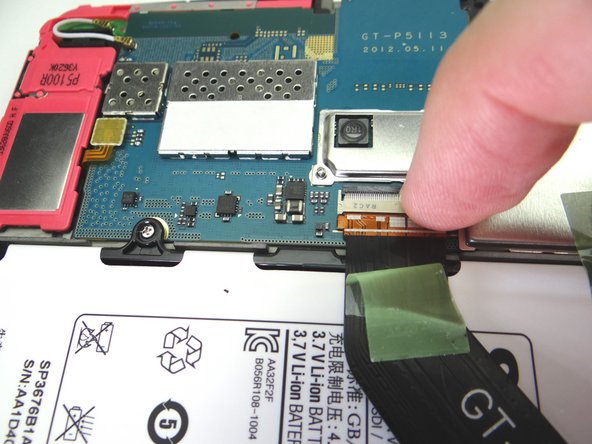
  18. Picture 1: Peel tape up from connector and fold it back.  Don't discard it - leave it attached to the cable. Picture 2: Use blue pry tool to lift ZIF connector black bar into open position. Picture 3: Slide cable out with your fingers.
    • Picture 1: Peel tape up from connector and fold it back. Don't discard it - leave it attached to the cable.

    • Picture 2: Use blue pry tool to lift ZIF connector black bar into open position.

    • Picture 3: Slide cable out with your fingers.

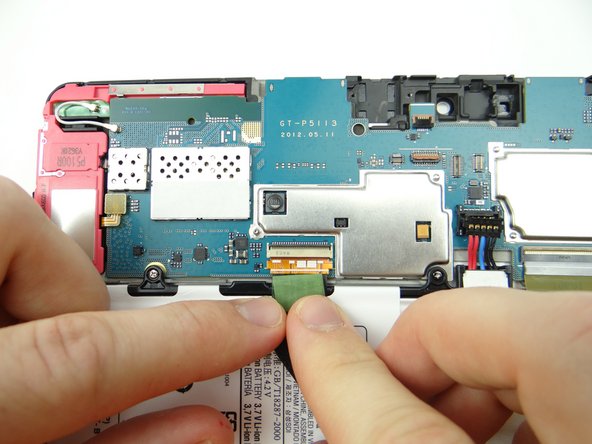
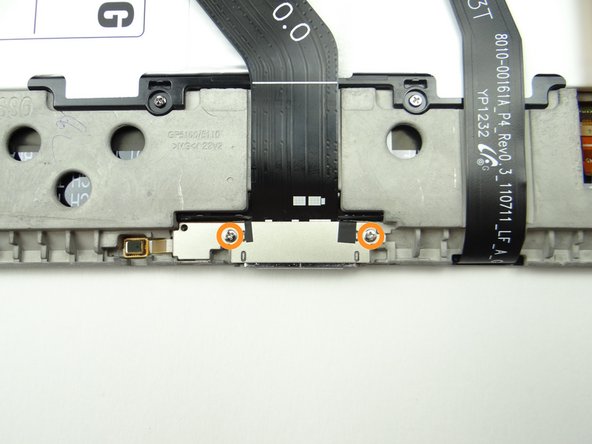
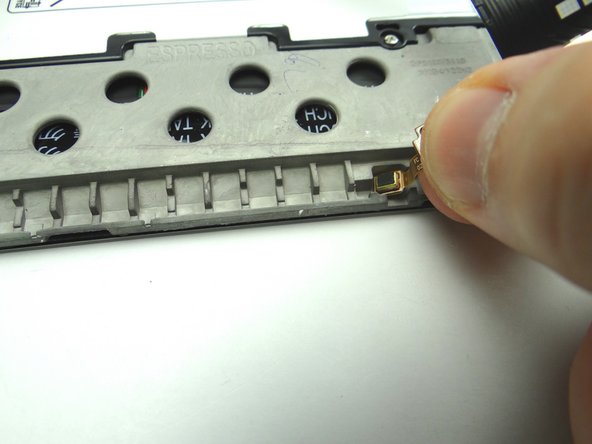
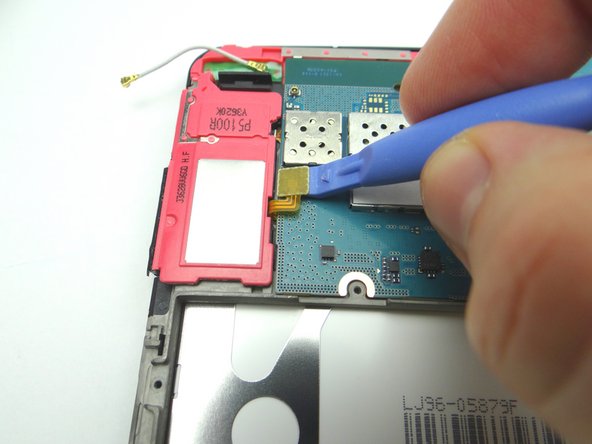
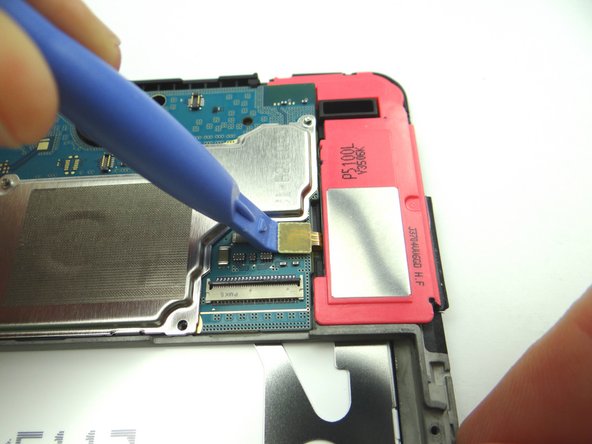
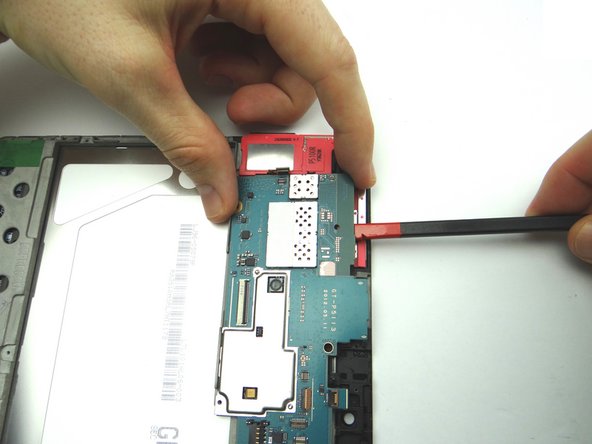
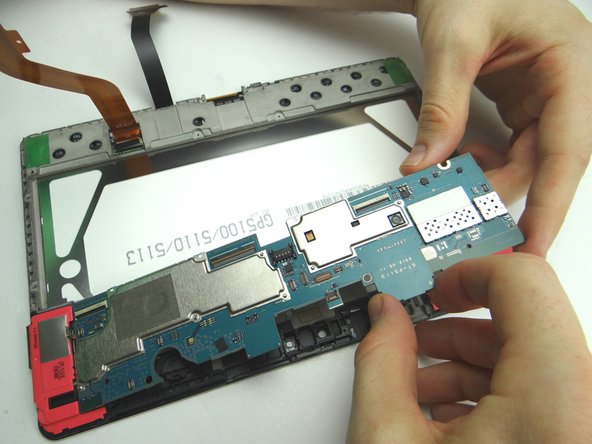
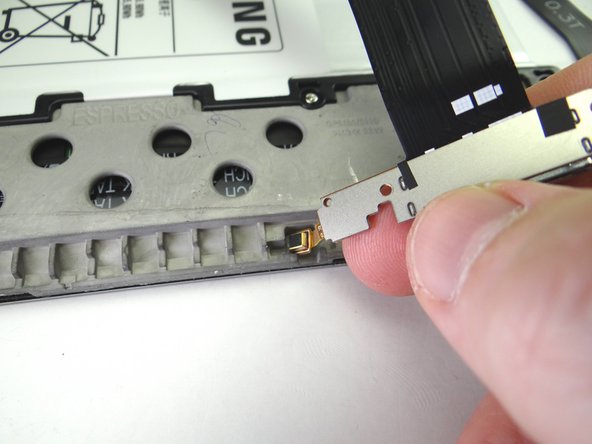
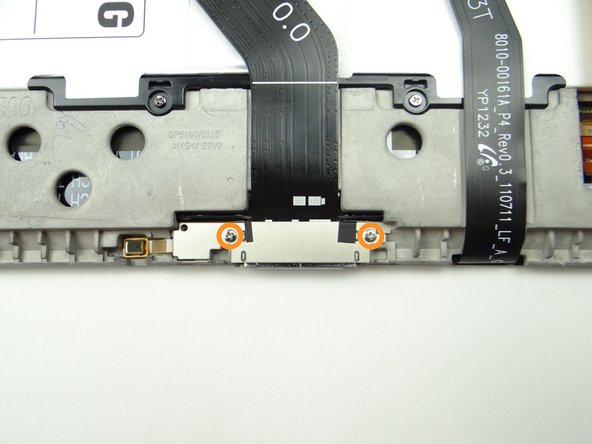
  19. Picture 1: Remove two 2.9 mm #00 Phillips screws securing charging port.  Place in SLOT 2. Adhesive holds the microphone (attached to the charging port) in place: Pictures 2:  Pull up the right side of the charging port until the microphone starts to stick.  Pinch the microphone with your fingers and peel it up.
    • Picture 1: Remove two 2.9 mm #00 Phillips screws securing charging port. Place in SLOT 2.

    • Adhesive holds the microphone (attached to the charging port) in place:

    • Pictures 2: Pull up the right side of the charging port until the microphone starts to stick. Pinch the microphone with your fingers and peel it up.

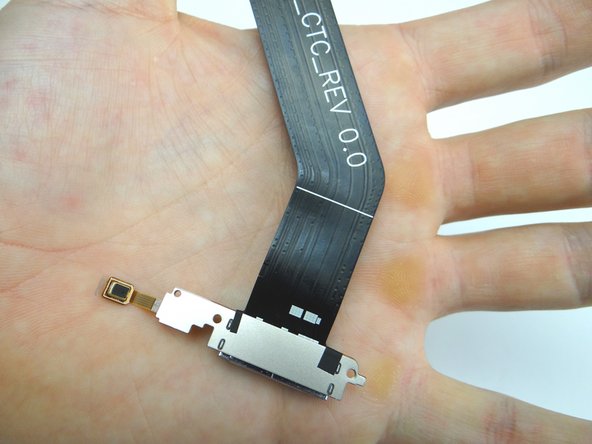
    • Picture 3: Place charging port / microphone assembly in ZONE V.

  20. Use blue pry tool to lift the cream-colored digitizer ZIF connector bar into open position. Slide cable out with your fingers. Slide cable out with your fingers.
    • Use blue pry tool to lift the cream-colored digitizer ZIF connector bar into open position.

    • Slide cable out with your fingers.

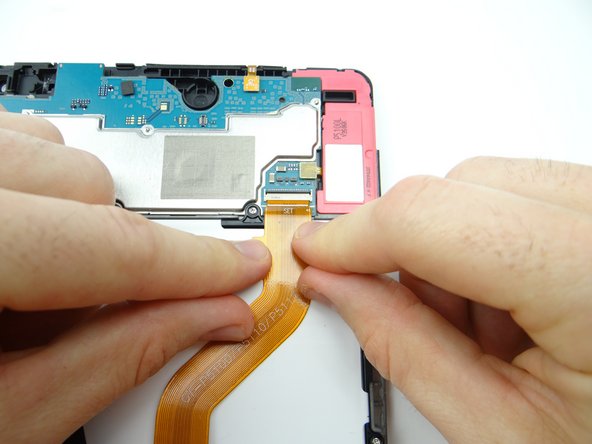
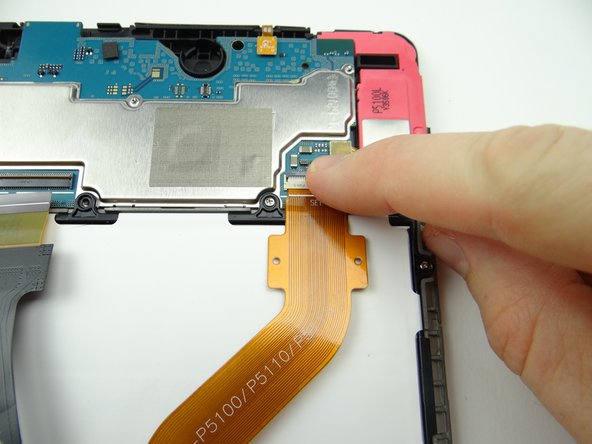
  21. Use blue pry tool to lift the black LCD ZIF connector bar into open position. Pull cable free with your fingers.
    • Use blue pry tool to lift the black LCD ZIF connector bar into open position.

    • Pull cable free with your fingers.

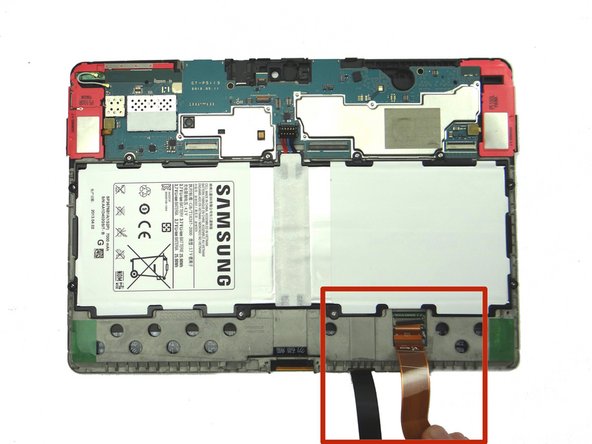
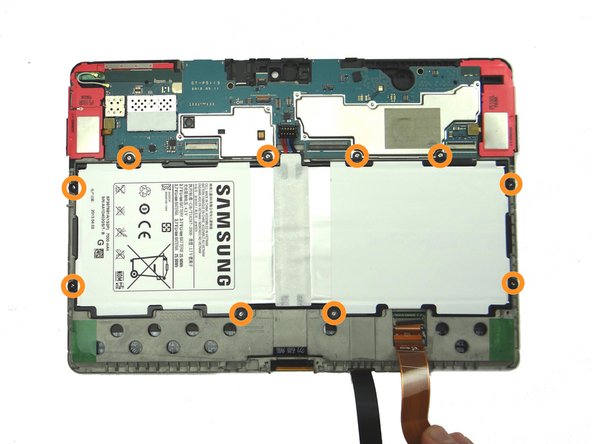
  22. Hold LCD and digitizer cables out of the way while removing the battery screws. Remove ten 3.0 mm #00 Phillips screws holding the battery.  Place screws in SLOT 3.
    • Hold LCD and digitizer cables out of the way while removing the battery screws.

    • Remove ten 3.0 mm #00 Phillips screws holding the battery. Place screws in SLOT 3.

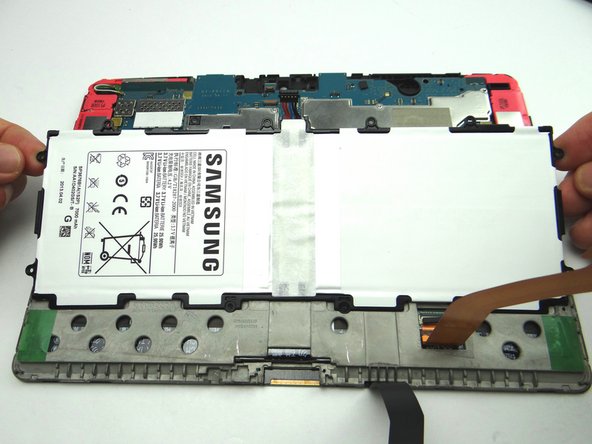
  23. The battery lifts easily up and away from the tablet.  Place battery in ZONE V.
    • The battery lifts easily up and away from the tablet. Place battery in ZONE V.

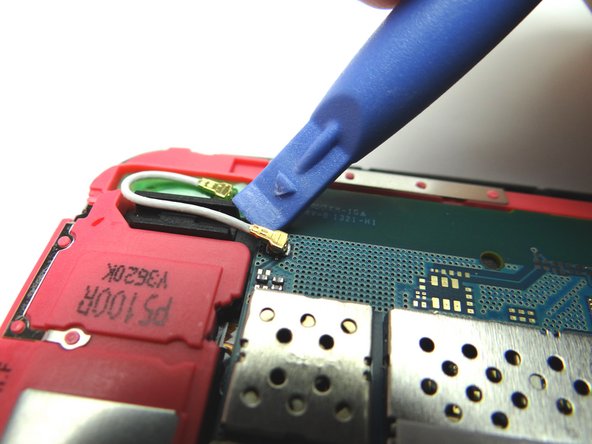
  24. Picture 1: Use blue pry tool to disconnect antenna from logic board.  Leave antenna connected to the loudspeaker. Picture 2: Use blue pry tool to disconnect loudspeaker from logic board. Picture 3: Use blue pry tool to disconnect opposite loudspeaker from logic board.
    • Picture 1: Use blue pry tool to disconnect antenna from logic board. Leave antenna connected to the loudspeaker.

    • Picture 2: Use blue pry tool to disconnect loudspeaker from logic board.

    • Picture 3: Use blue pry tool to disconnect opposite loudspeaker from logic board.

  25. The logic board should come up easily: Picture 1: Wedge the flat end of the spudger under the top edge of the logic board as shown.  Pry up just enough to pinch the logic board with your fingers. Picture 2: Carefully continue lifting logic board away from the front panel.
    • The logic board should come up easily:

    • Picture 1: Wedge the flat end of the spudger under the top edge of the logic board as shown. Pry up just enough to pinch the logic board with your fingers.

    • Picture 2: Carefully continue lifting logic board away from the front panel.

    • Picture 3: Place in ZONES I & II.

  26. Wedge flat end of spudger under corner of loudspeaker with the antenna.  Pull up with your hands at the same time. Place in sandbox.
    • Wedge flat end of spudger under corner of loudspeaker with the antenna. Pull up with your hands at the same time.

    • Place in sandbox.

  27. Wedge flat end of spudger under corner of loudspeaker without antenna. Pull up with your hands at the same time. Place in sandbox.
    • Wedge flat end of spudger under corner of loudspeaker without antenna. Pull up with your hands at the same time.

    • Place in sandbox.

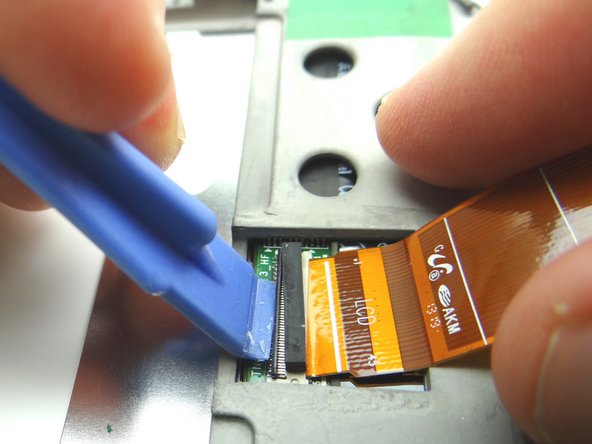
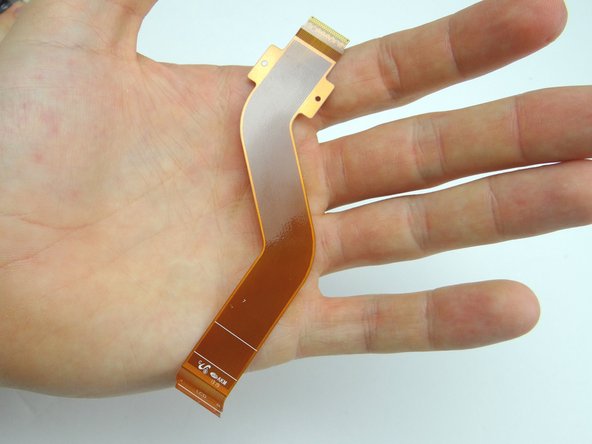
  28. Open ZIF connector on front panel and pull cable free. Place LCD cable in sandbox.
    • Open ZIF connector on front panel and pull cable free.

    • Place LCD cable in sandbox.

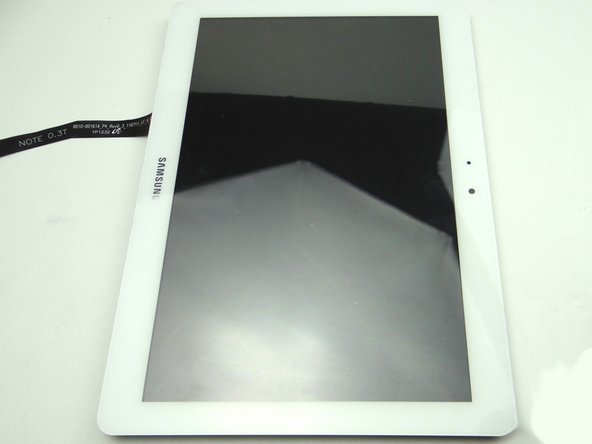
  29. Retrieve replacement front panel.
    • Retrieve replacement front panel.

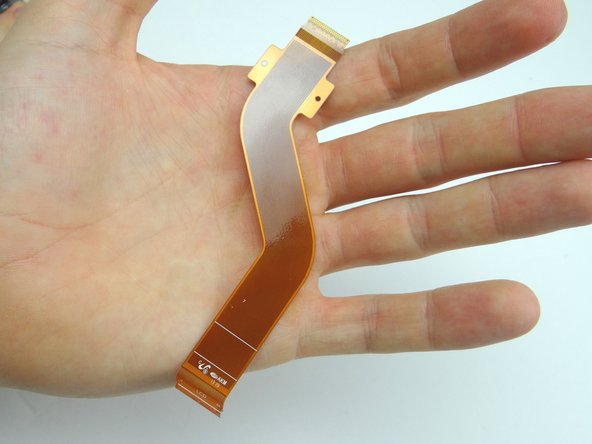
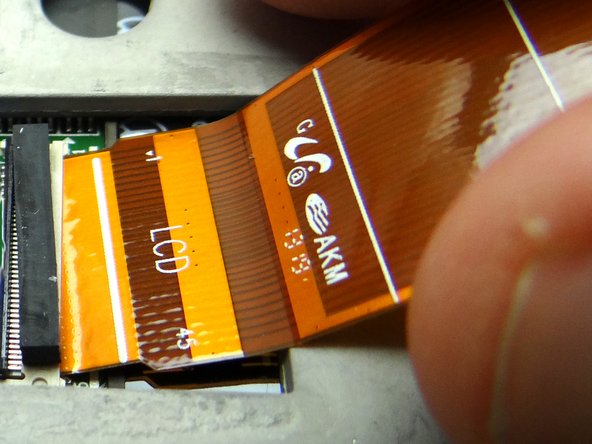
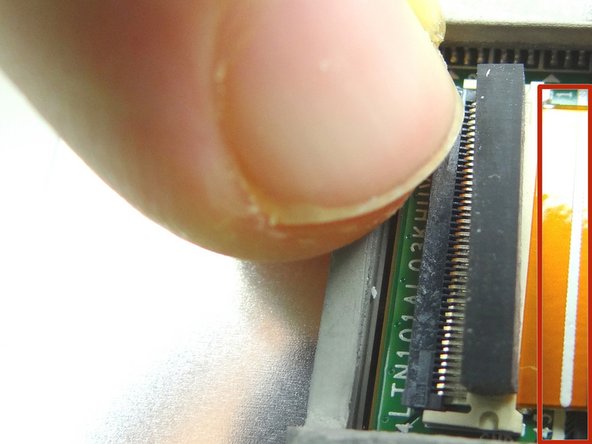
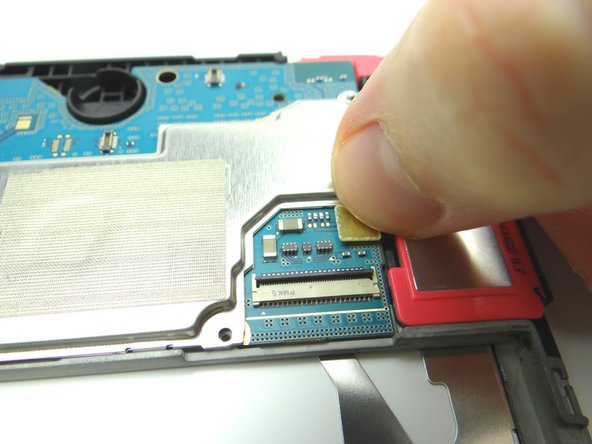
  30. Picture 1: Retrieve LCD cable. Picture 2: Seat LCD cable. Picture 3: Make sure white line (red rectangle) on LCD cable aligns with white line on PCB board.  Then close ZIF connector.
    • Picture 1: Retrieve LCD cable.

    • Picture 2: Seat LCD cable.

    • Picture 3: Make sure white line (red rectangle) on LCD cable aligns with white line on PCB board. Then close ZIF connector.

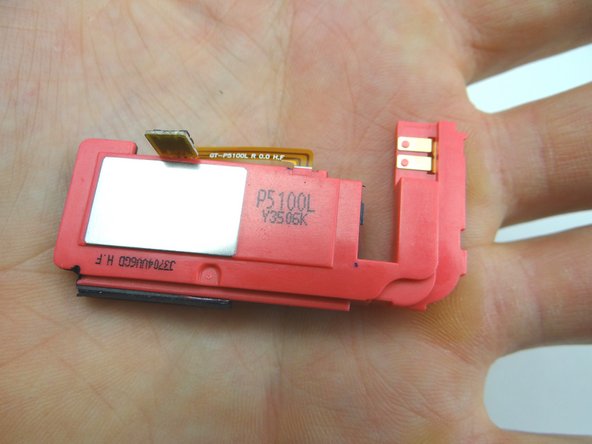
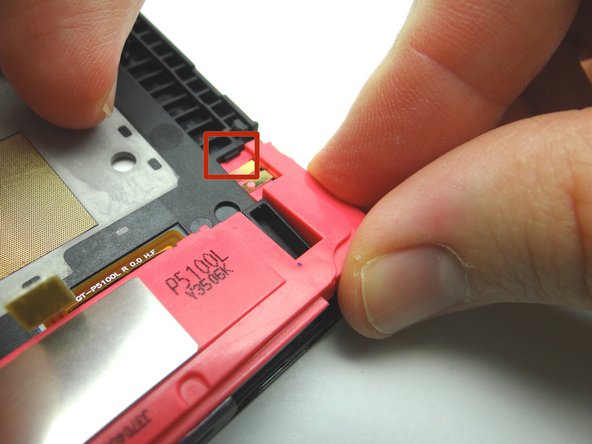
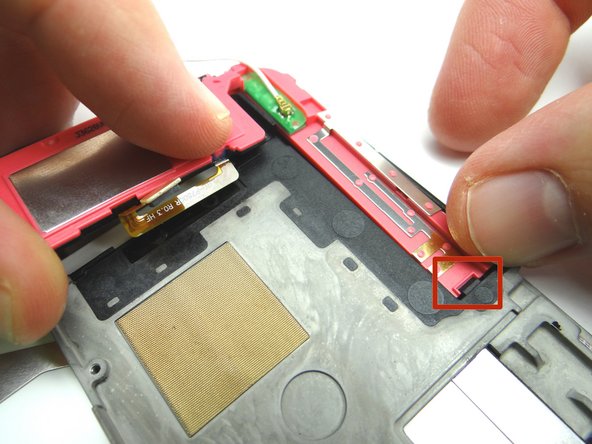
  31. Replace loudspeaker without antenna: Set under ledge (red square) then push into place.
    • Replace loudspeaker without antenna:

    • Set under ledge (red square) then push into place.

  32. Replace loudspeaker with antenna: Seat under ledge (red square) then push into place.
    • Replace loudspeaker with antenna:

    • Seat under ledge (red square) then push into place.

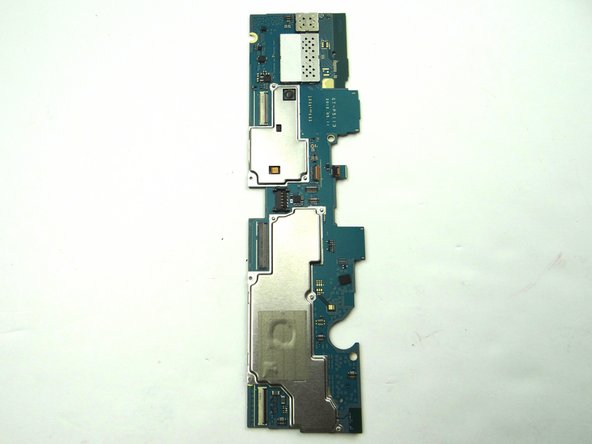
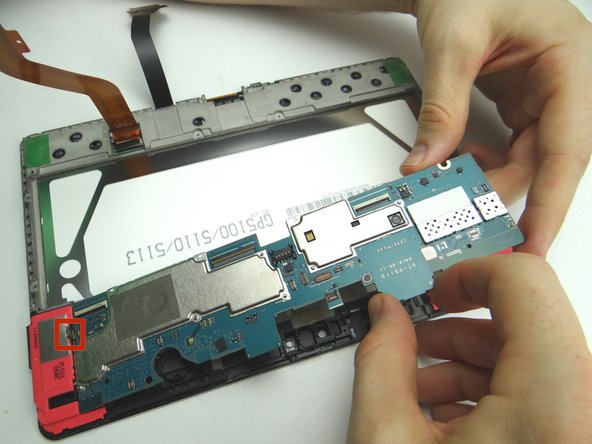
  33. Picture 1: Retrieve logic board from ZONES I & II. Pictures 2 & 3: Seat logic board.  Make sure speaker cables and antenna don't get trapped underneath the board. Pictures 2 & 3: Seat logic board.  Make sure speaker cables and antenna don't get trapped underneath the board.
    • Picture 1: Retrieve logic board from ZONES I & II.

    • Pictures 2 & 3: Seat logic board. Make sure speaker cables and antenna don't get trapped underneath the board.

  34. Connect cables on both speakers. Connect antenna. Connect antenna.
    • Connect cables on both speakers.

    • Connect antenna.

  35. From ZONE V, replace battery.
    • From ZONE V, replace battery.

  36. Replace ten 3.0 mm #00 Phillips screws holding the battery from SLOT 3.
    • Replace ten 3.0 mm #00 Phillips screws holding the battery from SLOT 3.

  37. Push LCD cable into open ZIF connector on logic board. Close ZIF connector black swing bar.
    • Push LCD cable into open ZIF connector on logic board.

    • Close ZIF connector black swing bar.

  38. Seat digitizer cable. Close ZIF connector cream-colored swing bar.
    • Seat digitizer cable.

    • Close ZIF connector cream-colored swing bar.

  39. From ZONE V, replace charging port cable & microphone: Picture 2: Seat microphone first then charging port. Picture 3: Replace two 2.9 mm #00 Phillips screws securing charging port from SLOT 2.
    • From ZONE V, replace charging port cable & microphone:

    • Picture 2: Seat microphone first then charging port.

    • Picture 3: Replace two 2.9 mm #00 Phillips screws securing charging port from SLOT 2.

  40. Push charging port cable into open ZIF connector on logic board. Close ZIF connector black swing bar. Replace tape.
    • Push charging port cable into open ZIF connector on logic board.

    • Close ZIF connector black swing bar.

    • Replace tape.

  41. From COMPARTMENT E, replace power / volume buttons cable. Push assembly firmly back into place to adhere to the frame. Connect cable to logic board.
    • From COMPARTMENT E, replace power / volume buttons cable.

    • Push assembly firmly back into place to adhere to the frame.

    • Connect cable to logic board.

  42. Seat MISSING vibrator from COMPARTMENT F.
    • Seat MISSING vibrator from COMPARTMENT F.

    • Connect cable to logic board.

  43. From COMPARTMENT D: Push sensor back into its socket. Connect sensor cable to logic board.
    • From COMPARTMENT D:

    • Push sensor back into its socket.

    • Connect sensor cable to logic board.

  44. Replace rear camera from COMPARTMENT D: Push camera into its socket. Push camera into its socket.
    • Replace rear camera from COMPARTMENT D:

    • Push camera into its socket.

  45. Connect rear camera to logic board.
    • Connect rear camera to logic board.

  46. Replace front-facing camera from COMPARTMENT C: Use plastic tweezers or your fingers to push front-facing camera cable into open ZIF connector. Close ZIF connector.
    • Replace front-facing camera from COMPARTMENT C:

    • Use plastic tweezers or your fingers to push front-facing camera cable into open ZIF connector.

    • Close ZIF connector.

  47. Push front-facing camera into its socket.
    • Push front-facing camera into its socket.

  48. Picture 1: Replace infrared sensor from COMPARTMENT C.  Use flat end of spudger to push infrared cable against the mid-frame wall. Push cable into open ZIF connector. Close ZIF connector.
    • Picture 1: Replace infrared sensor from COMPARTMENT C. Use flat end of spudger to push infrared cable against the mid-frame wall.

    • Push cable into open ZIF connector.

    • Close ZIF connector.

  49. Picture 1: Seat headphone jack from COMPARTMENT B. Picture 2: Connect cable to logic board. Picture 3: Replace two 3.0 mm #00 Phillips screws from the headset jack from SLOT 1.
    • Picture 1: Seat headphone jack from COMPARTMENT B.

    • Picture 2: Connect cable to logic board.

    • Picture 3: Replace two 3.0 mm #00 Phillips screws from the headset jack from SLOT 1.

  50. Push battery connector straight down into its socket. Push battery connector straight down into its socket.
    • Push battery connector straight down into its socket.

  51. Seat front panel on rear case, charging port first. Push center clips into place. Push center clips into place.
    • Seat front panel on rear case, charging port first.

    • Push center clips into place.

  52. Picture 1: Press charging port clips into place. Picture 2: Press clips in top corner into place. Picture 3: Turn tablet over and continue pressing clips into place.
    • Picture 1: Press charging port clips into place.

    • Picture 2: Press clips in top corner into place.

    • Picture 3: Turn tablet over and continue pressing clips into place.

  53. Examine all edges to ensure all clips are seated and the display is flush with the rear case. Examine all edges to ensure all clips are seated and the display is flush with the rear case. Examine all edges to ensure all clips are seated and the display is flush with the rear case.
    • Examine all edges to ensure all clips are seated and the display is flush with the rear case.

  54. Replace SD card from COMPARTMENT A. Power up and test device.
    • Replace SD card from COMPARTMENT A.

    • Power up and test device.

Finish Line
James Linder

Member since: 01/24/2013

71,591 Reputation

217 Guides authored

0 Comments

Add Comment

View Statistics:

Past 24 Hours: 0

Past 7 Days: 0

Past 30 Days: 0

All Time: 99

CELL PHONE SANDBOX